
AQUILA - SalesForce Integration (Username-Password Flow)
In Salesforce, the Username-Password Flow is an OAuth 2.0 authentication flow where an application obtains an access token by directly sending a Salesforce username, password, and (usually) security token to Salesforce.\
Important note
The Username-Password Flow is increasingly discouraged for new Salesforce integrations because it requires handling user credentials directly. For most modern integrations, the JWT Bearer Flow or Client Credentials Flow is usually preferred due to better security and easier compliance with MFA requirements.
How it works
The client application sends a request to Salesforce's OAuth token endpoint with:
grant_type=password- Salesforce username
- Salesforce password
- Security token (often appended to the password)
- Connected App client ID
- Connected App client secret
Salesforce validates the credentials and returns an access token if authentication succeeds.
Log in to your Salesforce Organization.
Note: If the salesforce dashboard interface is in classic mode change it to lighting mode.
- In the Upper Right Corner click the gear icon.

- Select setup.
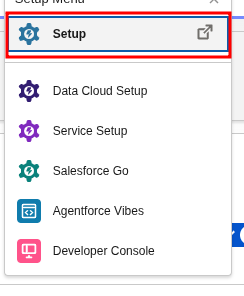
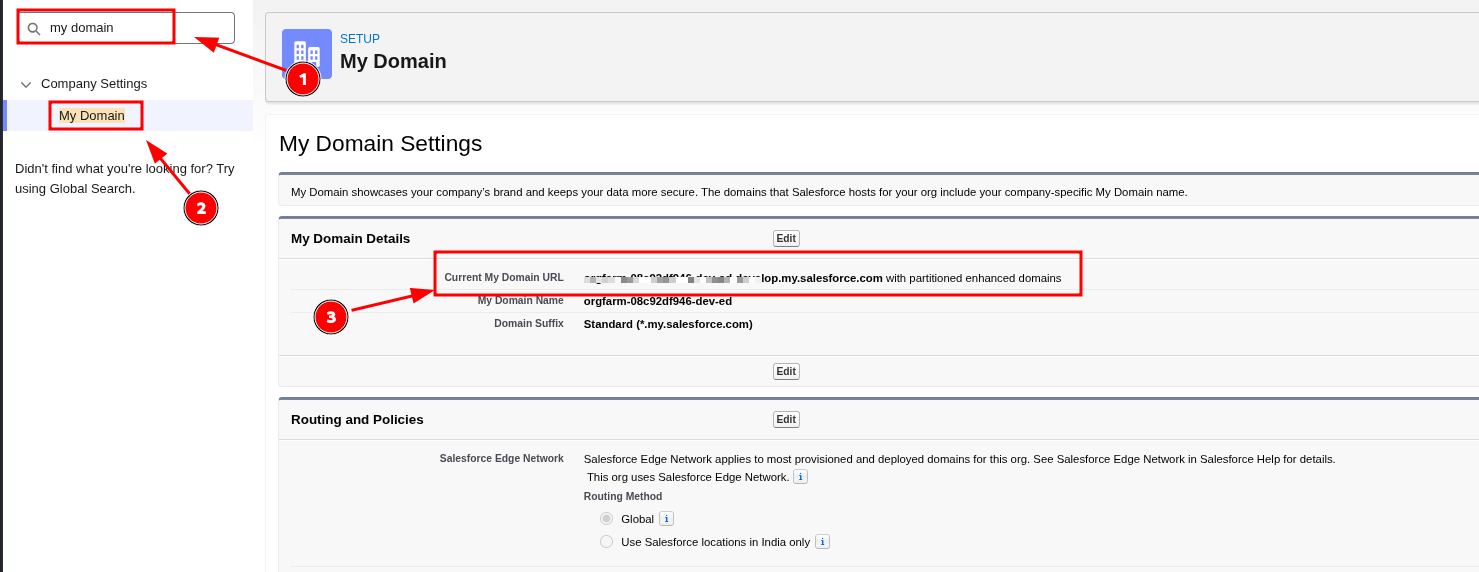
To find the base URL and instance URL follow the guide below.
- In quick find box, enter my domain then select my domain under Company Settings.
- Under My Domain Details copy Current My Domain URL that's your base URL and Instance URL. (Give it to Cytech Support)
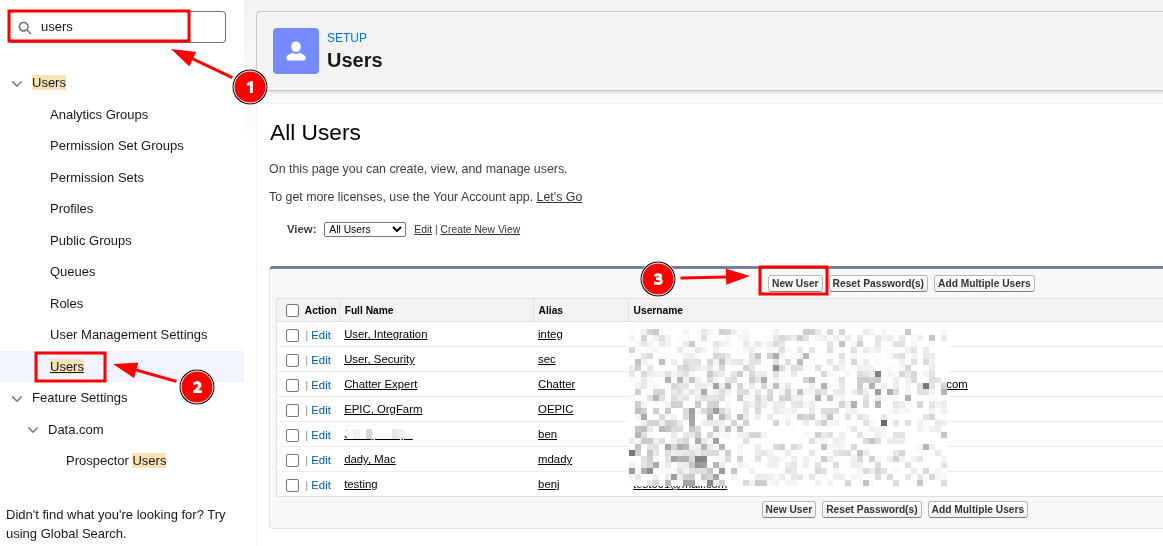
Creating User
- In Setup, enter Users in the Quick Find box, then select Users.
- Click New User.
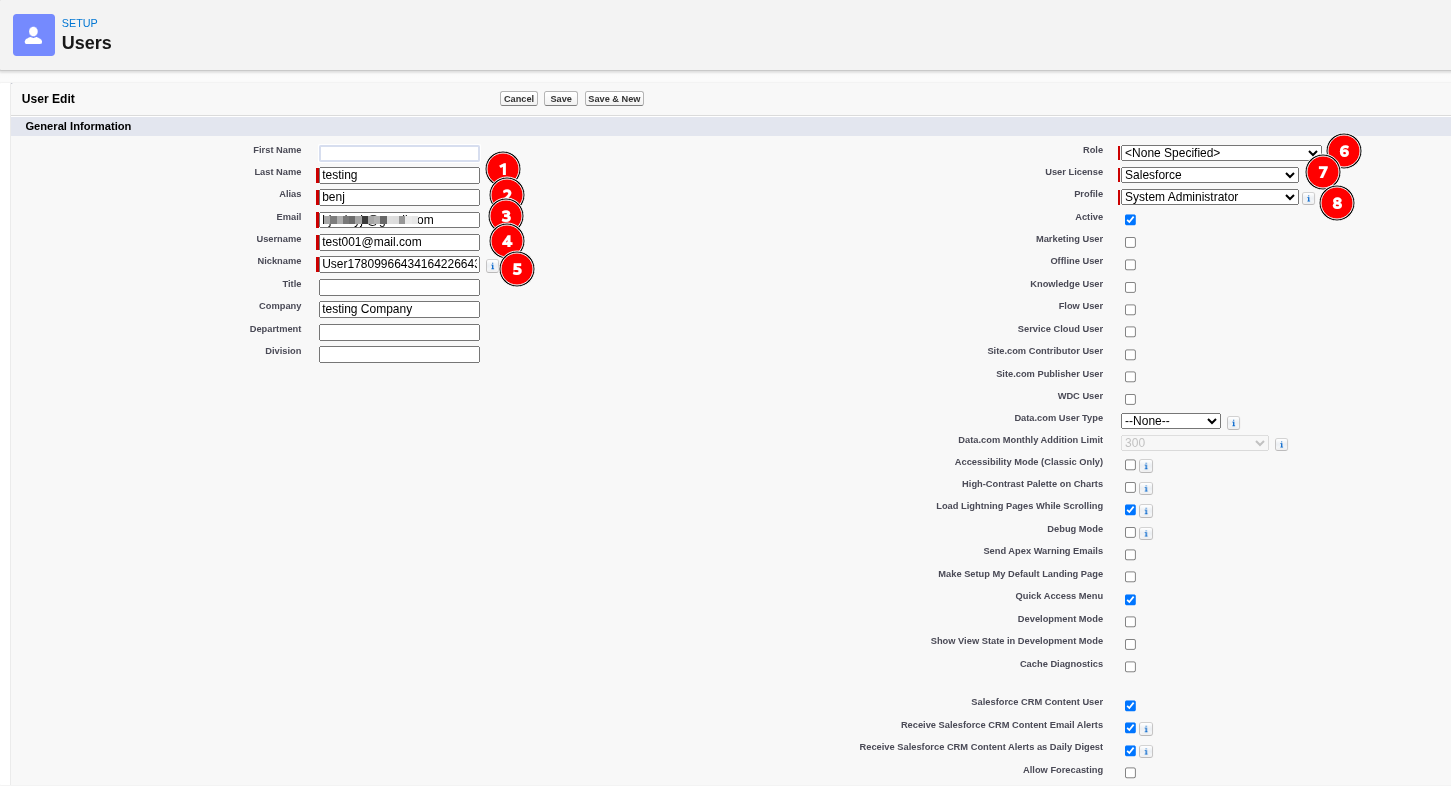
- Fill out the form, and assign the System Administrator.
- Role > None Specified
- User License > Salesforce
- Profile > System Administrator
- Click Save.
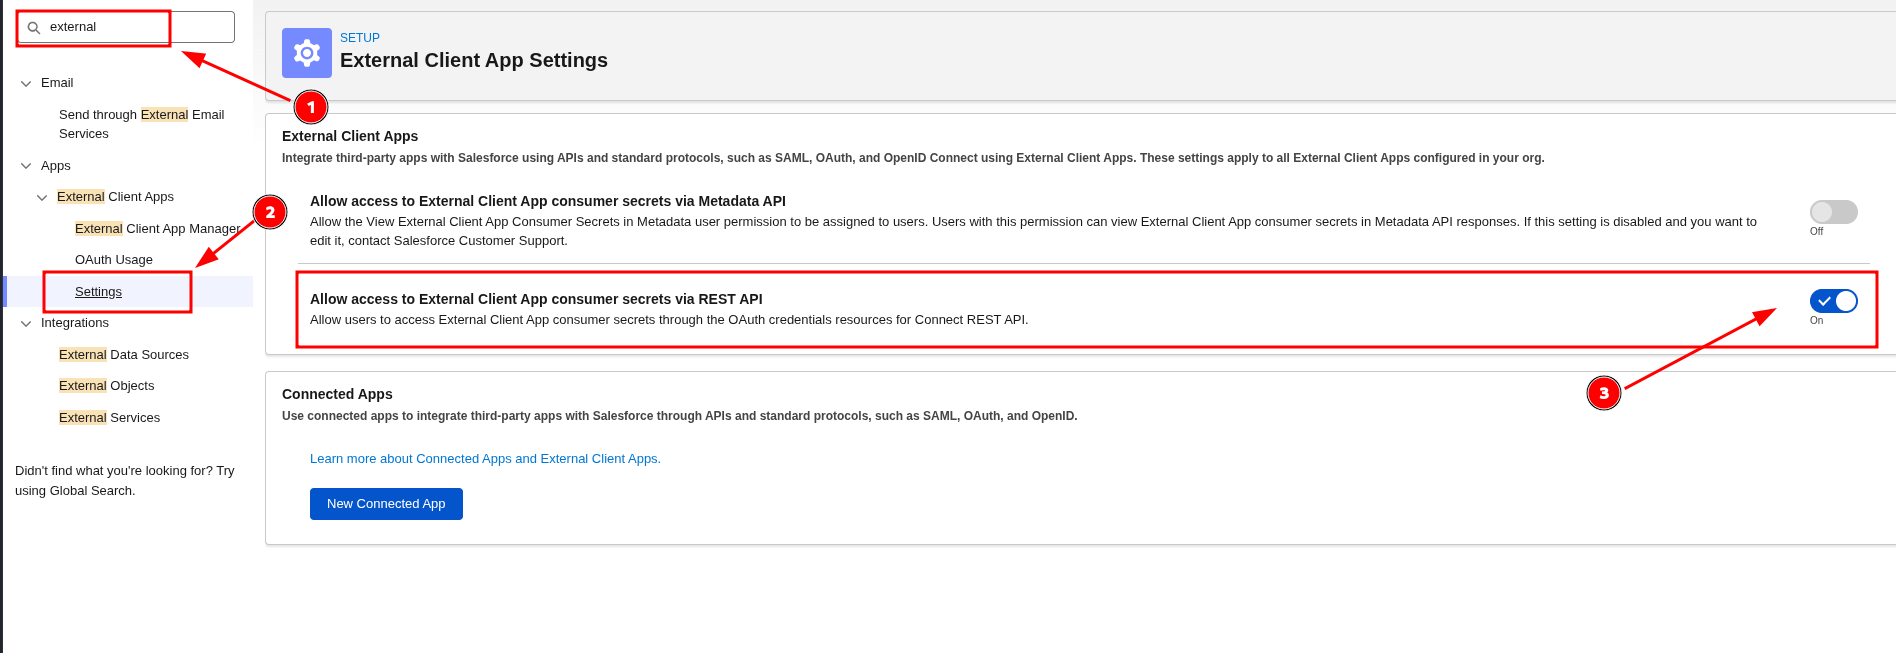
Enable Allow Access to External Client App Consumer Secret via REST API
External Client App Setting > Allow Access to External Client App Consumer Secret via REST API
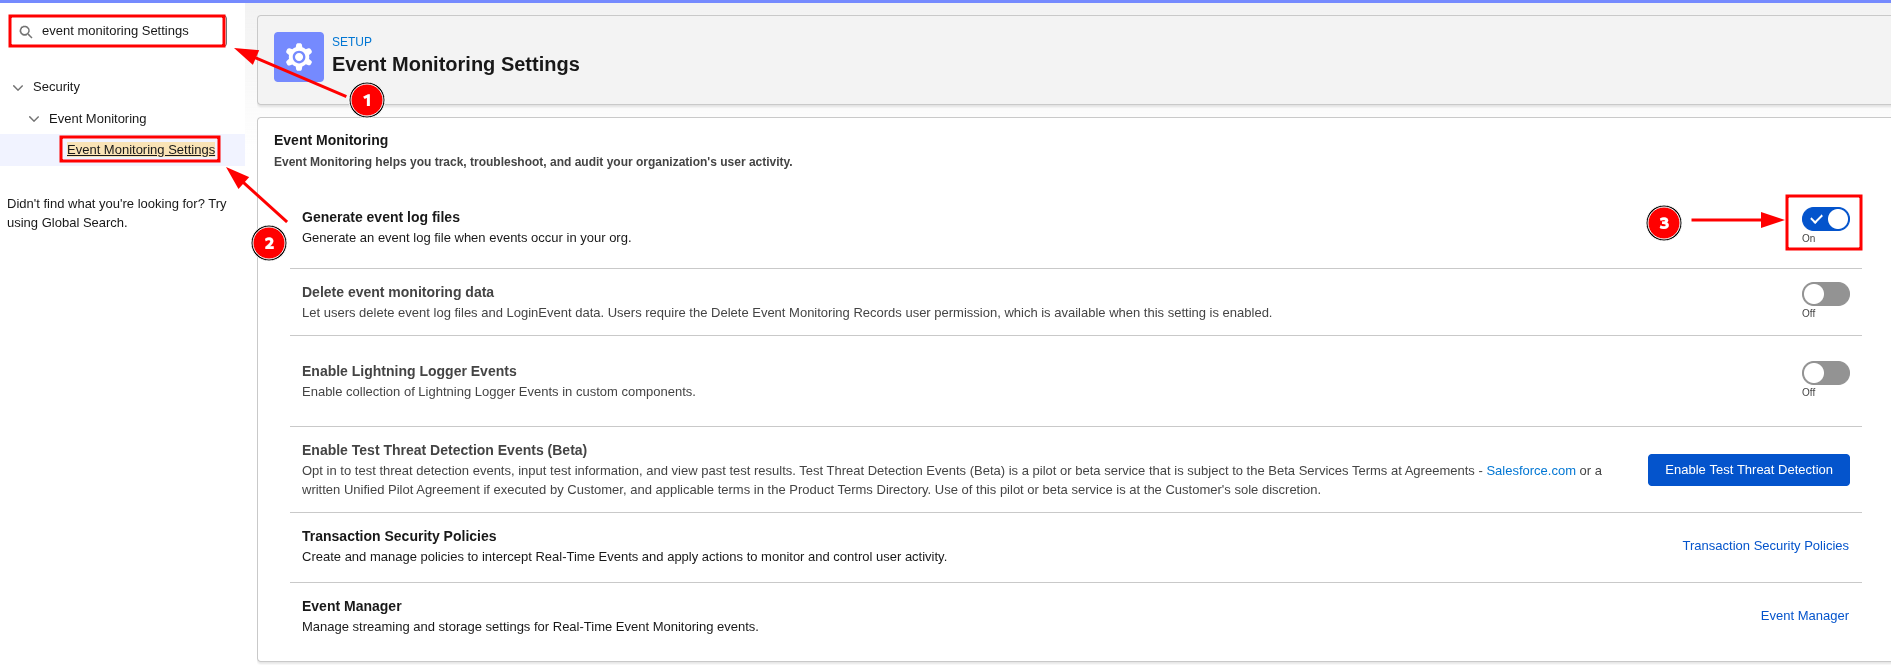
Enable Event log files
Event Monitoring Settings > Generate event log files
Create A Connected Apps
For security reasons, Salesforce blocks the OAuth 2.0 Username-Password flow by default in recent releases. Prefer the JWT bearer flow. If you must use the Username-Password flow, in OAuth and OpenID Connect Settings, select Allow OAuth Username-Password Flows. For more information, see the Salesforce release note: Username-Password OAuth flow blocked by default.

- Log in to Salesforce (Lightning UI).
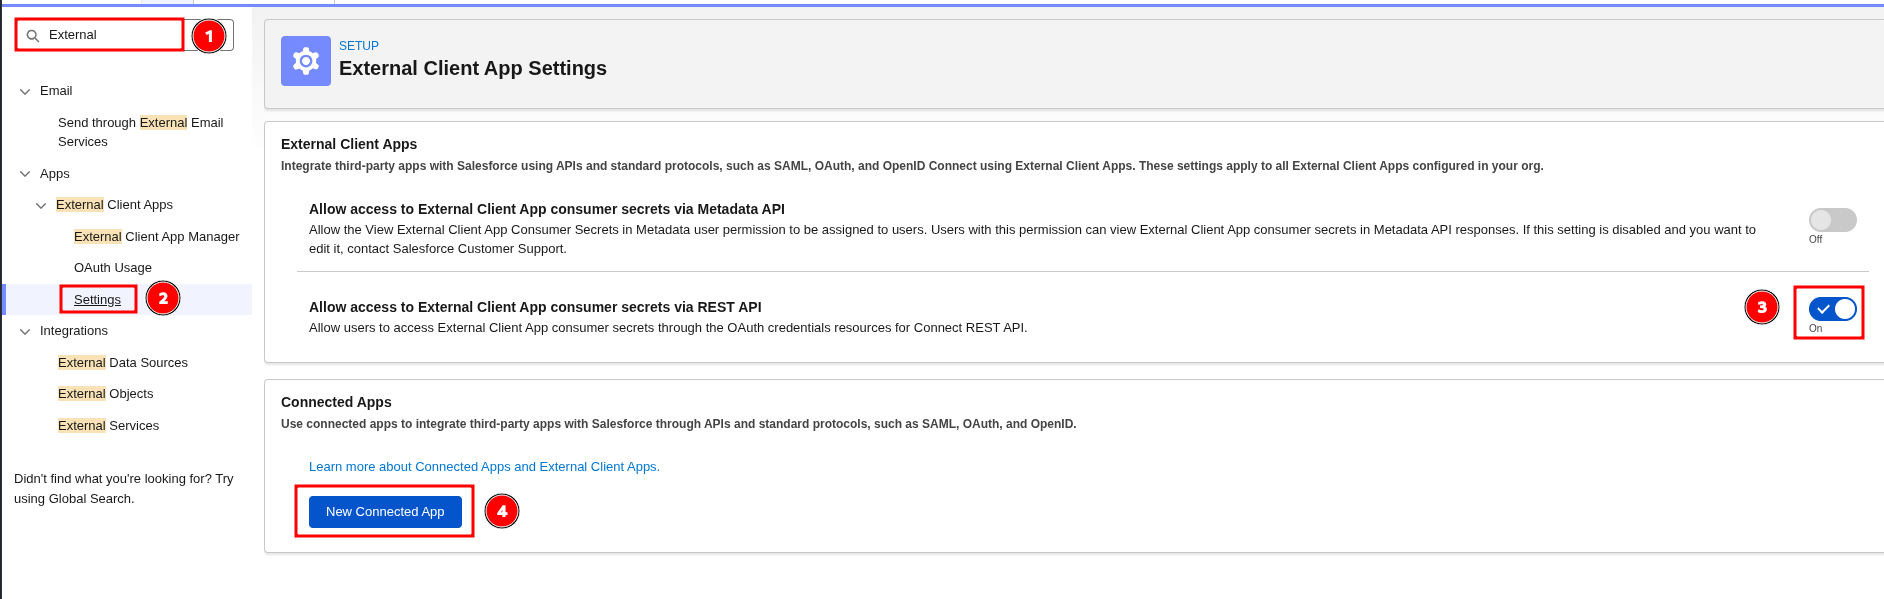
- From
Setup, inQuick FindenterExternal Client Appsand selectSettings. Turn onAllow creation of connected apps. To create a connected app, selectNew Connected App.
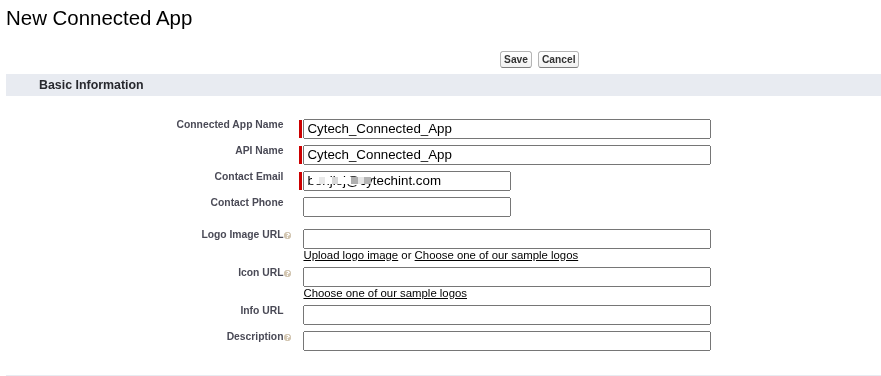
- Fill
Basic Information:Connected App Name,API Name,Contact Email.
- In
API (Enable OAuth Settings), checkEnable OAuth Settings. Callback URL:- Web apps: your app callback (for example,
https://yourapp.example.com/callback). - Not used by the JWT or Username-Password flows, but Salesforce requires a value; you can enter your instance URL.
- Web apps: your app callback (for example,
- Select OAuth scopes:
Manage user data via APIs (api)Perform requests at any time (refresh_token, offline_access)Full access (full)- Enable Client Credentials Flow
- Enable Refresh Token Rotation
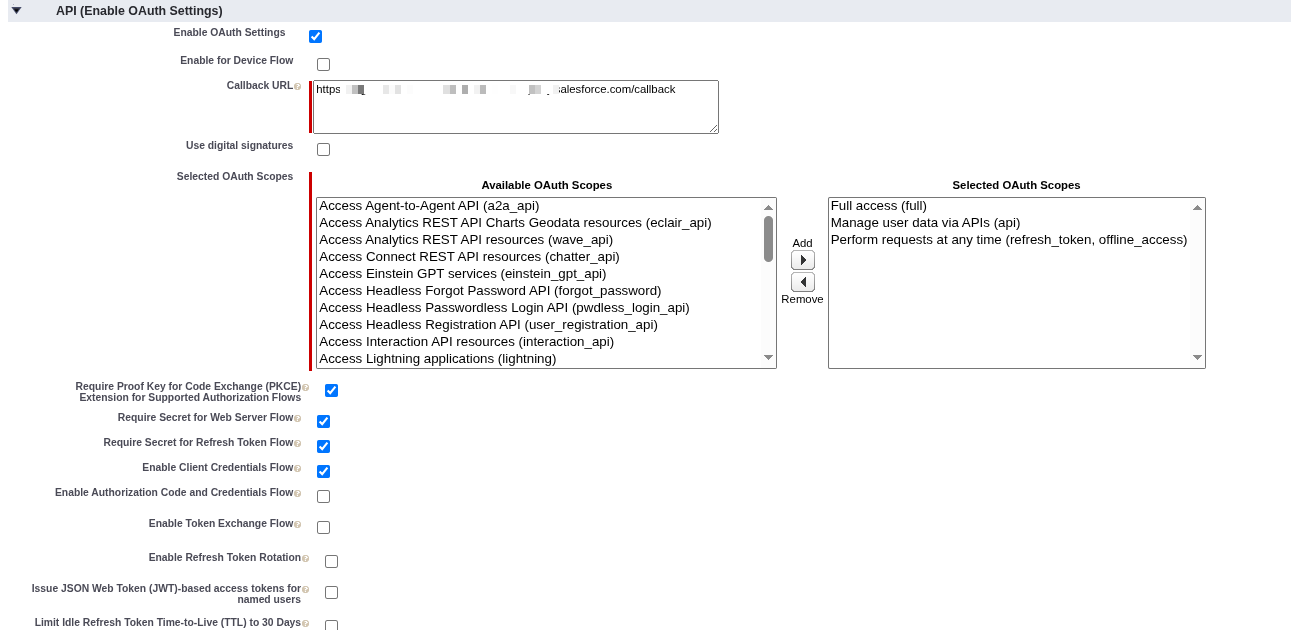
- Click
Save. It can take up to 10 minutes for the Connected App to propagate. - After saving, open
Manage Consumer Detailsto obtainConsumer KeyandConsumer Secret.
Manage Consumer Details Appears only once so better to copy consumer key and consumer secret in a safe place.
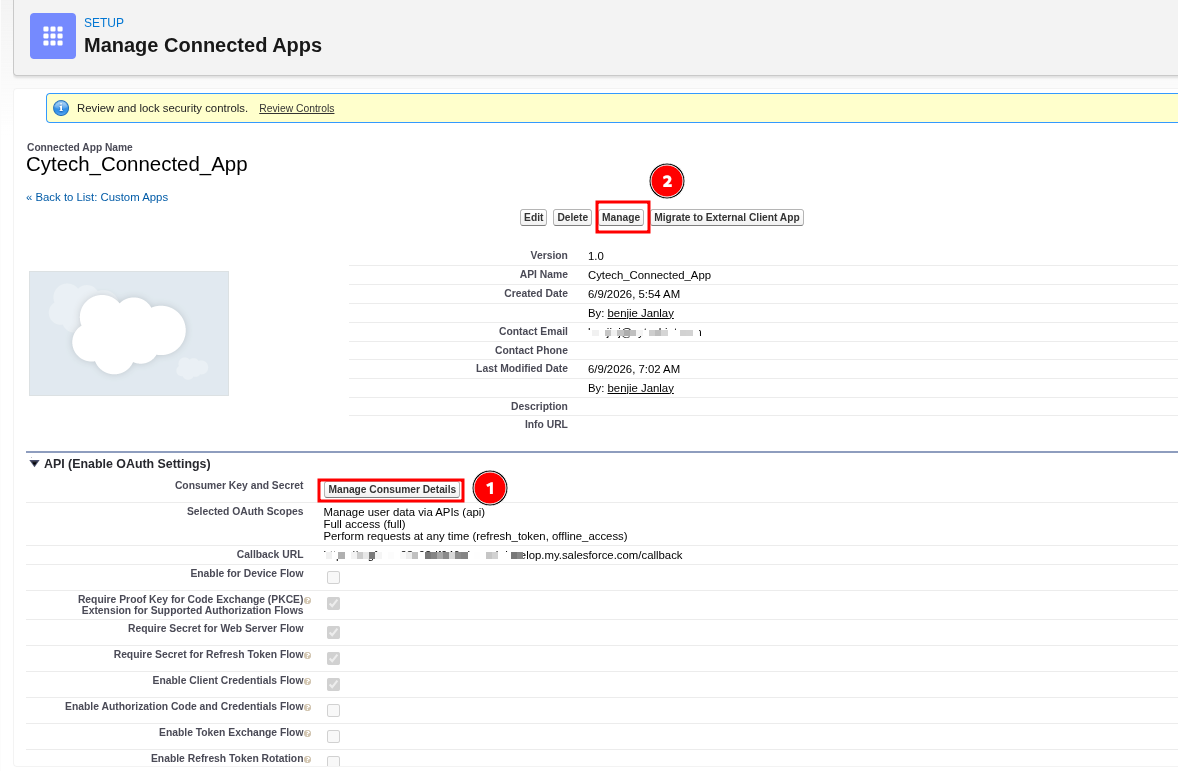
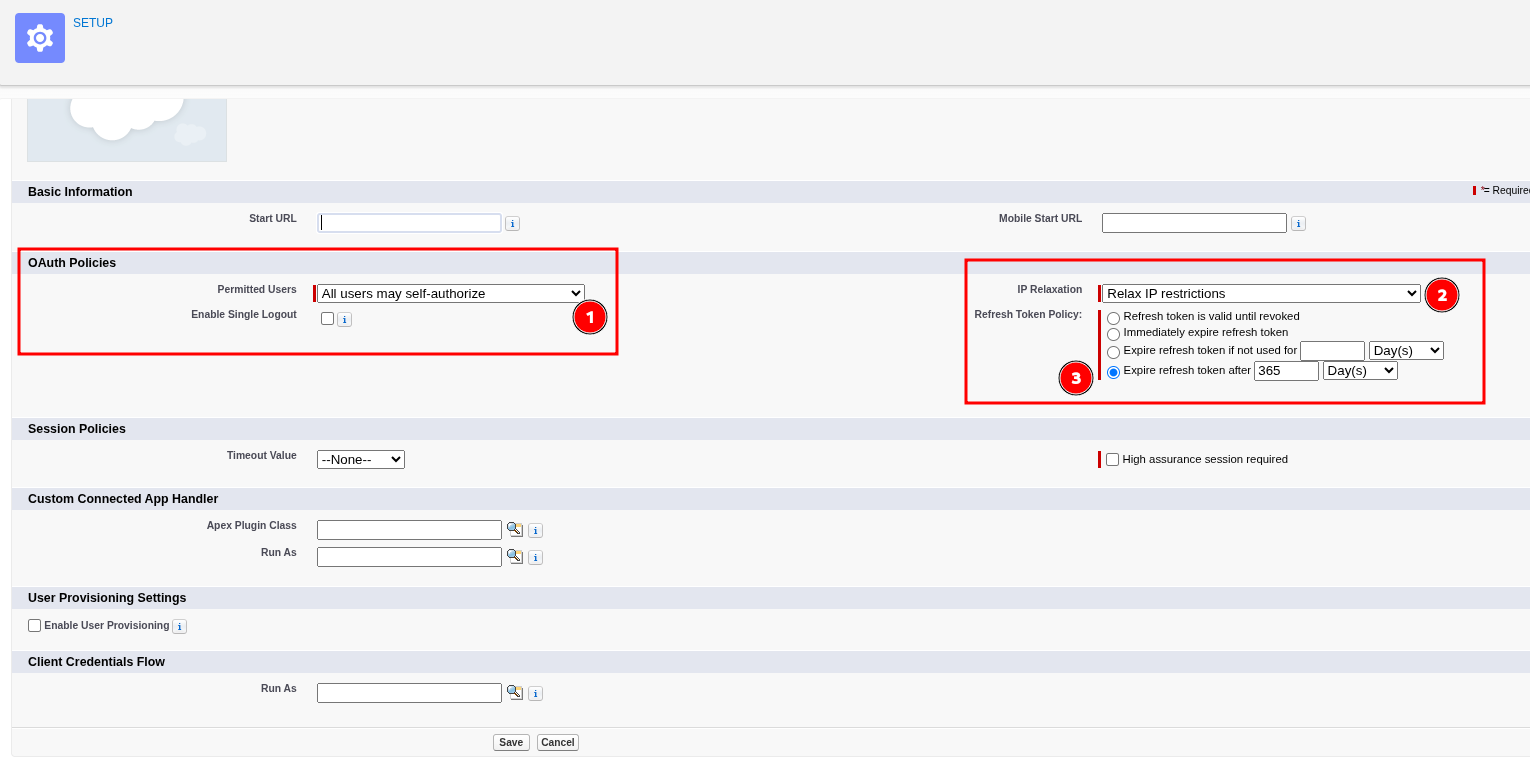
- Then Click Manage to OAuth Policies
- Permitted Users > All users may self-authorize
- IP Relaxation > Relax IP Restrictions
- Refresh Token Policy > Expire refresh token after "365" days
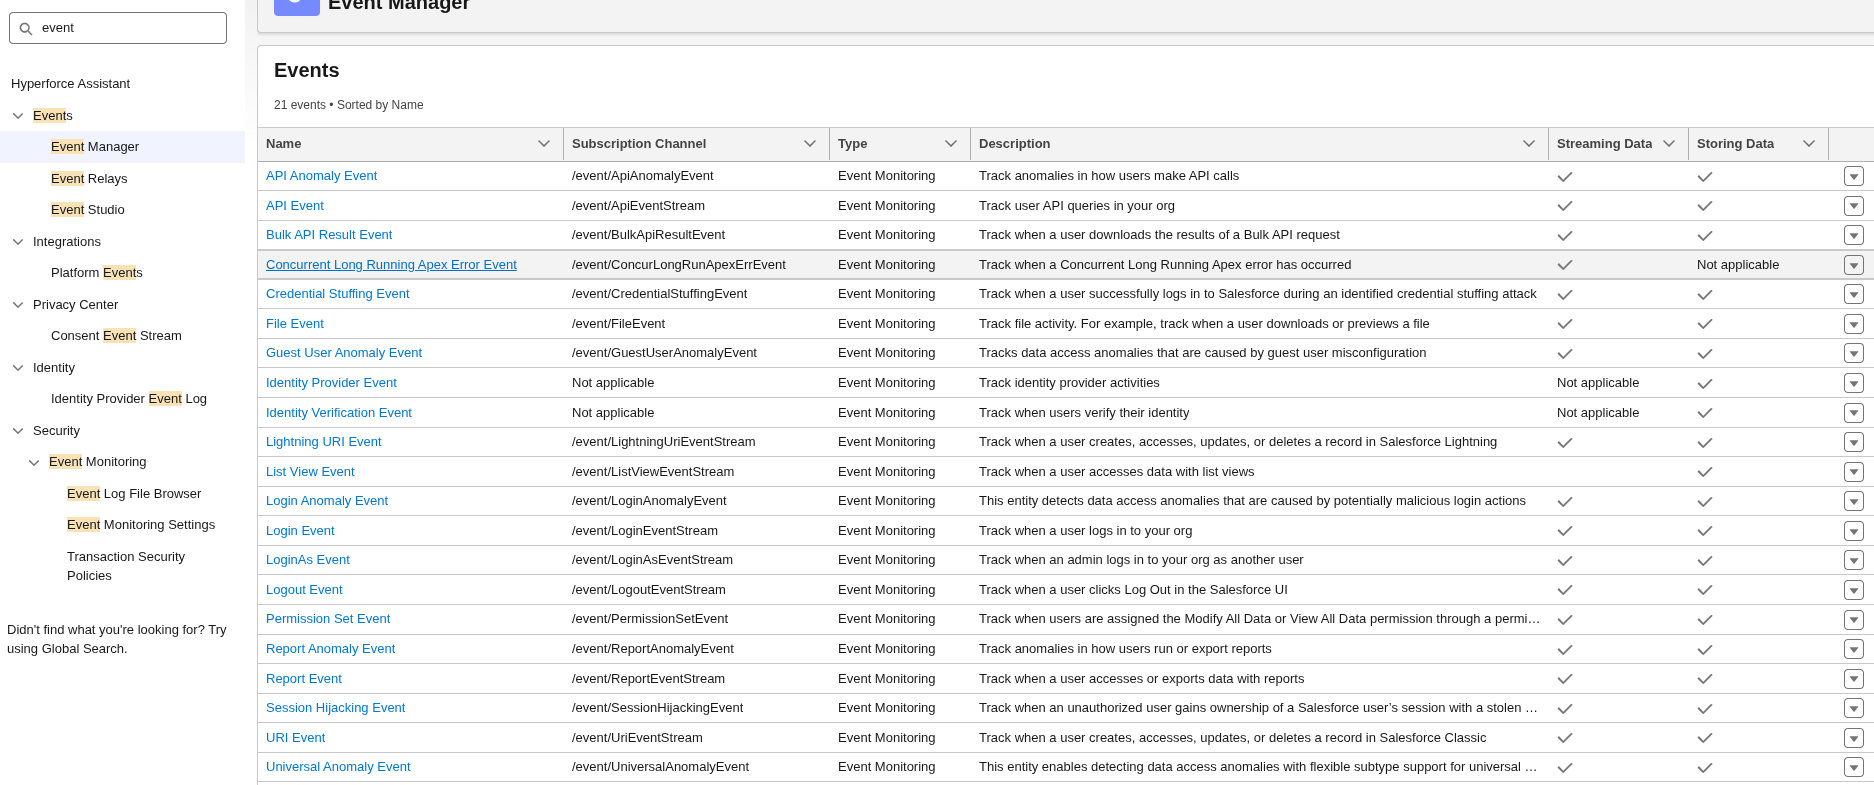
Verify if LoginEvent is enable
in Quick find > Event Manager > enable all
Provide this to Cytech Support:
- Username
- Password
- Consumer Key
- Consumer Secret
- Instance URL
If you need further assistance, kindly contact our support at support@cytechint.com for prompt assistance and guidance.
No comments to display
No comments to display