AQUILA - GitLab Integration
Purpose
This document explains, in a clear and practical way, how to locate GitLab log files on the host (or in Kubernetes), confirm access, and connect those logs to AQUILA. It covers common GitLab installation types (Omnibus/Linux package, self‑compiled, and Helm chart deployments) and troubleshooting tips.
Audience
This guide is written for system administrators, DevOps engineers, and security/observability operators who will configure log collection from GitLab into AQUILA.
Assumptions & prerequisites
-
You have administrative access to the GitLab host(s) or Kubernetes cluster where GitLab runs.
-
You have access to AQUILA site.
-
Basic familiarity with Linux shell commands and Kubernetes (
kubectl) for Helm deployments.
Step 1: Overview of required GitLab logs
The following GitLab logs are commonly consumed by security/observability platforms. Confirm their presence on the host (or in the pods) before configuring AQUILA. If you moved any files to different paths, provide the updated absolute paths to AQUILA.
-
api_json.log
-
Linux package (Omnibus) installations:
/var/log/gitlab/gitlab-rails/api_json.log -
Self‑compiled installations:
/home/git/gitlab/log/api_json.log -
Helm chart (Kubernetes): Webservice pods,
subcomponent="api_json".
-
-
application_json.log
-
Linux package:
/var/log/gitlab/gitlab-rails/application_json.log -
Self‑compiled:
/home/git/gitlab/log/application_json.log -
Helm chart: Sidekiq and Webservice pods,
subcomponent="application_json".
-
-
audit_json.log
-
Linux package:
/var/log/gitlab/gitlab-rails/audit_json.log -
Self‑compiled:
/home/git/gitlab/log/audit_json.log -
Helm chart: Sidekiq and Webservice pods,
subcomponent="audit_json".
-
-
auth_json.log
-
Linux package:
/var/log/gitlab/gitlab-rails/auth_json.log -
Self‑compiled:
/home/git/gitlab/log/auth_json.log -
Helm chart: Sidekiq and Webservice pods,
subcomponent="auth_json".
-
-
Pages logs
-
Linux package:
/var/log/gitlab/gitlab-pages/current.
-
-
production_json.log
-
Linux package:
/var/log/gitlab/gitlab-rails/production_json.log -
Self‑compiled:
/home/git/gitlab/log/production_json.log -
Helm chart: Webservice pods,
subcomponent="production_json".
-
-
Sidekiq logs
-
Linux package:
/var/log/gitlab/sidekiq/current -
Self‑compiled:
/home/git/gitlab/log/sidekiq.log
-
If you have moved or renamed any of the above logs, please add the new absolute path(s) to the Changed Paths table in the Appendix below before proceeding.
Step 2: Install Log Collector Agent
On the device where GitLab is installed, you must also install the AQUILA Log Collector Agent. This agent is responsible for collecting the GitLab logs and forwarding them to AQUILA for processing.
Please refer to the official manuals for installing the AQUILA Log Collector Agent on different operating systems:
Ensure that after installation, the Log Collector service is running properly.
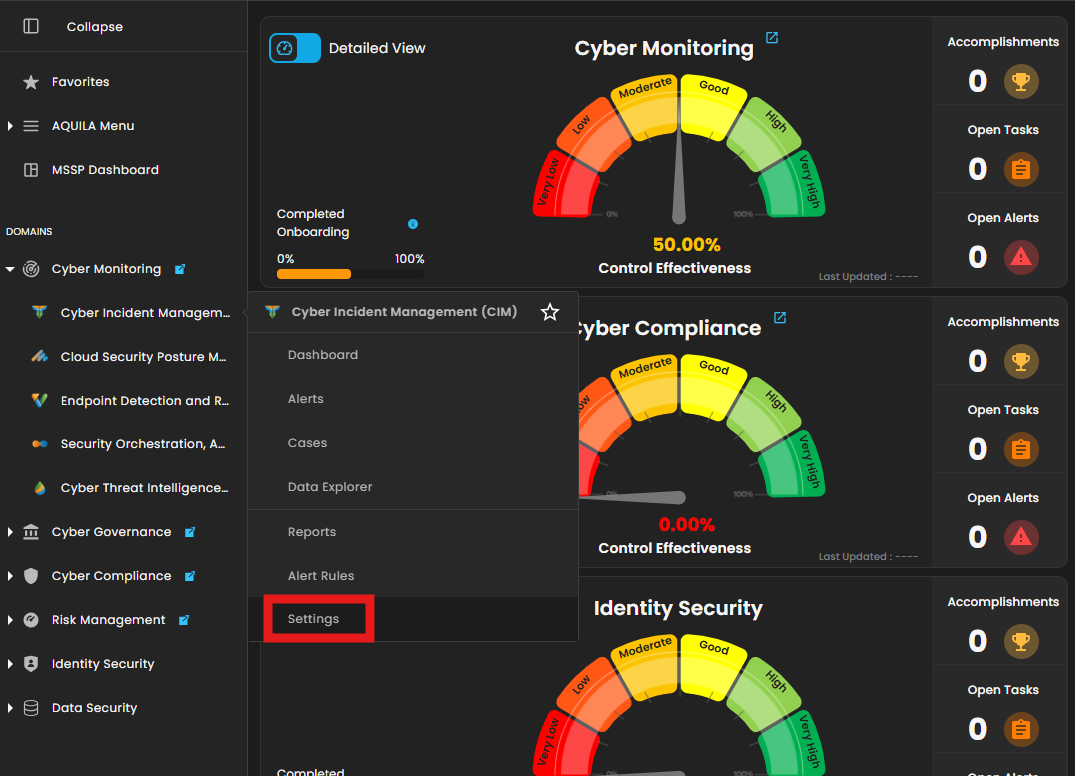
Step 3: Integrate GitLab on AQUILA
-
Log in to the AQUILA site.
-
Navigate to Cyber Monitoring → Cyber Incident Management (CIM) → Settings.
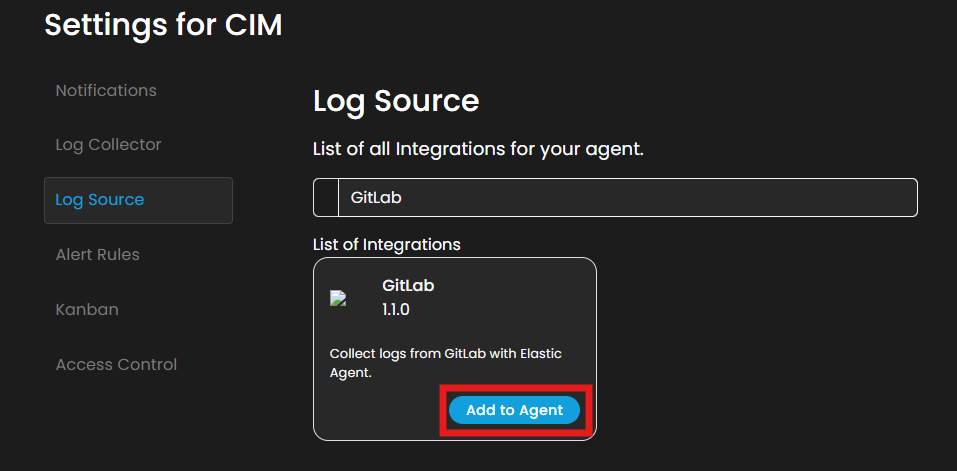
3. In Settings for CIM, go to Log Source. In the Search Integration textbox, type "GitLab" and click Add to Agent.
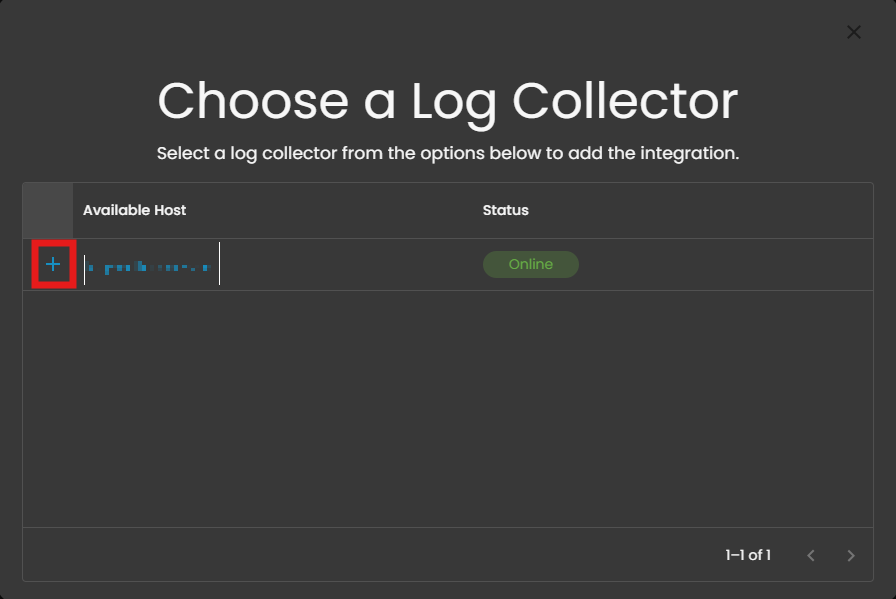
4. Choose a Log Collector and click the + button.
5. In the GitLab section, select the radio button Collect GitLab logs via filestream.
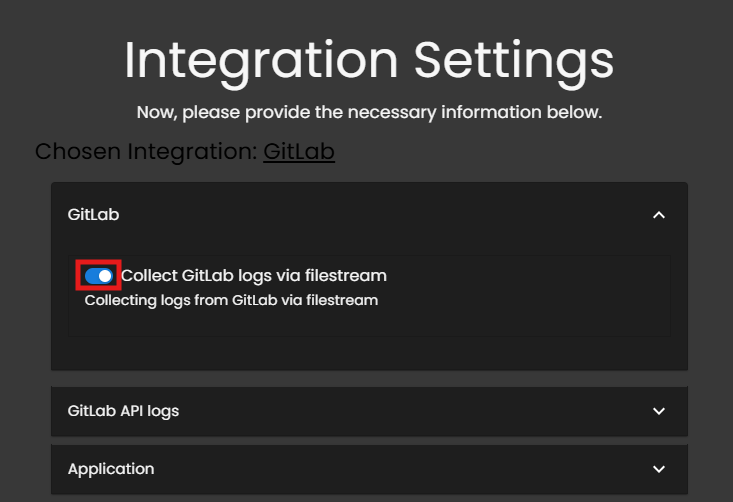
6. For the following logs, enter the specific paths gathered earlier:
-
-
GitLab API logs (ex. /var/log/gitlab/gitlab-rails/api_json.log)
-
Application logs (ex. /var/log/gitlab/gitlab-rails/application_json.log)
-
Audit logs (ex. /var/log/gitlab/gitlab-rails/audit_json.log)
-
Auth logs (ex. /var/log/gitlab/gitlab-rails/auth_json.log)
-
GitLab Pages logs (ex. /var/log/gitlab/gitlab-pages/current)
-
GitLab Production logs (ex. /var/log/gitlab/gitlab-rails/production_json.log)
-
GitLab Sidekiq logs (ex. /var/log/gitlab/sidekiq/current)
-
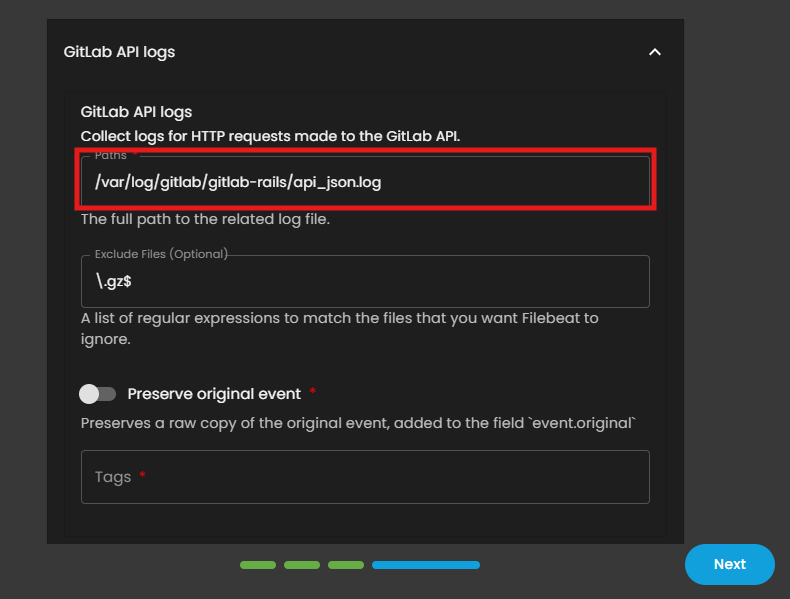
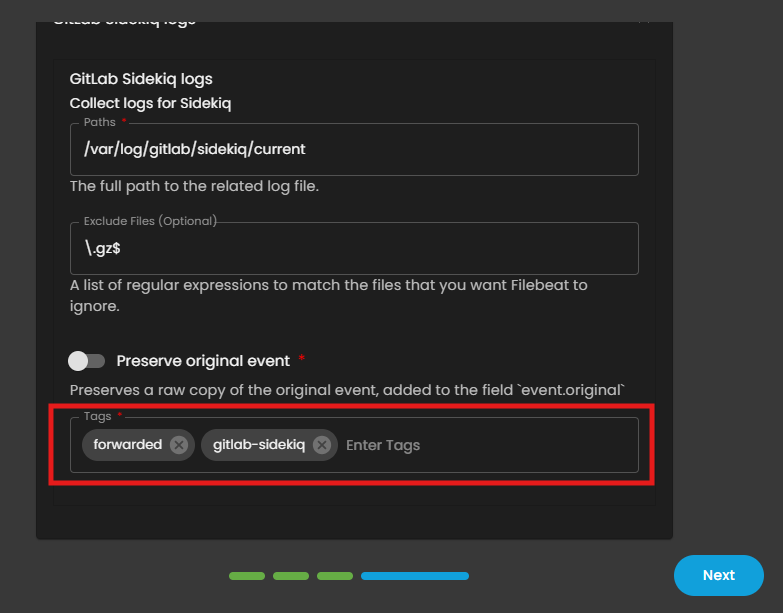
8. Once all paths and tags have been entered, click Next to continue.
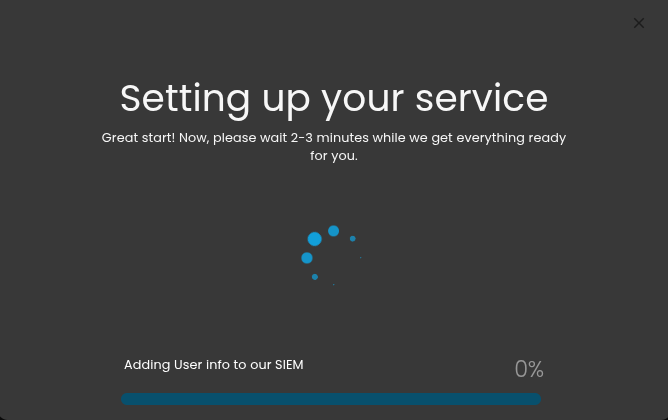
9. Wait for the Successful window to display, this will confirm the successful integration.
If you need further assistance, kindly contact our support at support@cytechint.com for prompt assistance and guidance.
No comments to display
No comments to display