Deploy Software via Group Policy (GPO) (incomplete)
Introduction
Deploy Software via Group Policy (GPO) is a method used in Windows Active Directory (AD) environments to automatically install, update, or remove software on computers or for users centrally and silently, without manual installation on each machine. It’s mainly handled by Group Policy Objects (GPOs) through Microsoft Installer (MSI) packages.
Open the Windows Server Device:
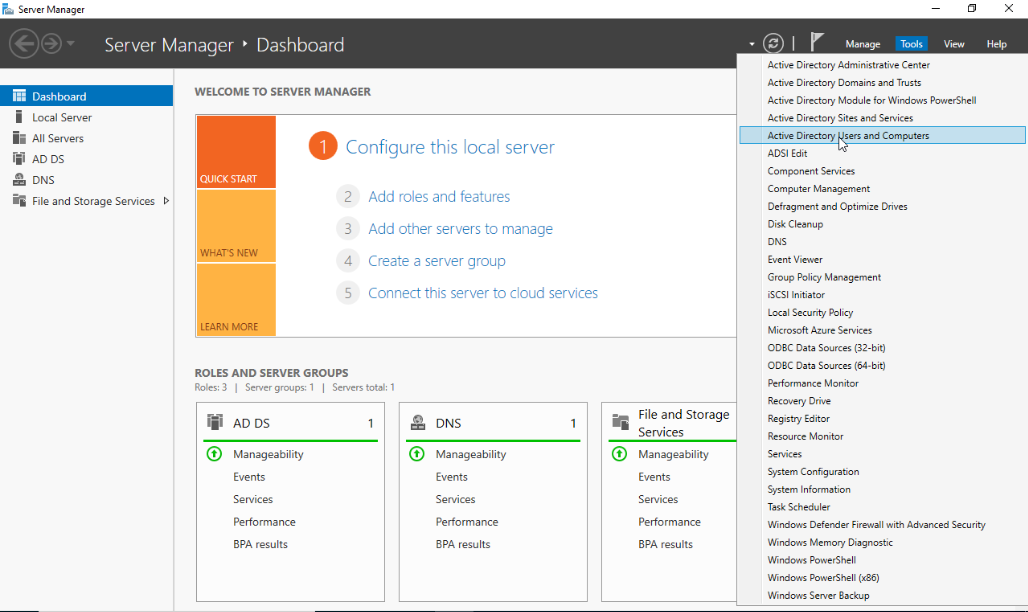
- Open Server Manager click Tools on the upper right side and choose the Active Directory Users and Computers.
- On the Active Directory Users and Computers right click the Users folder select New and Computer.
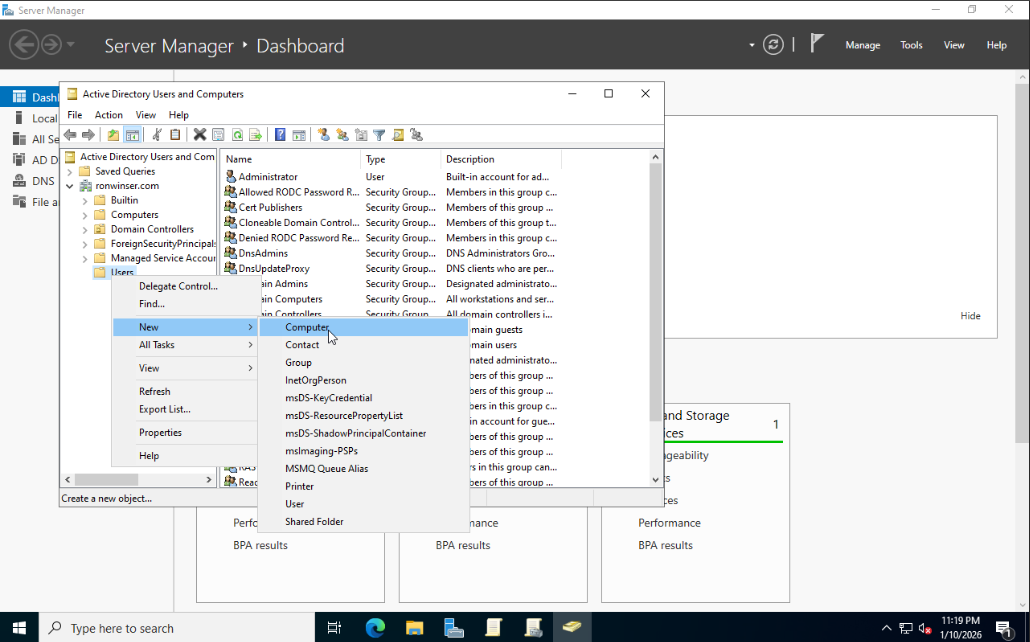
After you clicked the Computer, New Object - Computer window displayed.
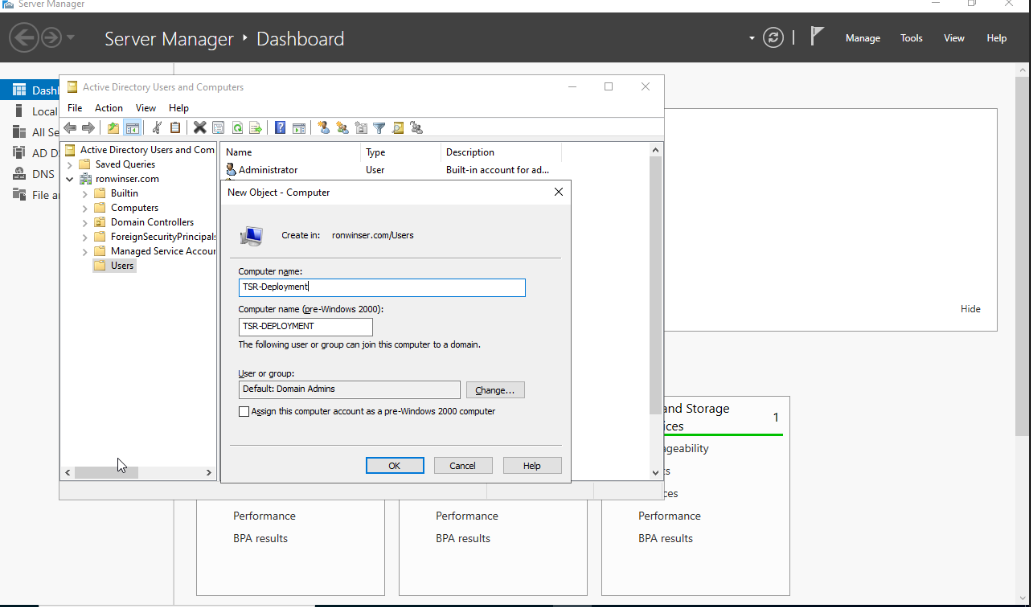
- Input your desired Computer Name: TSR-Deployment
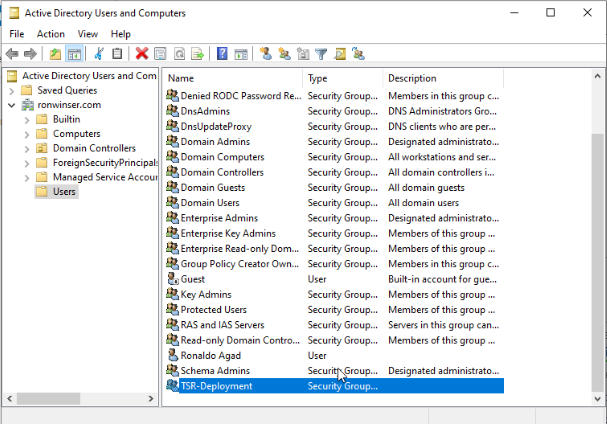
Click "OK" once done and you will see the TSR-Deployment added on the Active Directory Users and Computers.
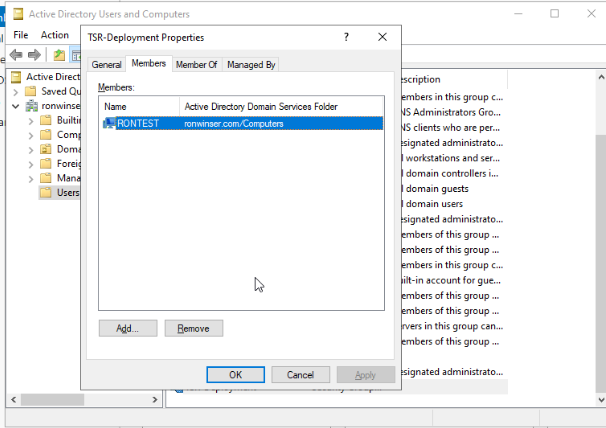
- Next Process double click the TSR-Deployment on the Active Directory Uses and Computers, TSR-Deployment Properties will appear and click the Members tab.
- Click the "Add" button, select the "Object Types" once it opens check the Computer.
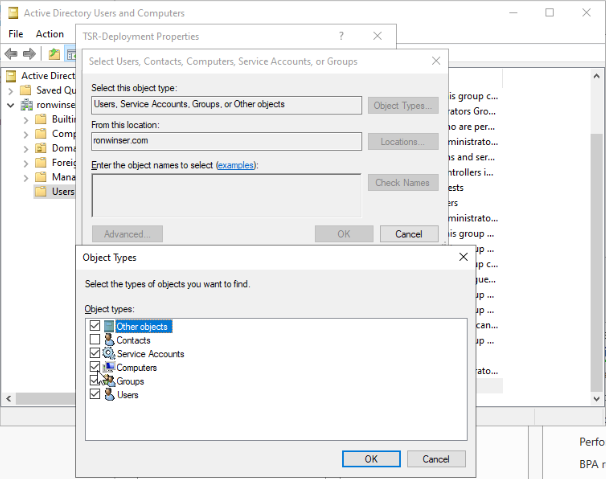
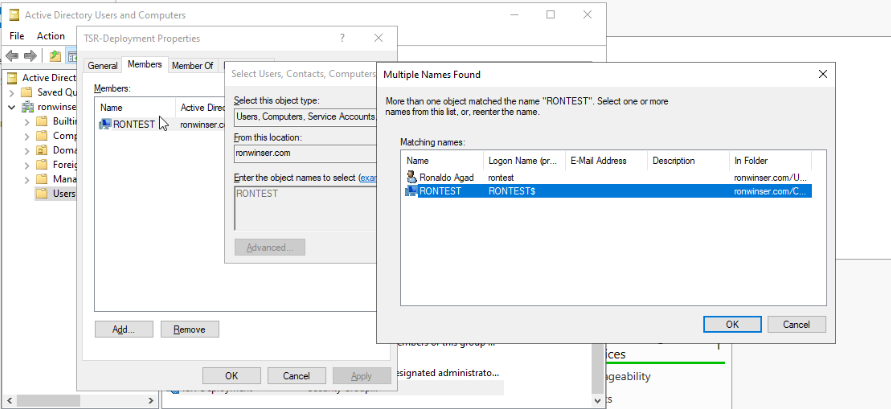
- Type your computer name that is connected to the domain, after that click the Check Names and choose only the "Computer" icon which is your computer device.

Creating a UNC Path for Software Folders
To ensure domain-joined computers can access the AQUILA EDR ZIP file package and folder for centralizing logs, create a shared network folder and configure appropriate permissions.
- Create a ZIP Folder
- On a file server, create a folder (e.g.,
C:\ZIP). - Copy the
edr-agent-8.18.1-windows-x86_64.zipfile into this folder.
- On a file server, create a folder (e.g.,
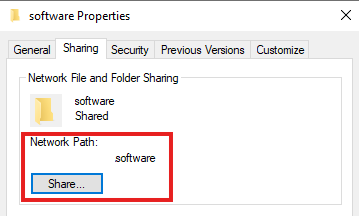
- Enable Folder Sharing
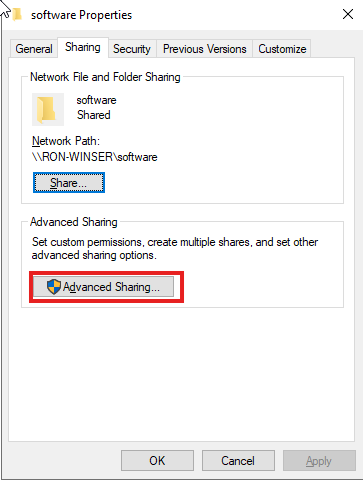
- Right-click the
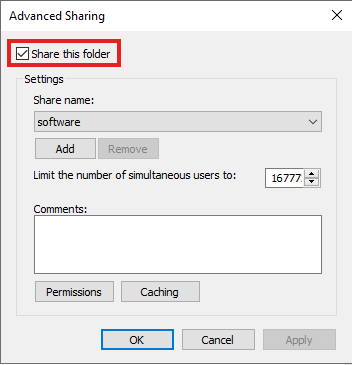
ZIPfolder and select Properties. - Navigate to the Sharing tab and click Advanced Sharing.
- Check the box Share this folder.

- Right-click the
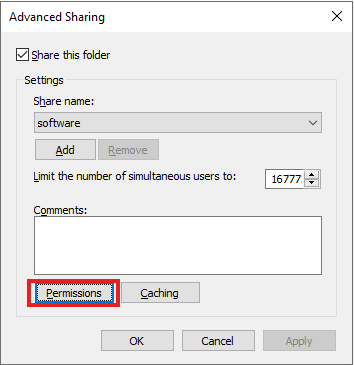
- Set Permissions
- Click Permissions
-
Grant the Read permission to
Domain Computers. -
Grant the Full Control permission to
Domain Admins
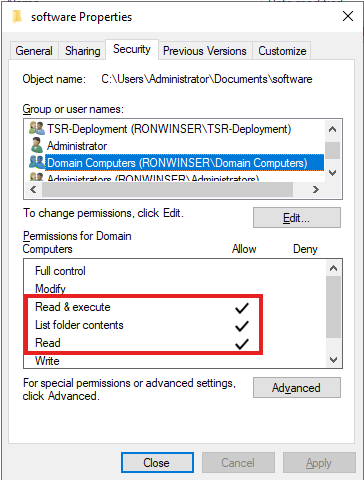
- Also, in the Security tab, grant the Read & execute permission to
Domain Computersand Full control permission toDomain Admins.
- Save the network share path
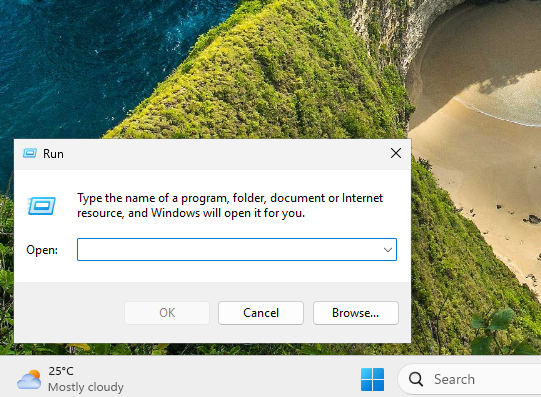
- Open the shared folder on the User domain logged in.
- Use windows + R or search run on the windows search

- Type the Shared Folder path, e.g. (\\ServerPath)
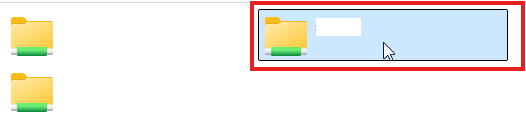
- Open the specified folder where the software are inputted
- Open the specified folder where the software are inputted
- Use windows + R or search run on the windows search


No comments to display
No comments to display