# Deploy Software via Group Policy (GPO) (incomplete)
### **Introduction**
**Deploy Software via Group Policy (GPO)** is a method used in **Windows Active Directory (AD)** environments to automatically **install, update, or remove software** on computers or for users centrally and silently, without manual installation on each machine. It’s mainly handled by **Group Policy Objects (GPOs)** through Microsoft Installer (MSI) packages.
#### **Open the Windows Server Device:**
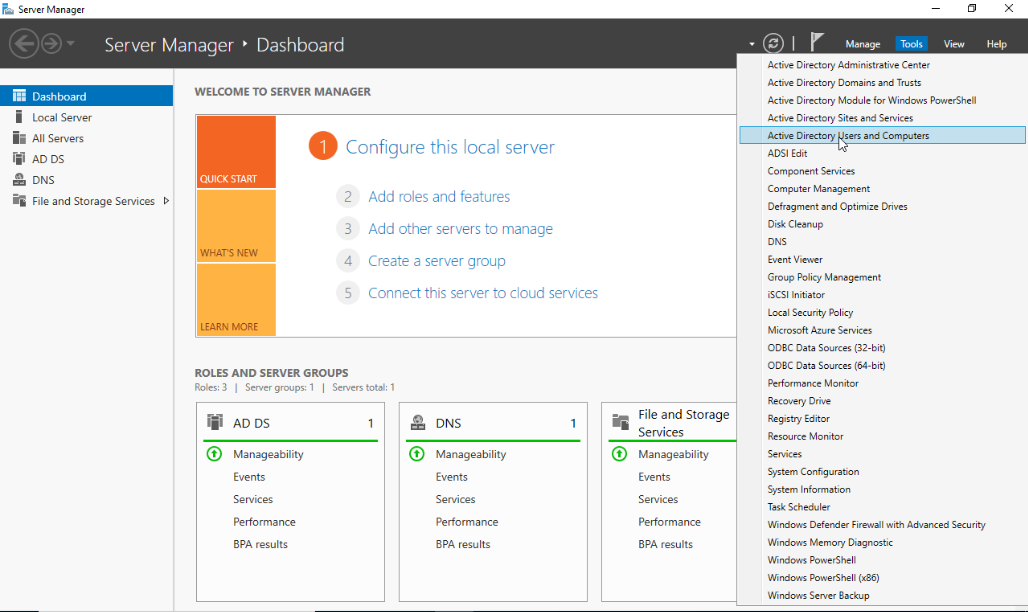
- Open **Server Manager** click **Tools** on the upper right side and choose the **Active Directory Users and Computers.**
[](https://cytechint-docs-bookstack.s3.amazonaws.com/uploads/images/gallery/2026-01/phG9efsyRpAoBEsr-image.png)
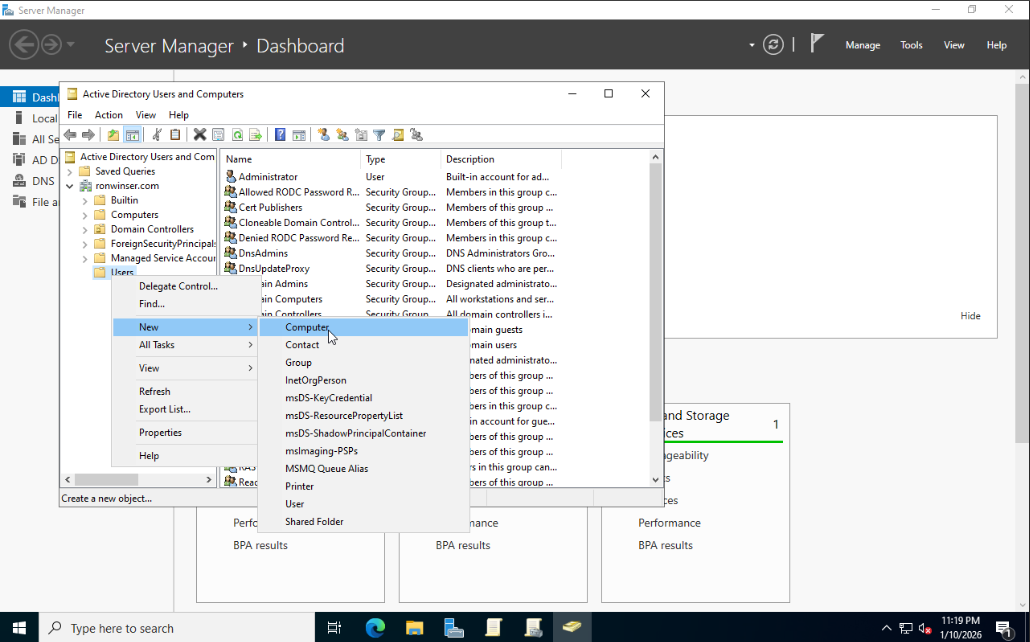
- On the **Active Directory Users and Computers** right click the **Users** folder select **New** and **Computer.**
[](https://cytechint-docs-bookstack.s3.amazonaws.com/uploads/images/gallery/2026-01/1vYRefnPn8bKRgkY-image.png)
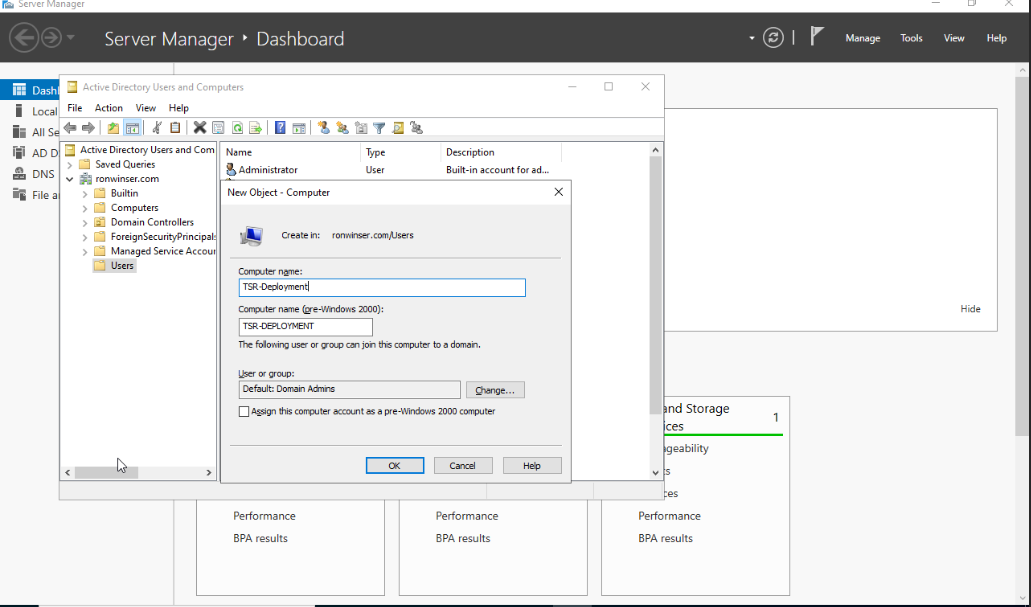
After you clicked the Computer, New Object - Computer window displayed.
- **Input your desired Computer Name:** TSR-Deployment
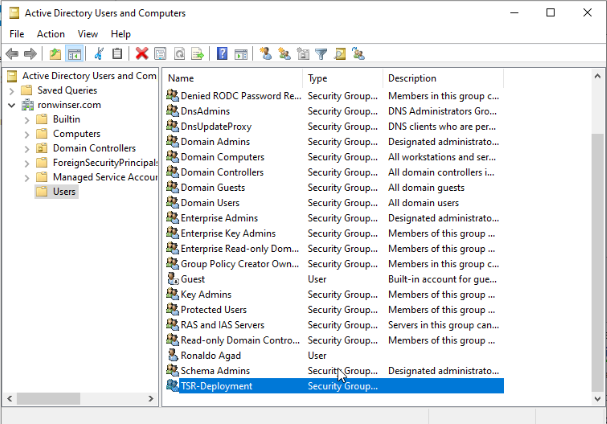
Click "OK" once done and you will see the TSR-Deployment added on the Active Directory Users and Computers.
[](https://cytechint-docs-bookstack.s3.amazonaws.com/uploads/images/gallery/2026-01/0ZqXIGysHHYUIEcF-image.png)
[](https://cytechint-docs-bookstack.s3.amazonaws.com/uploads/images/gallery/2026-01/0OlRbArKvhNc6x1O-image.png)
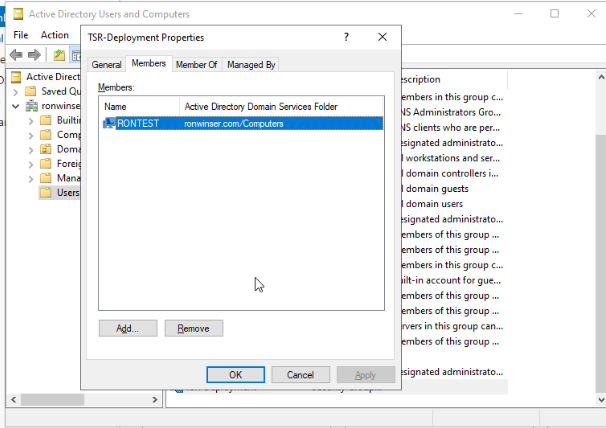
- Next Process double click the **TSR-Deployment** on the **Active Directory Uses and Computers, TSR-Deployment Properties** will appear and click the **Members** tab.
[](https://cytechint-docs-bookstack.s3.amazonaws.com/uploads/images/gallery/2026-01/ow5BVIAB80PJK0fs-image.png)
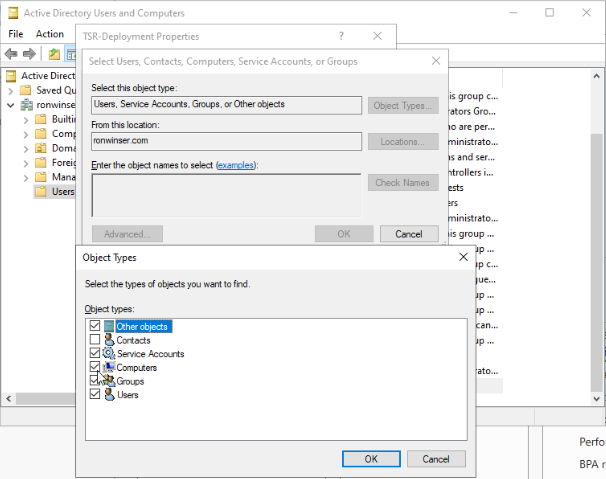
- Click the "**Add**" button, select the "**Object Types**" once it opens check the **Computer**.
[](https://cytechint-docs-bookstack.s3.amazonaws.com/uploads/images/gallery/2026-01/AsF2mxZKR1A8llWC-image.png)
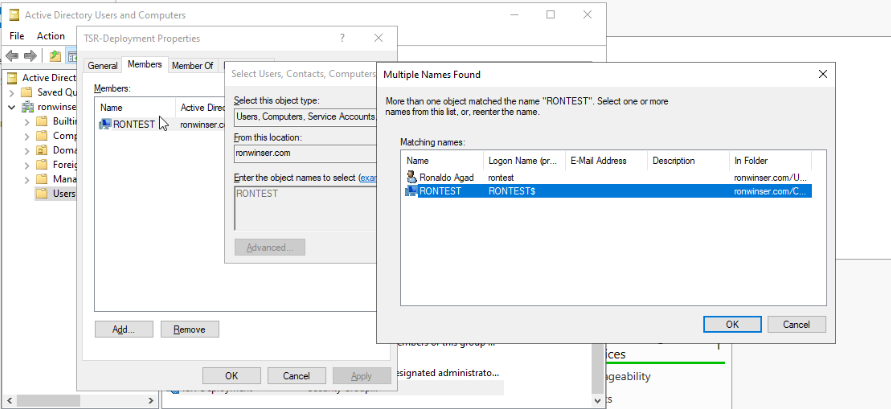
- Type your **computer name** that is connected to the domain, after that click the **Check Names** and choose only the "**Computer**" icon which is your computer device.
[](https://cytechint-docs-bookstack.s3.amazonaws.com/uploads/images/gallery/2026-01/aeehraMDeA0YUH7H-image.png)
##### **Creating a UNC Path for Software Folders**
To ensure domain-joined computers can access the **AQUILA EDR ZIP** file package and folder for centralizing logs, create a shared network folder and configure appropriate permissions.
1. **Create a ZIP Folder**
- On a file server, create a folder (e.g., `C:\ZIP`).
- Copy the `edr-agent-8.18.1-windows-x86_64.zip` file into this folder.
2. **Enable Folder Sharing**
- Right-click the `ZIP` folder and select **Properties**.
- Navigate to the **Sharing** tab and click **Advanced Sharing**. [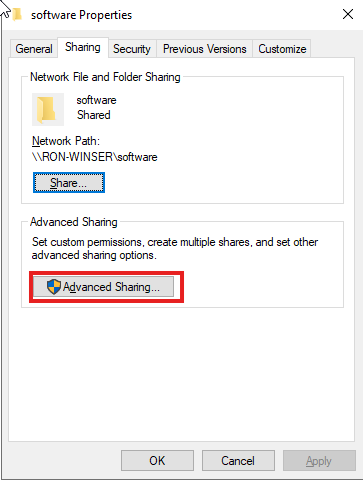](https://cytechint-docs-bookstack.s3.amazonaws.com/uploads/images/gallery/2026-01/opYjeqE5wFFJ3Z8V-image.png)
- Check the box **Share this folder**. [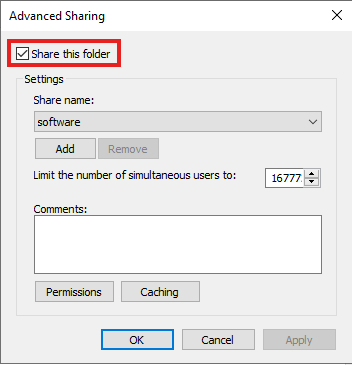](https://cytechint-docs-bookstack.s3.amazonaws.com/uploads/images/gallery/2026-01/BTHQBRIZqm8z8flC-image.png)
3. Set Permissions
- Click Permissions
- Grant the **Read** permission to `Domain Computers`.
- Grant the **Full Control** permission to `Domain Admins`
[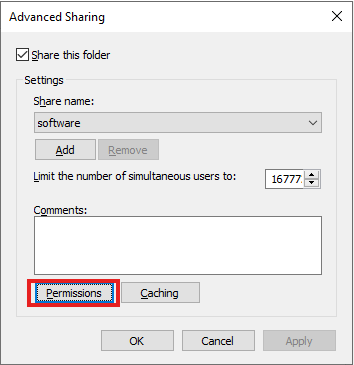](https://cytechint-docs-bookstack.s3.amazonaws.com/uploads/images/gallery/2026-01/myA2I9R7JSAhtqXd-image.png)
- Also, in the **Security** tab, grant the **Read & execute** permission to `Domain Computers` and **Full control** permission to `Domain Admins`.
[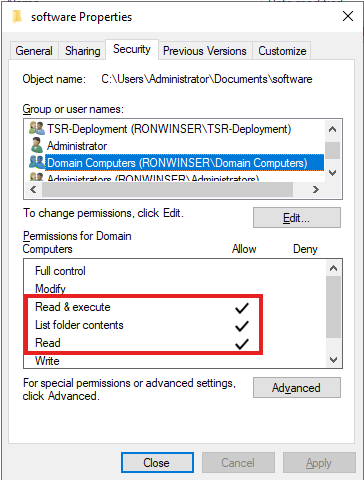](https://cytechint-docs-bookstack.s3.amazonaws.com/uploads/images/gallery/2026-01/FxIoPizZ4sAn35bl-image.png)
- Save the network share path [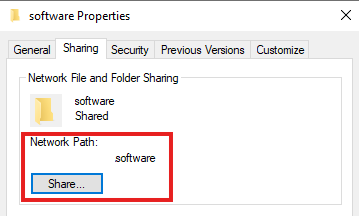](https://cytechint-docs-bookstack.s3.amazonaws.com/uploads/images/gallery/2026-01/n7WCkSqxbemm2zL4-image.png)
4. Open the shared folder on the User domain logged in.
- Use **windows + R** or search **run** on the **windows search**[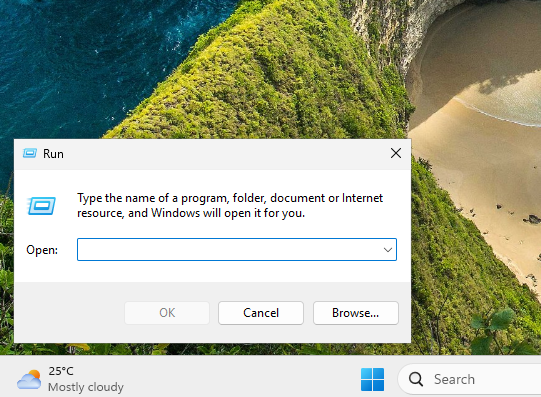](https://cytechint-docs-bookstack.s3.amazonaws.com/uploads/images/gallery/2026-01/92XIwI2hrUXOWf93-image.png)
- Type the Shared Folder path, e.g. **(\\\\ServerPath)**
- Open the specified folder where the software are inputted[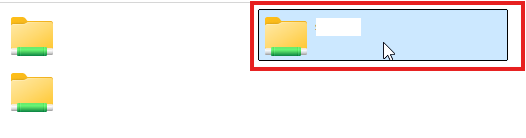](https://cytechint-docs-bookstack.s3.amazonaws.com/uploads/images/gallery/2026-01/r3F4zuXooUThjDJQ-image.png)[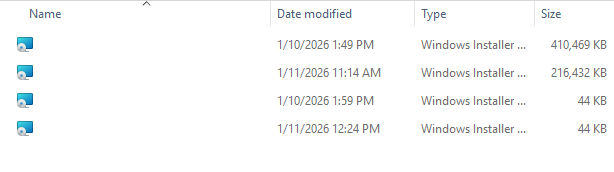](https://cytechint-docs-bookstack.s3.amazonaws.com/uploads/images/gallery/2026-01/AUryq6tR2kxH7SI7-image.png)