AQUILA - Cato Network Integration(Windows)
Cato Networks provides a cloud-native SASE (Secure Access Service Edge) platform that converges networking and security into a global cloud service. The platform generates security and connectivity events that can be collected, analyzed, and monitored for network insights and threat detection. This integration enables centralized event collection from Cato Networks using the Cato CLI for visualization and analysis.
Integration Overview
This integration supports event collection through:
- Cato CLI (catocli) using the Events Feed API
- Automated event polling via Windows Service (NSSM)
- Python-based event collection script running as a background service
Events can be searched, observed, and visualized for security monitoring, connectivity analysis, and network performance tracking.
Compatibility
- Supports event collection for Security and Connectivity event types
- Requires Python 3.6 or higher
- Compatible with Windows Server operating systems
- Requires valid Cato Network API token and Account ID
- Requires NSSM (Non-Sucking Service Manager) for Windows Service integration
Prerequisites
Before configuring the Cato Network integration, ensure you have:
- Python 3.6 or higher installed
- Python virtual environment configured at
C:\cato\venv - Cato CLI (catocli) installed
- Valid Cato Network API token
- Valid Cato Network Account ID
- NSSM (Non-Sucking Service Manager) downloaded
Python Installation
Windows Installation:
Step 1: Open your web browser and navigate to the official Python downloads page:
Step 2: Locate the latest stable version of Python 3 (3.12 or newer is recommended) and choose the correct installer for your system type (64-bit or 32-bit).
Step 3: Click the installer link to download the .exe file.
Step 4: After downloading, locate the installer file (e.g., python-3.x.x-amd64.exe) and double-click it to start the installation.
Step 5: On the installer screen, configure the following options:
- Check Install launcher for all users
- Check Add python.exe to PATH to enable running Python from the Command Prompt
Step 6: Click Install Now to begin the installation process.
Step 7: Wait for the installation to complete, then click Close when the success message appears.
Step 8: Verify the installation:
Creating Python Virtual Environment
A Python virtual environment isolates project dependencies and prevents conflicts with system-wide Python packages.
Step 1: Open Command Prompt or PowerShell.
Step 2: Create and Navigate to your project directory using the mkdir and cd command:
mkdir "C:\cato"
cd C:\cato
Step 3: Create a virtual environment:
python -m venv venvStep 4: Activate the virtual environment:
- Command Prompt:
venv\Scripts\activate.bat
- PowerShell:
.\venv\Scripts\activate.ps1
Step 5: Once activated, the virtual environment name (e.g., (venv)) will appear in your terminal prompt.
Step 6: To deactivate the virtual environment, type:
deactivateCato CLI Installation
Step 1: Ensure your virtual environment is activated.
Step 2: Install the Cato CLI using pip:
pip3 install catocli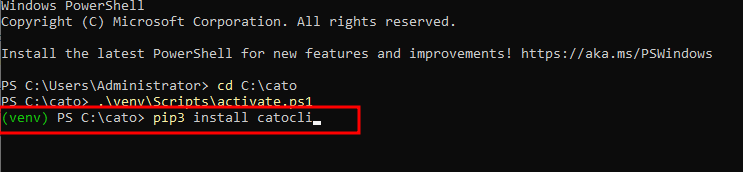
Step 3: Verify the installation by running:
catocli --version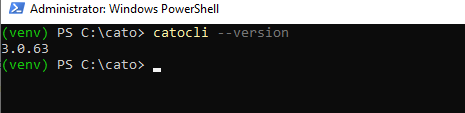
Configuring Cato CLI for Local System Execution
To enable the Cato CLI to run as a Windows Service under the Local System account, modify the profile manager configuration.
Step 1: Navigate to the Cato CLI profile manager file:
C:\cato\venv\Lib\site-packages\catocli\Utils\profile_manager.pyStep 2: Open the file in a text editor (e.g., Notepad or Visual Studio Code).
Step 3: Locate the __init__ constructor in the file:
def __init__(self):
    self.cato_dir = Path.home() / '.cato'
    self.credentials_file = self.cato_dir / 'credentials'
    self.config_file = self.cato_dir / 'config'
    self.default_endpoint = "https://api.catonetworks.com/api/v1/graphql2"
Step 4: Replace Path.home() with Path("C:/cato"):
def __init__(self):
    self.cato_dir = Path("C:/cato") / '.cato'
    self.credentials_file = self.cato_dir / 'credentials'
    self.config_file = self.cato_dir / 'config'
    self.default_endpoint = "https://api.catonetworks.com/api/v1/graphql2"
This change ensures the Cato CLI uses a fixed directory path instead of the user's home directory, which is essential for running as a system service.
Step 5: Save and close the file.
Validating Cato Network API Token and Account ID
Step 1: Configure the Cato CLI with your API token and Account ID:
catocli configure set --cato-token "your-api-token" --account-id "12345"
Replace "your-api-token" with your actual Cato Network API token and "12345" with your Account ID.
Downloading and Installing NSSM
NSSM (Non-Sucking Service Manager) is a service helper tool that allows you to run any application as a Windows Service.
Step 1: Download NSSM from the official website:
Step 2: Extract the downloaded ZIP file.
Step 3: Copy the appropriate `nssm.exe` file (32-bit or 64-bit based on your system) to the Cato integration directory:
C:\cato\nssm.exeCreating the Python Event Collection Script
Step 1: Create a Python script file at:
C:\cato\my_script.pyStep 2: Paste this configuration script to my_script.py that you created earlier:
import os
import subprocess
import time
import gzip
import shutil
import logging
import sys
import msvcrt
from logging.handlers import RotatingFileHandler

# ================= CONFIG =================
BASE_DIR = r"C:\cato"

MARKER_FILE = os.path.join(BASE_DIR, "events-marker.txt")
LOCK_FILE = os.path.join(BASE_DIR, "cato-eventsfeed.lock")
LOG_FILE = os.path.join(BASE_DIR, "events.log")
WATCHDOG_FILE = os.path.join(BASE_DIR, "cato-eventsfeed.watchdog")

CATOCLI = r"C:\cato\venv\Scripts\catocli.exe"

INTERVAL = 600          # 10 minutes
MAX_RETRIES = 3
RETRY_DELAY = 10        # seconds

os.makedirs(BASE_DIR, exist_ok=True)

# ================= CUSTOM HANDLER =================
class CompressedRotatingFileHandler(RotatingFileHandler):
    def doRollover(self):
        """
        Override rotation to compress old logs
        """
        if self.stream:
            self.stream.close()
            self.stream = None

        # Rotate existing files
        for i in range(self.backupCount - 1, 0, -1):
            sfn = f"{self.baseFilename}.{i}.gz"
            dfn = f"{self.baseFilename}.{i+1}.gz"
            if os.path.exists(sfn):
                if i + 1 > self.backupCount:
                    os.remove(sfn)
                else:
                    os.rename(sfn, dfn)

        # Compress current log → .1.gz
        if os.path.exists(self.baseFilename):
            with open(self.baseFilename, 'rb') as f_in:
                with gzip.open(f"{self.baseFilename}.1.gz", 'wb') as f_out:
                    shutil.copyfileobj(f_in, f_out)

            os.remove(self.baseFilename)

        # Reopen fresh log file
        self.stream = self._open()

# ================= LOGGING =================
LOG_MAX_SIZE = 1000 * 1024 * 1024   # 1 GB
LOG_BACKUP_COUNT = 5             # keep 5 rotated logs

log_handler = CompressedRotatingFileHandler(
    LOG_FILE,
    maxBytes=LOG_MAX_SIZE,
    backupCount=LOG_BACKUP_COUNT
)

logging.basicConfig(
    level=logging.INFO,
    format="%(asctime)s [%(levelname)s] %(message)s",
    handlers=[
        log_handler
    ]
)

# ================= LOCK =================
def acquire_lock():
    lock_file = open(LOCK_FILE, 'w')
    try:
        msvcrt.locking(lock_file.fileno(), msvcrt.LK_NBLCK, 1)
        return lock_file
    except OSError:
        logging.error("Another instance is already running. Exiting.")
        sys.exit(1)

# ================= CORE =================
def run_cato():
    cmd = [
        CATOCLI,
        "query", "eventsFeed",
        "--run",
        "--print-events",
        f"--marker-file={MARKER_FILE}",
        "--runtime-limit=10",
        "--event-types=Security,Connectivity"
    ]

    for attempt in range(1, MAX_RETRIES + 1):
        try:
            logging.info(f"Running Cato CLI (Attempt {attempt})")

            result = subprocess.run(
                cmd,
                capture_output=True,
                text=True
            )

            if result.stdout:
                logging.info(result.stdout.strip())

            if result.stderr:
                logging.error(result.stderr.strip())

            if result.returncode == 0:
                logging.info("Cato CLI succeeded")
                return True
            else:
                logging.error(f"Failed with code {result.returncode}")

        except Exception as e:
            logging.exception(f"Exception: {e}")

        time.sleep(RETRY_DELAY)

    logging.error("Max retries reached")
    return False

# ================= WATCHDOG =================
def update_watchdog():
    try:
        with open(WATCHDOG_FILE, "w") as f:
            f.write(str(int(time.time())))
    except Exception as e:
        logging.exception(f"Watchdog update failed: {e}")

# ================= MAIN LOOP =================
def main():
    lock = acquire_lock()

    try:
        while True:
            start = time.time()

            try:
                success = run_cato()
                if success:
                    update_watchdog()
            except Exception as e:
                logging.exception(f"Unexpected crash in main loop: {e}")

            elapsed = time.time() - start
            sleep_time = max(0, INTERVAL - elapsed)

#            logging.info(f"Sleeping {sleep_time} seconds")
            time.sleep(sleep_time)

    finally:
        lock.close()

if __name__ == "__main__":
    main()
Step 3: Save the script file.
Installing the Cato Events Feed as a Windows Service
Use NSSM to install the Python script as a Windows Service that runs automatically in the background.
Step 1: Open PowerShell as Administrator and Navigate to the Cato directory:
cd C:\catoStep 2: Run the NSSM installation command:
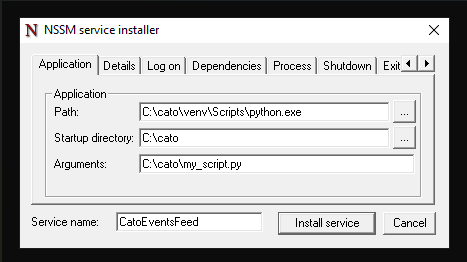
C:\cato\nssm.exe install CatoEventsFeedThis opens the NSSM service installer GUI.
Step 1: Configuring the Service - Application Tab:
Path: C:\cato\venv\Scripts\python.exe
Startup directory: C:\cato
Arguments: C:\cato\my_script.py
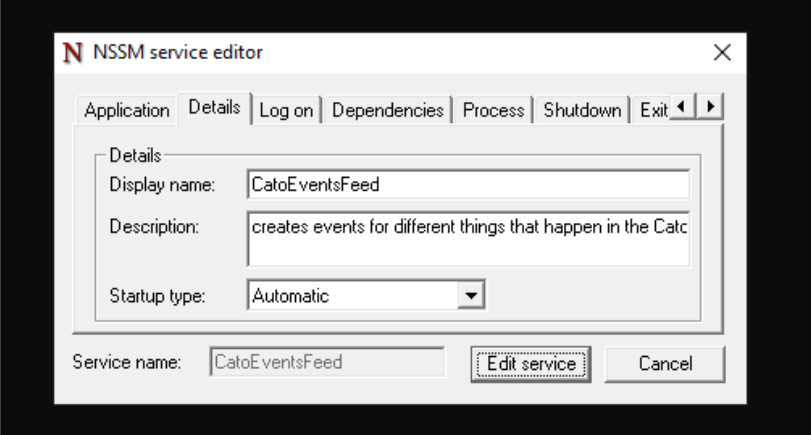
Step 2: Configuring the Service - Details Tab:
Display name: CatoEventsFeed
Description: The platform generates security and connectivity events that can be collected, analyzed, and monitored for network insights and threat detection. This service enables centralized event collection from Cato Networks using the Cato CLI for visualization and analysis.
Step 4: Configuring the Service - Log on tab
select Local System account
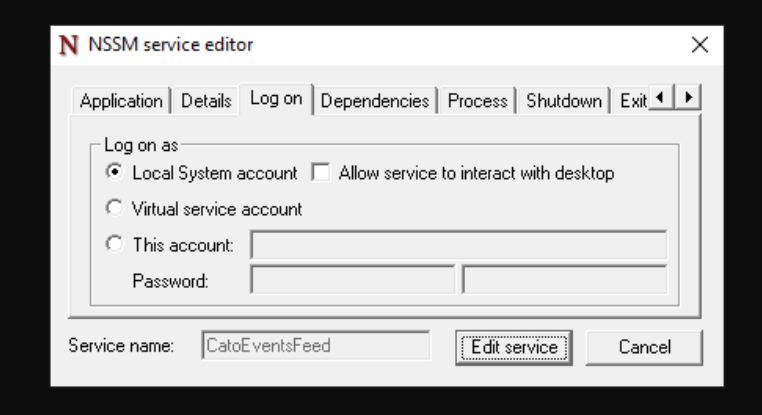
This allows the service to run with system-level privileges without requiring a specific user login.
Step 5: Configuring the Service - Exit action tab
delay restart if application runs for less than: 5000
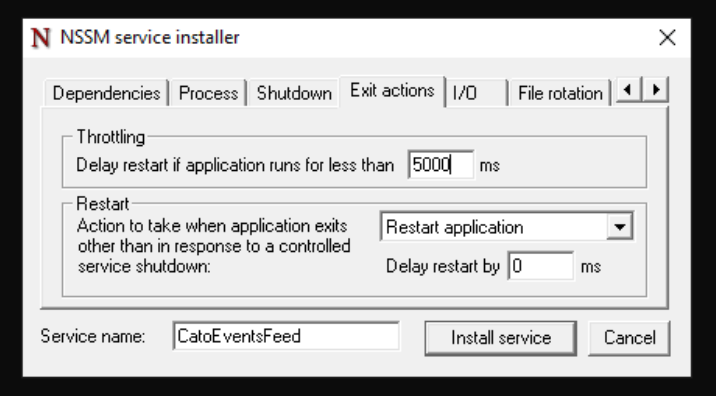
This setting ensures the service waits 5 seconds before attempting a restart if the application crashes immediately after starting.
Step 6: Click Install service to complete the installation.
Starting the Cato Events Feed Service
Step 1: Open PowerShell as Administrator and navigate to the Cato directory:
cd C:\catoStep 2: Start the service using NSSM:
.\nssm.exe start CatoEventsFeedStep 3: Verify the service is running:
sc.exe query CatoEventsFeedThe output should show "STATE: RUNNING".
Managing the Cato Events Feed Service
To start the service:
C:\cato\nssm.exe start CatoEventsFeedTo restart the service:
C:\cato\nssm.exe restart CatoEventsFeedTo check service status:
C:\cato\nssm.exe status CatoEventsFeedEvent Collection Settings
The integration collects the following event types from Cato Networks:
- Security Events: Threat detection, malware blocks, IPS alerts, and security policy violations
- Connectivity Events: Site connectivity changes, tunnel status, WAN link failures, and network performance issues
Configuration Parameters:
- Marker File:
C:\cato\events-marker.txt- Tracks the last processed event to prevent duplicates - Runtime Limit: 10 minutes per execution cycle
- Event Types: Security and Connectivity events
- Collection Interval: 10 minutes (configurable in my_script.py)
Log Events
Enable this option to collect Cato Network log events across all configured event types from your Cato SASE platform.
Logs Dataset
The cato.events dataset contains events collected from the Cato Networks Events Feed API. All Cato-specific event fields are available in the configured log files for detailed analysis, including:
- Event timestamps and identifiers
- Source and destination information
- Security threat classifications
- Network connectivity status
- Policy enforcement actions
- Geographic and site information
No comments to display
No comments to display