AQUILA Agent Mass Deployment Manual (MSI Package)
Overview
This document provides a step-by-step guide for deploying the AQUILA Agent across Windows endpoints using Microsoft Intune with an MSI installer. The goal of this deployment is to ensure consistent, secure, and scalable installation of the AQUILA Agent to support SOC monitoring, endpoint visibility, and response capabilities.
This guide is intended for:
-
SOC Engineers
-
IT Administrators
-
Endpoint & Security Operations Teams
Deployment Objectives
By following this guide, you will:
-
Deploy AQUILA Agent at scale using Intune
-
Ensure silent, unattended installation
-
Reduce manual endpoint interaction
-
Maintain consistent agent configuration across environments
-
Improve SOC visibility and endpoint telemetry
Prerequisites
Before proceeding, ensure the following requirements are met:
Microsoft Intune
-
Microsoft Intune is configured and accessible
-
Administrator permissions to create and assign apps
Endpoint Requirements
-
Supported Windows OS (Windows 10 / Windows 11 / Windows Server – if applicable)
-
Devices enrolled in Microsoft Intune
-
Stable internet connectivity
Installer Requirements
-
AQUILA Agent MSI installer (latest approved build)
-
MSI file accessible from your local machine
Deployment Method Summary
| Item | Value |
|---|---|
| Deployment Tool | Microsoft Intune |
| Installer Type | MSI |
| Installation Mode | Silent / Unattended |
| User Interaction | None |
| Deployment Scope | Device-based (recommended) |
Step-by-Step Deployment Instructions
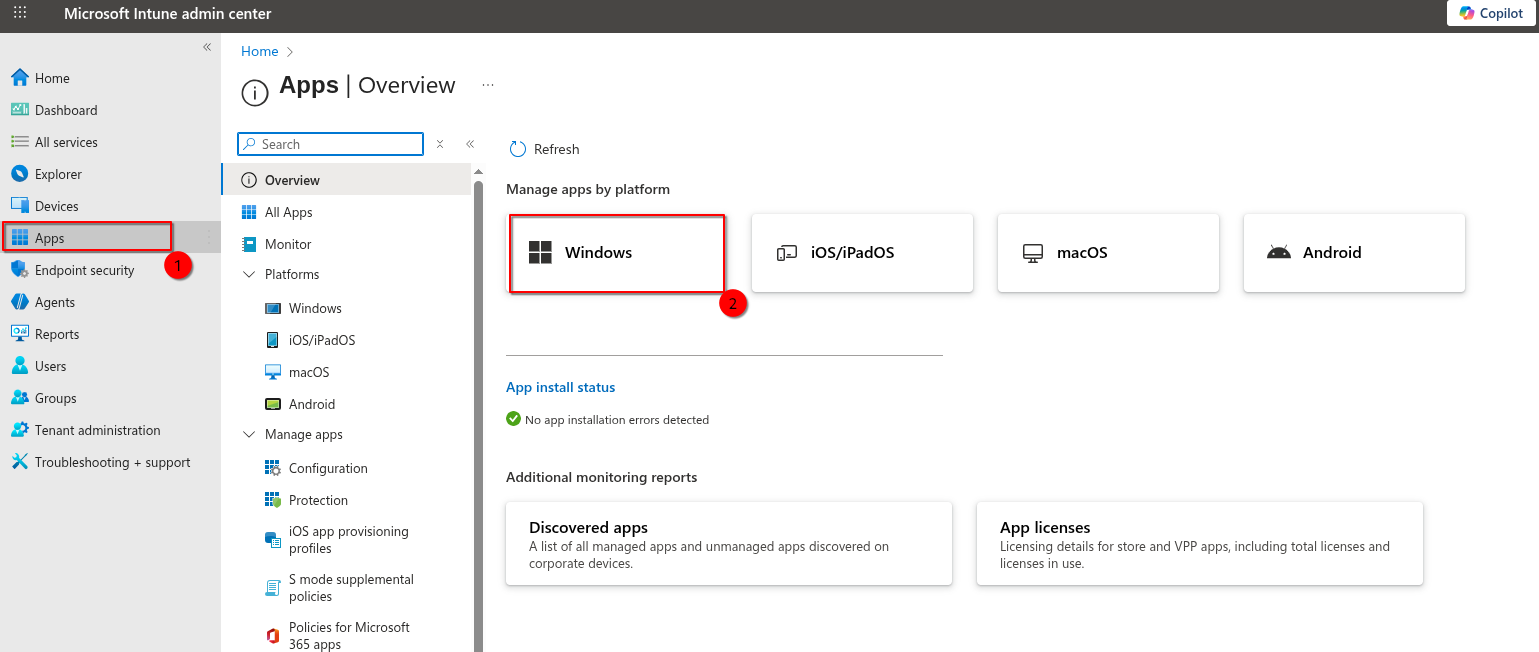
Step 1: Log in to Microsoft Intune Admin Center
Step 2: Create a New Application
-
Go to Apps → Windows
-
Click Create
-
Under App type, select Line-of-business app
-
Click Select
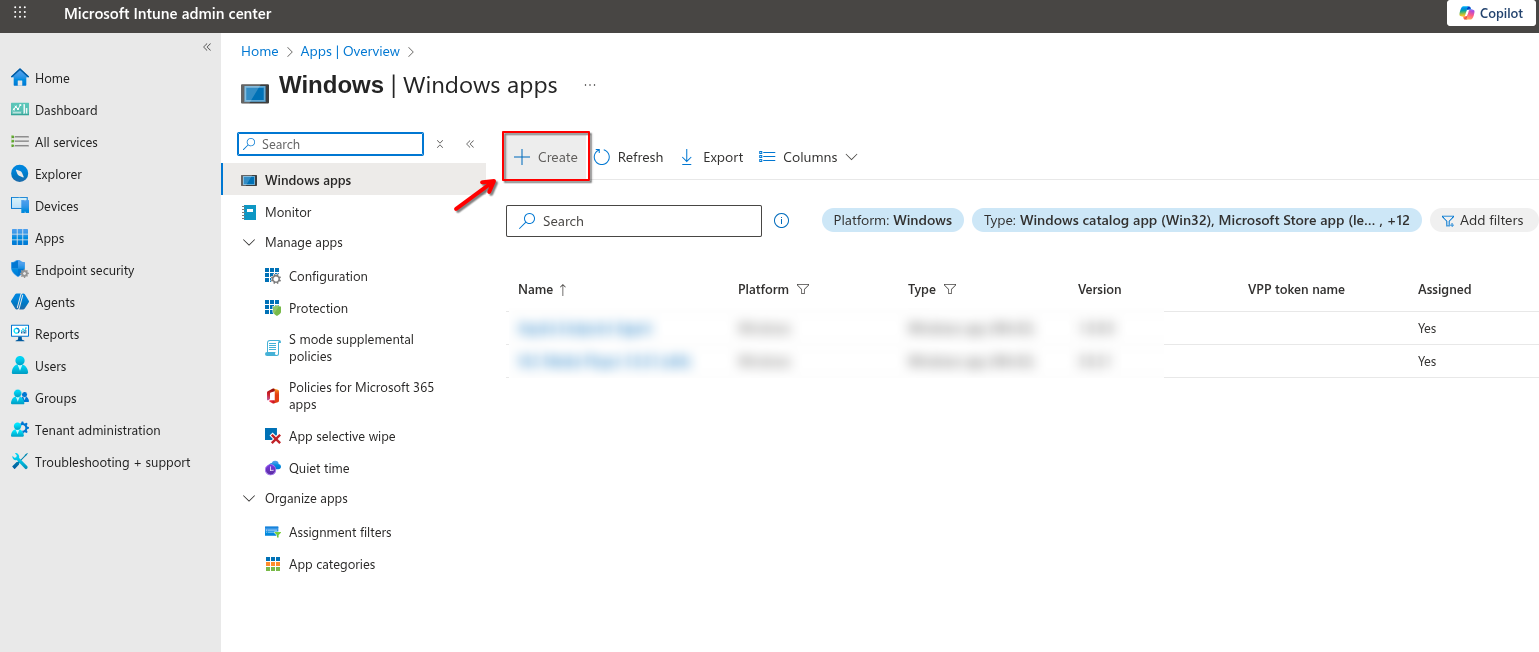

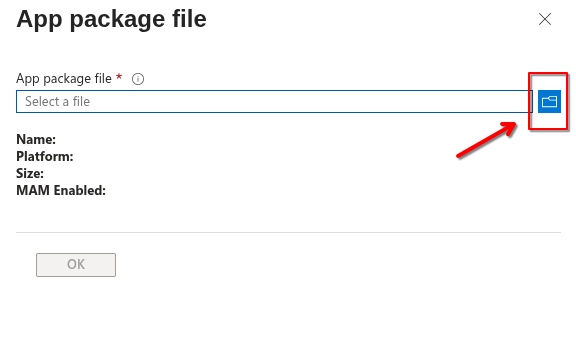
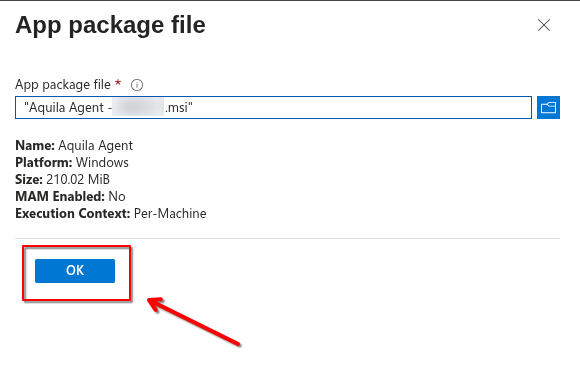
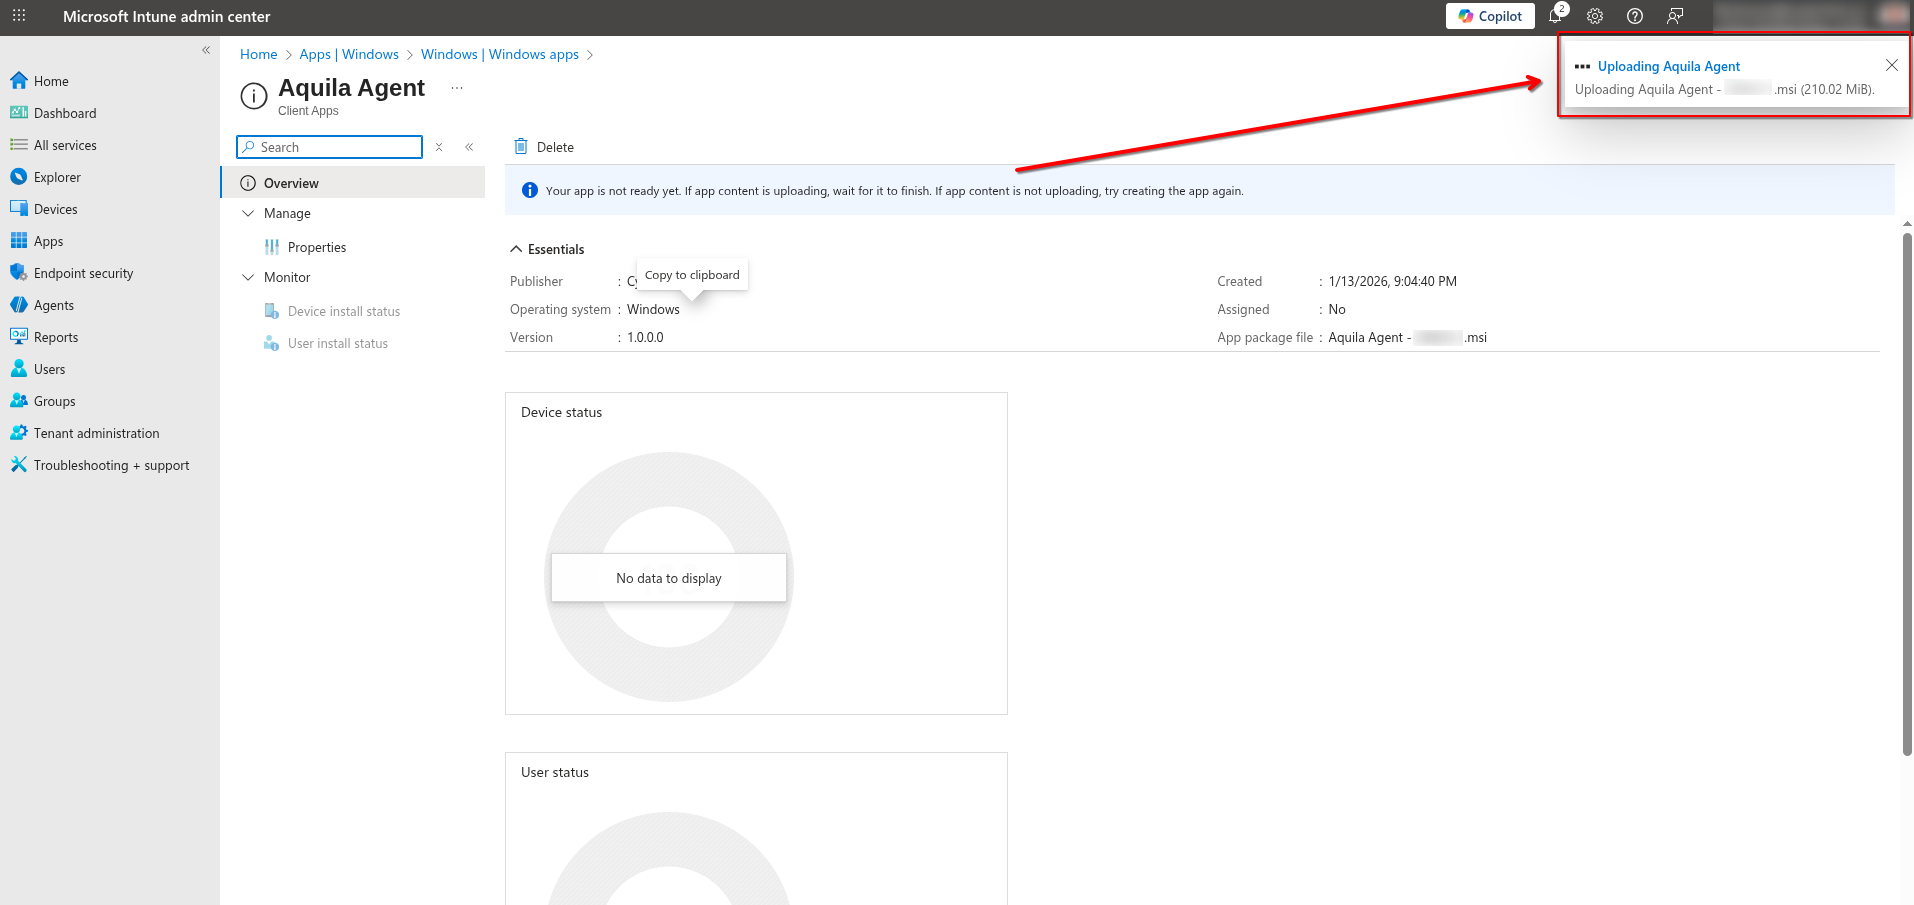
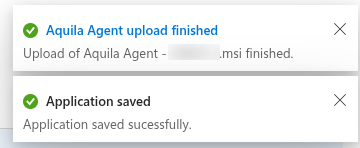
Step 3: Upload AQUILA Agent MSI
-
Click Select app package file
-
Upload the AQUILA Agent MSI installer
-
Click OK
Intune will automatically extract MSI metadata (Product Code, Version, Publisher).
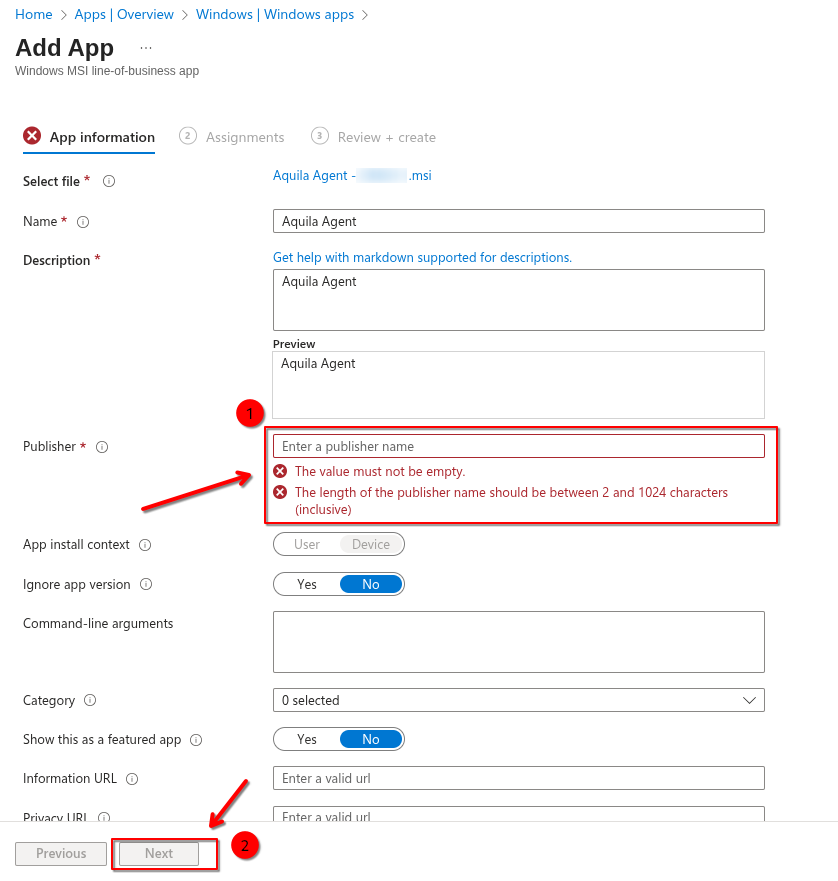
Step 4: Configure App Information
-
Name: AQUILA Agent
-
Description: Endpoint Security Agent for SOC Monitoring (EDR, VDR, DLP)
-
Publisher: AQUILA Security
-
Category: Security
-
(Optional) Upload a logo
-
Click Next
Step 5: Assign the Application
-
Under Assignments:
-
Add Required assignment to device or user groups
-
Recommended: Device groups
-
-
Select the target group(s)
Click Next
Best Practices
-
Deploy to a pilot group before full rollout
-
Use Supersedence to upgrade older versions
-
Monitor installation status regularly
-
Coordinate deployment windows with SOC teams

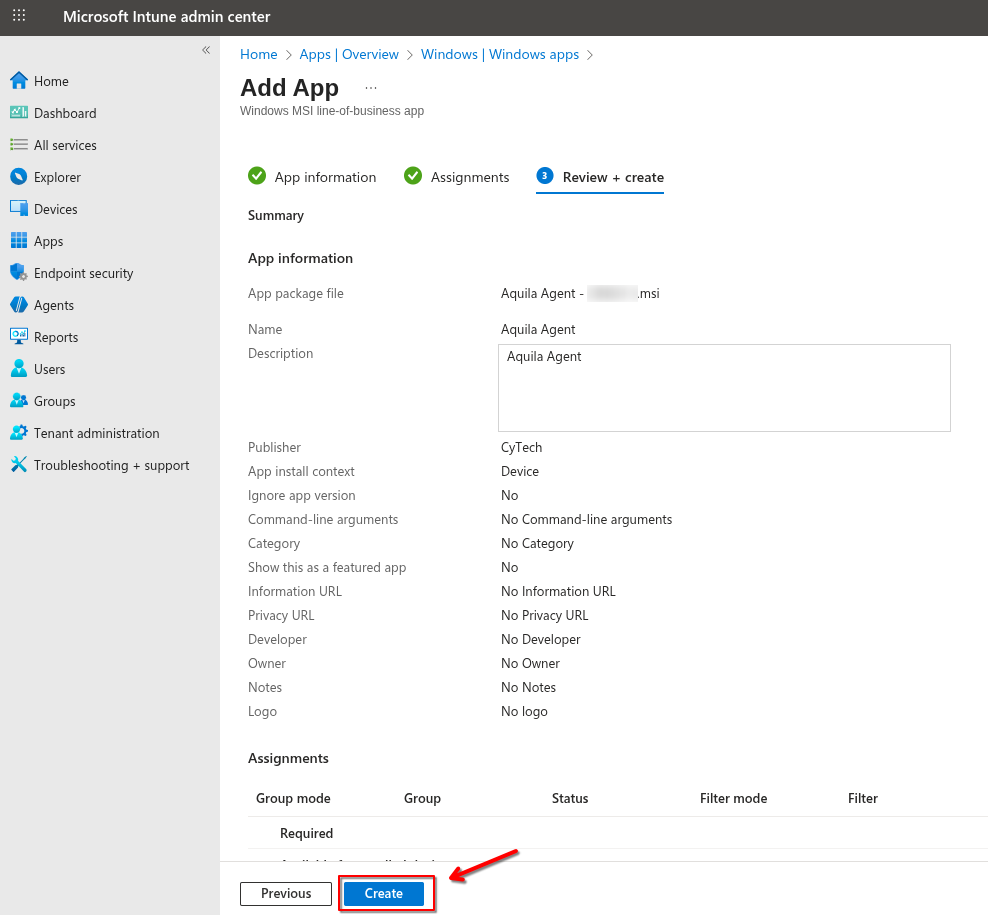
Step 6: Review and Create
-
Review all configuration settings
-
Click Create
Deployment will begin automatically based on Intune sync intervals.
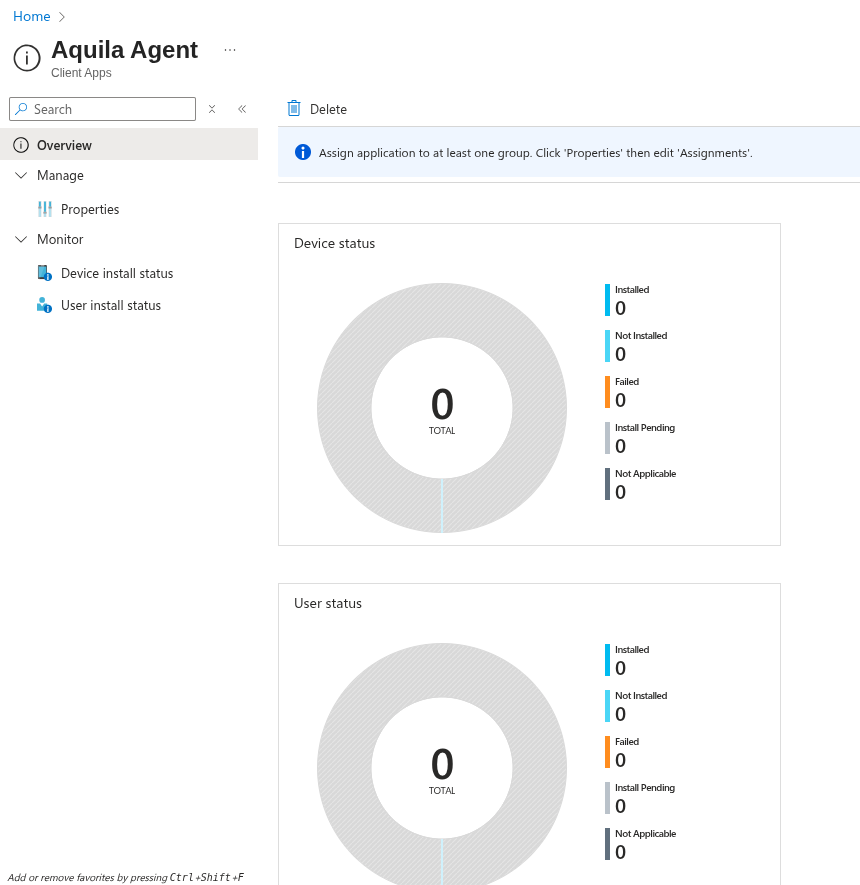
Post-Deployment Validation
Intune Validation
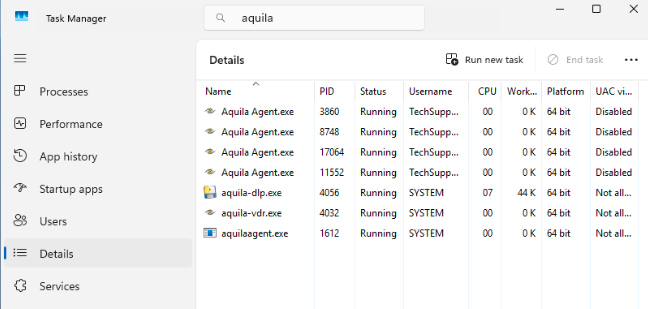
Endpoint Validation
-
Verify AQUILA Agent service is running
-
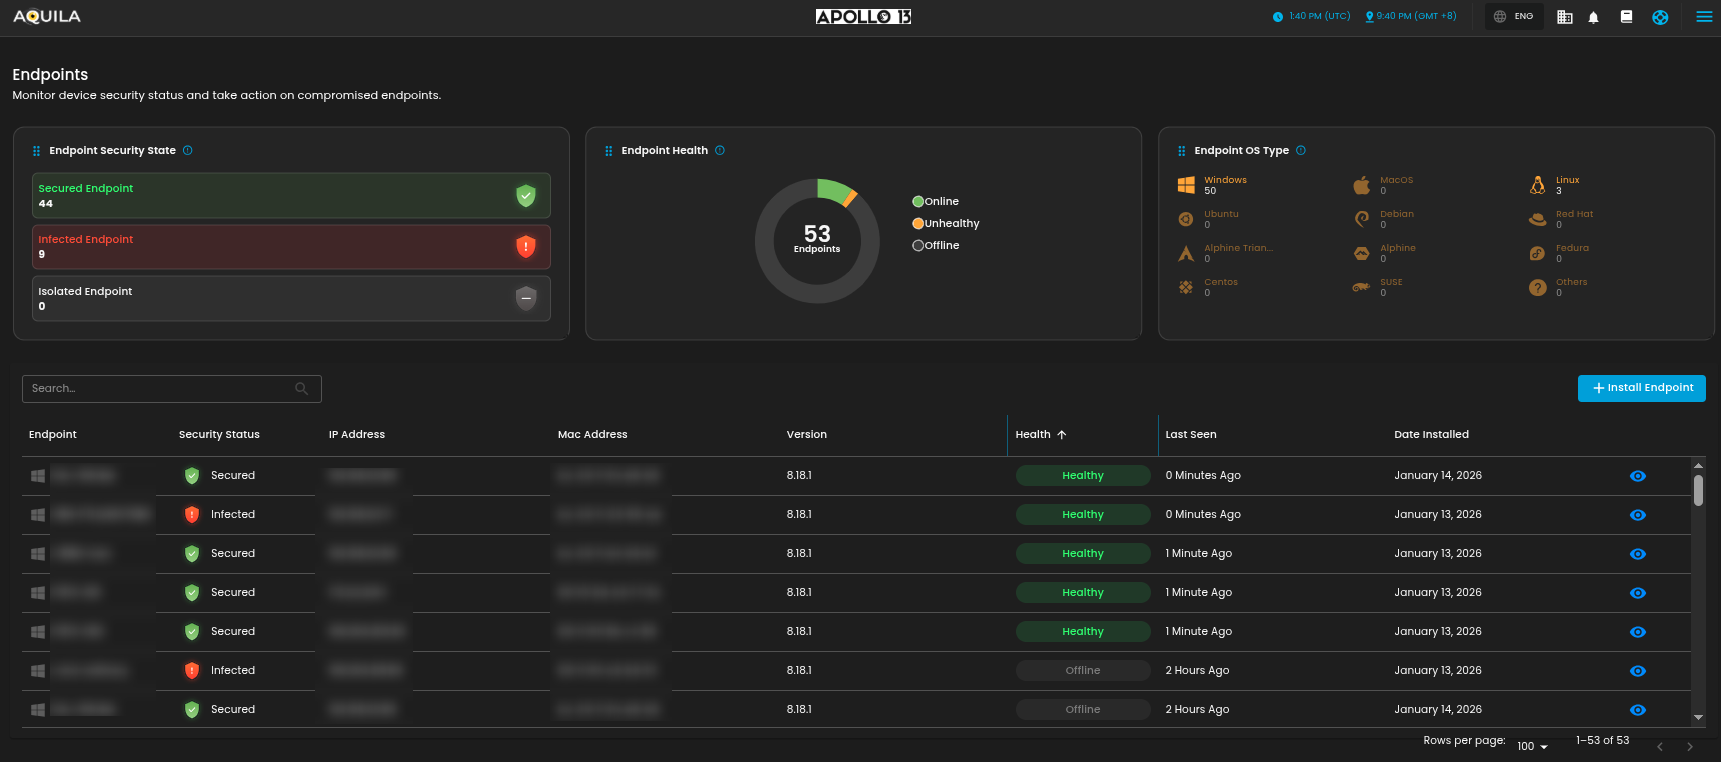
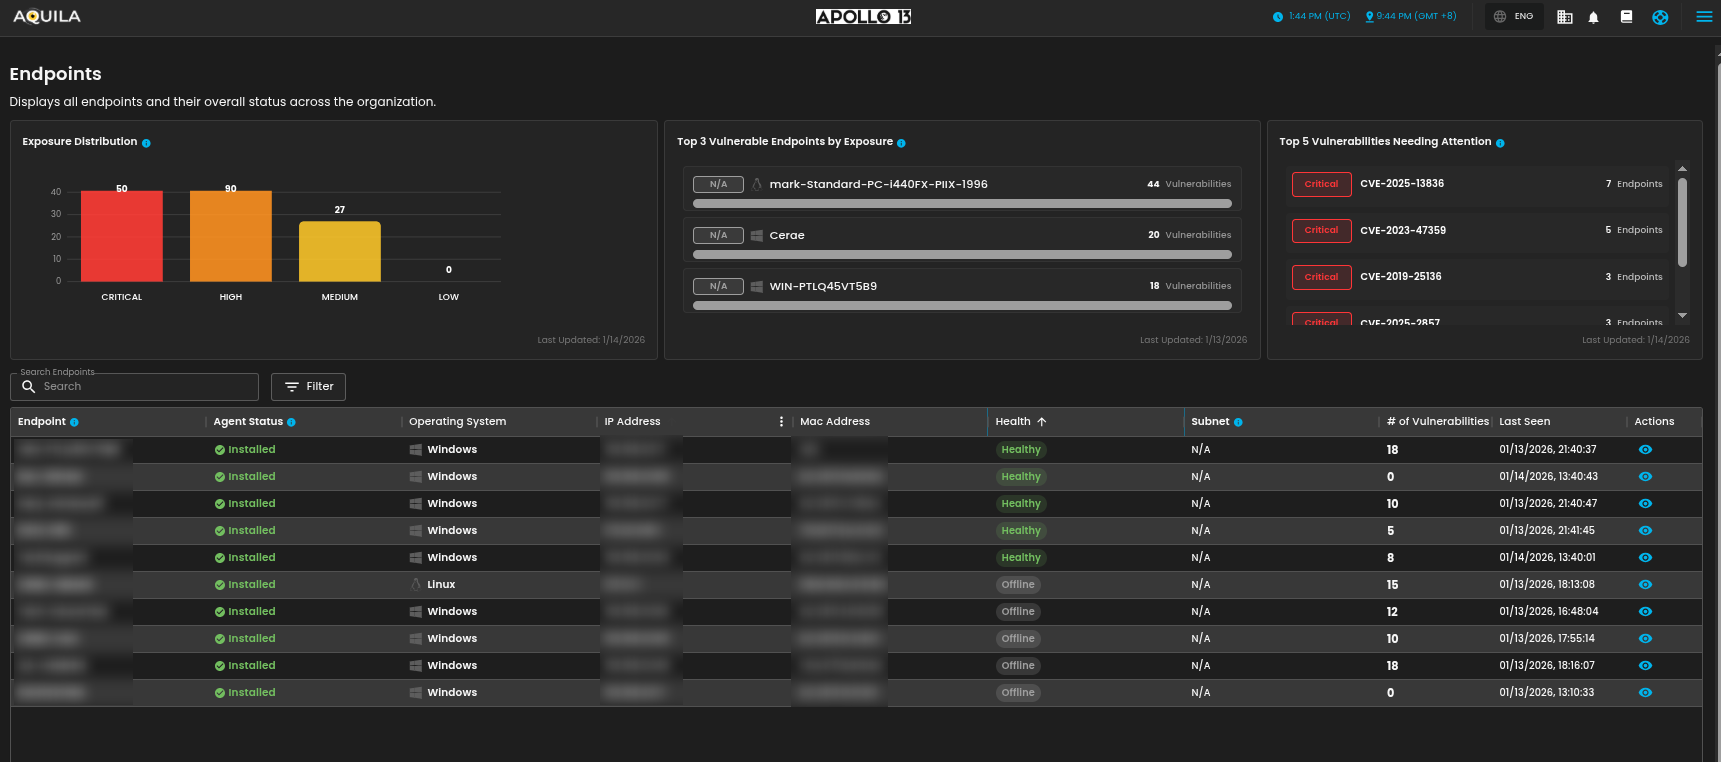
Confirm endpoint appears in AQUILA backend / SOC dashboard
Cyber Monitoring > Endpoint Detection and Response (EDR) > Endpoints
Risk Management > Vulnerability Assessment and Management (VAM) > Endpoint
Data Security > Data Loss Prevention (DLP) > Dashboard
Troubleshooting
| Issue | Recommendation |
| Installation failed | Check Intune error codes and logs |
| Agent not visible in backend | Verify internet access and enrollment |
| Multiple versions installed | Ensure old versions are uninstalled or superseded |
| Defender/UAC prompt | Expected if CA signing is still in progress |
Summary
Deploying the AQUILA Agent via Microsoft Intune using an MSI installer provides a reliable, scalable, and secure method for enterprise-wide endpoint onboarding. This approach minimizes manual effort, improves deployment consistency, and ensures endpoints are quickly integrated into SOC monitoring workflows.
For questions, validation support, or deployment assistance, please contact the SOC(csoc@cytechint.com)or AQUILA support team(aquilasupport@cytechint.com.sg).
No comments to display
No comments to display