Windows Server - Deploy Software via Group Policy (GPO)
Introduction
Deploy Software via Group Policy (GPO) is a method used in Windows Active Directory (AD) environments to automatically install, update, or remove software on computers or for users centrally and silently, without manual installation on each machine. It’s mainly handled by Group Policy Objects (GPOs) through Microsoft Installer (MSI) packages.
Open the Windows Server Device:
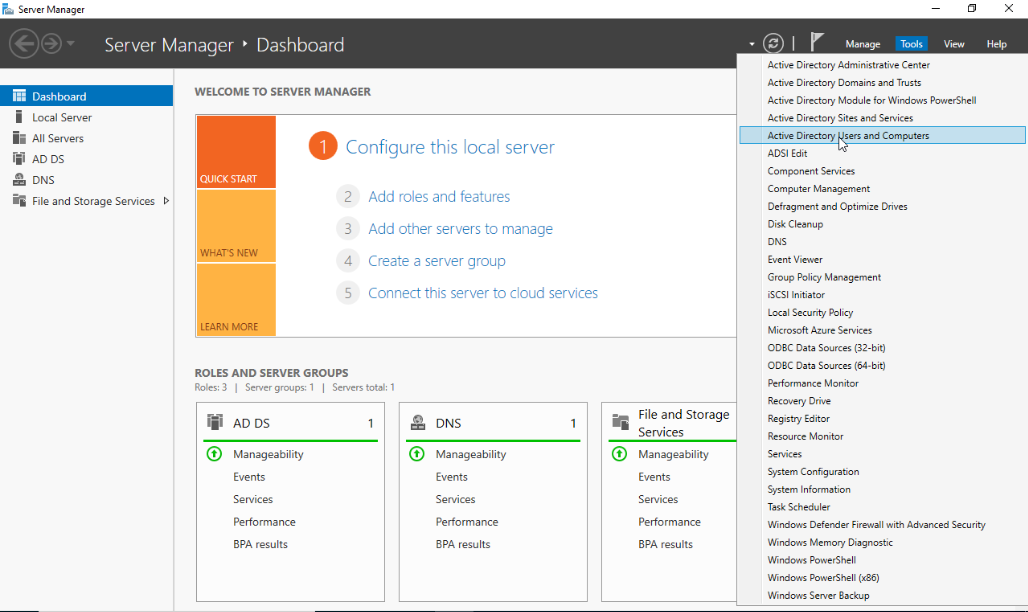
- Open Server Manager dashboard click Tools on the upper right side and choose the Active Directory Users and Computers.
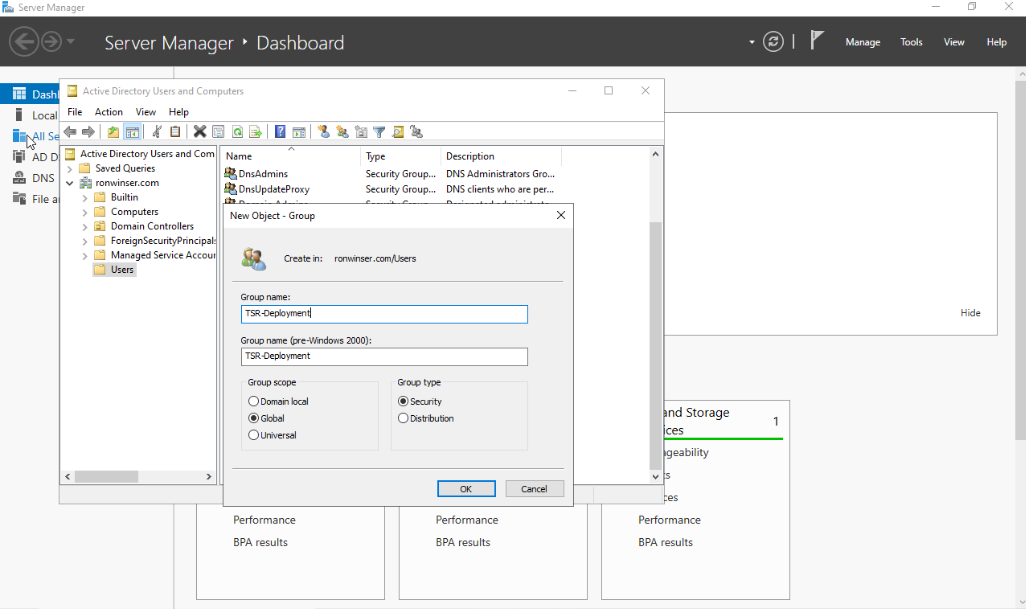
- On the Active Directory Users and Computers right click the Users folder select New and Group.
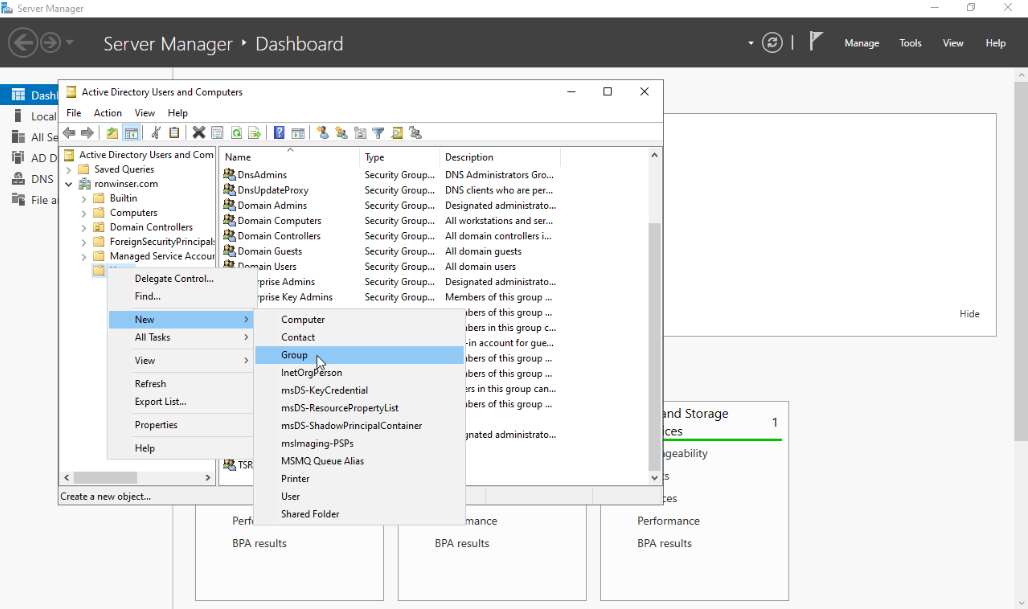
After you clicked the Computer, New Object - Computer window displayed.
- Input your desired Computer Name: TSR-Deployment
- Group scope: Global
- Group type: Security
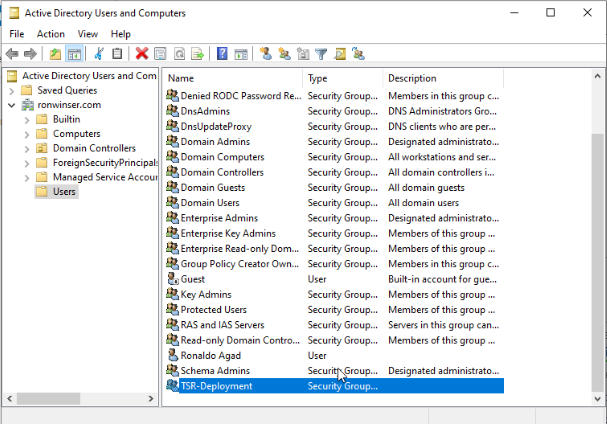
Click "OK" once done and you will see the TSR-Deployment added on the Active Directory Users and Computers.Computers.
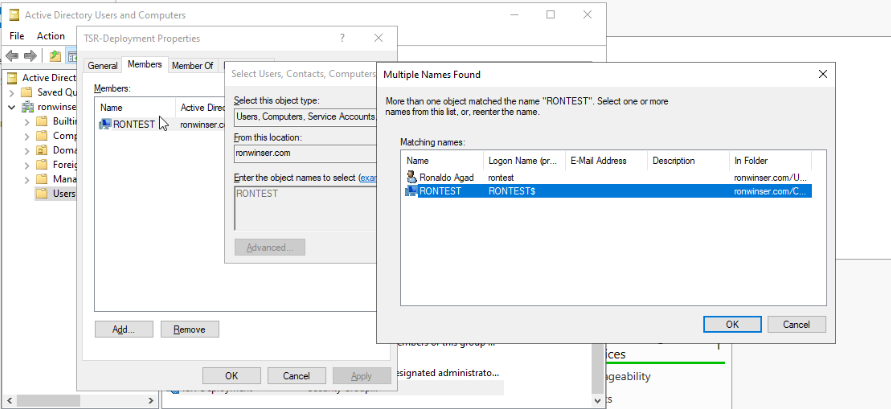
- Next Process double click the TSR-Deployment on the Active Directory Users and Computers, TSR-Deployment Properties will appear and click the Members tab.
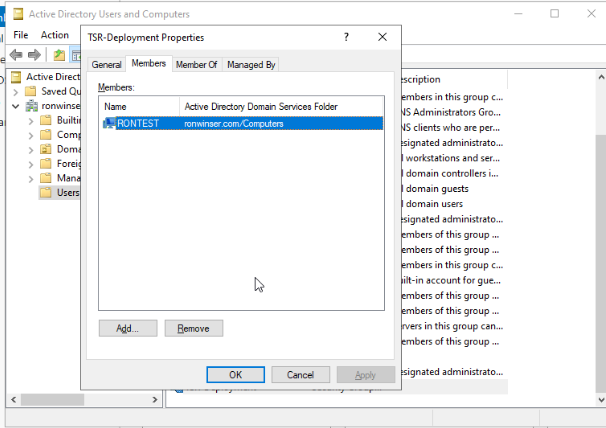
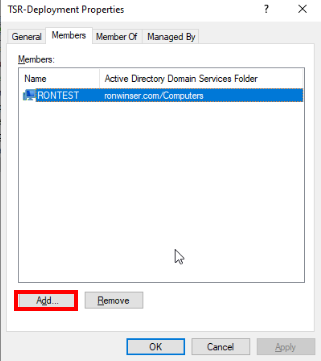
- Click Add, then select Object Types. Once it opens, check the Computers.
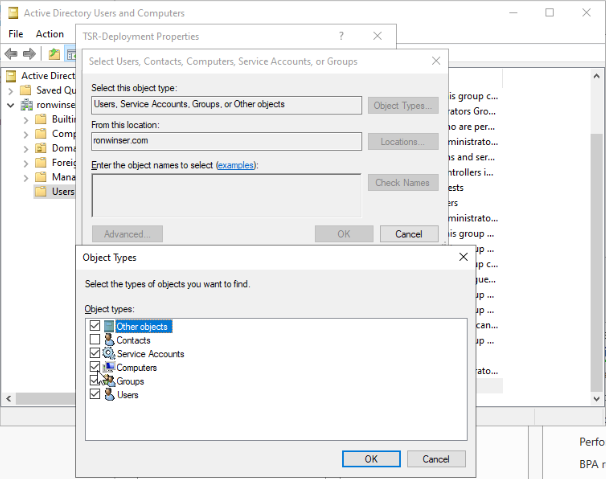
- Type the computer name that is connected to the domain. Then, click Check Names and select only the Computer icon that corresponds to your device.

Creating a UNC Path for Software Folders (Windows Server)
To ensure domain-joined computers can access the AQUILA EDR ZIP file package and folder for centralizing logs, create a shared network folder and configure appropriate permissions.
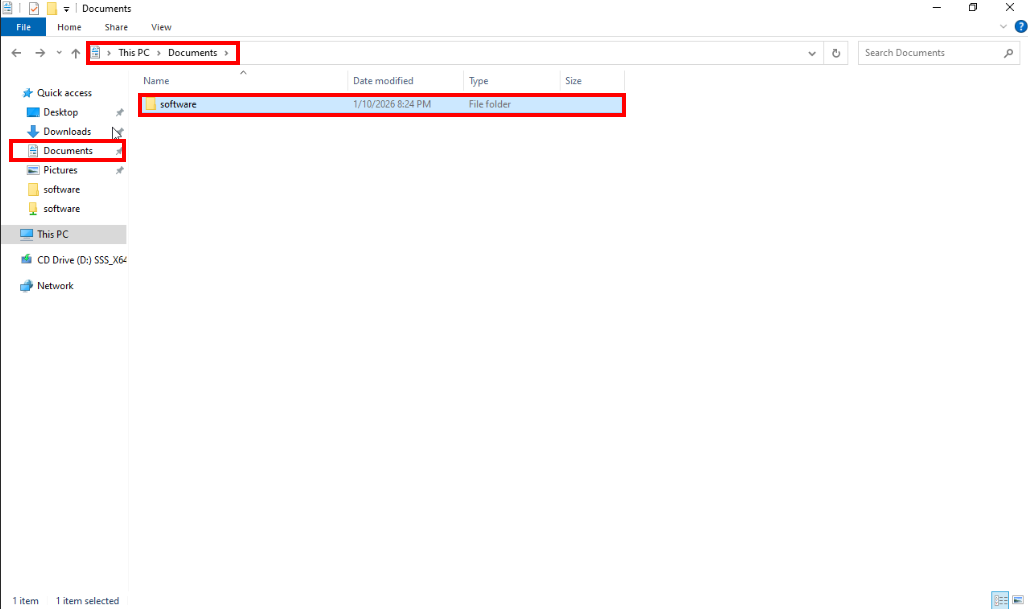
- On a Document folder, create another folder inside of it with your desired name (e.g., software).
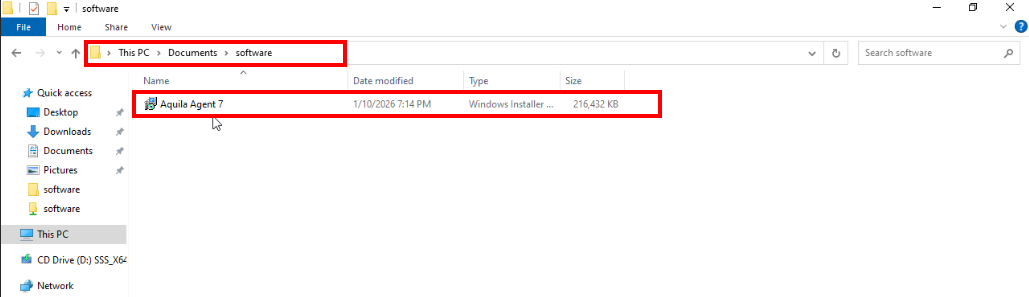
- Inside of the software folder, place the
aquila agent 7.msiinto this folder.
- Inside of the software folder, place the
- Enable Folder Sharing
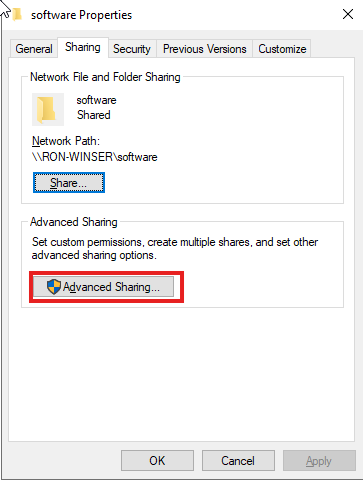
- Right-click the software folder and select Properties.
- Navigate to the Sharing tab and click Advanced Sharing.
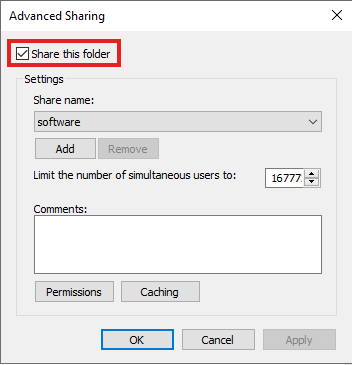
- Check the box Share this folder.

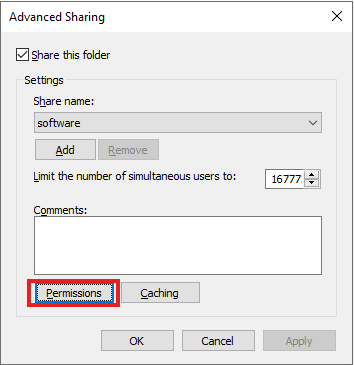
- Set Permissions
- Click Permissions
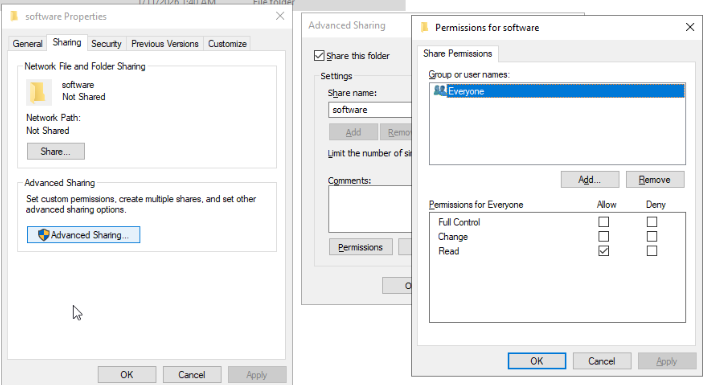
-
Grant the Read permission to
Domain Computers. -
Grant the Full Control permission to
Domain Admins
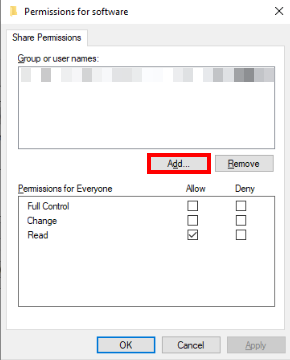
- Once the Permission clicked, Permissions for software will be shown and kindly Remove the Everyone.

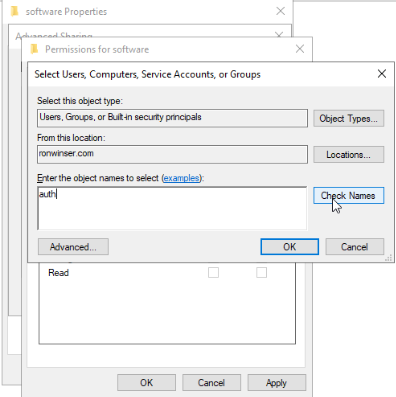
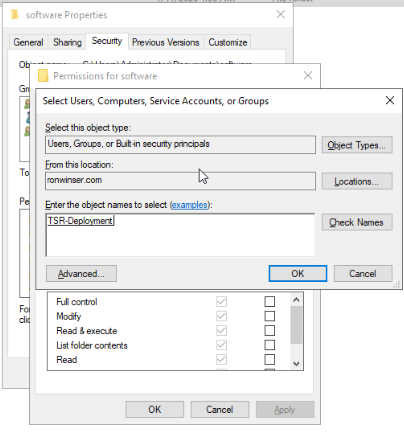
- After clicking the Remove, click the Add,
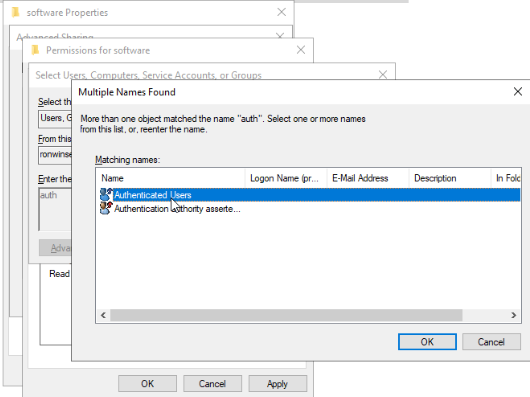
thethen Select Users, Computers, Service Accounts, or Group will be shown. Type "auth" then click Check Names.theThe Multiple Names Found will be shown and select the Authenticated Users and click OK.


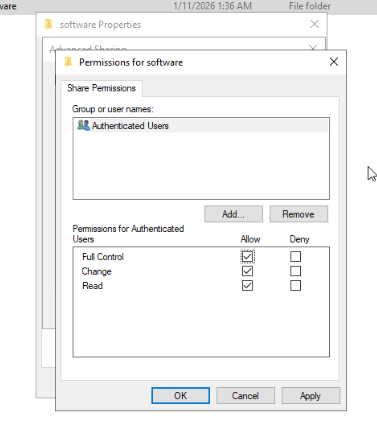
- Once Authenticated Users selected allow Full Control, click Apply and OK. Including the Advanced Sharing click Apply and OK.
- On the software folder properties click the Security tab. Point your mouse at Administrator ("username"\administrator) and click Edit
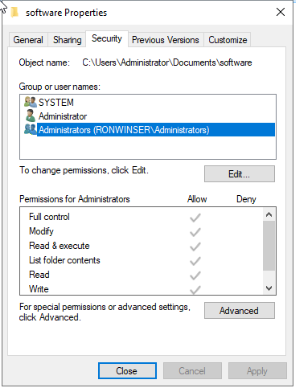
- On the Permission for software, click Add and type the Security Group name
youryou createdearlier"tsr-deployment" and click the CheckNames.Names (It will automaticallylinkcall the Security Group).Clickand clickOKOK.
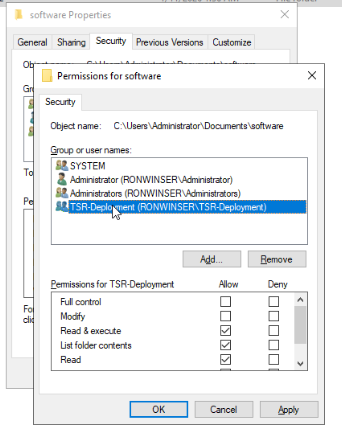
- As you can see the "TSR-Deployment" Security Group are added. To proceed click Apply and OK.
Let's go back to the Server Manager dashboard.
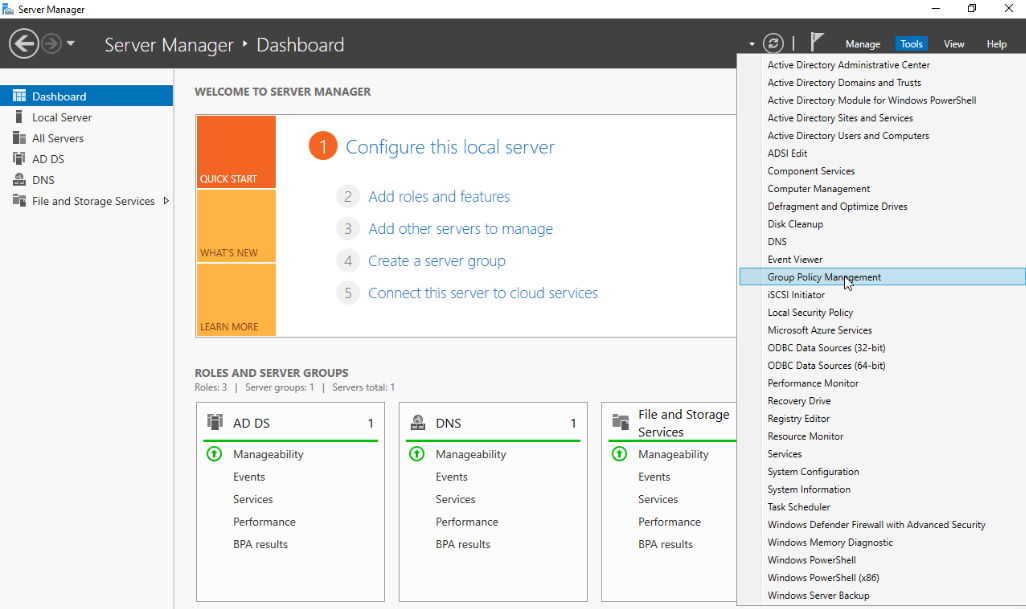
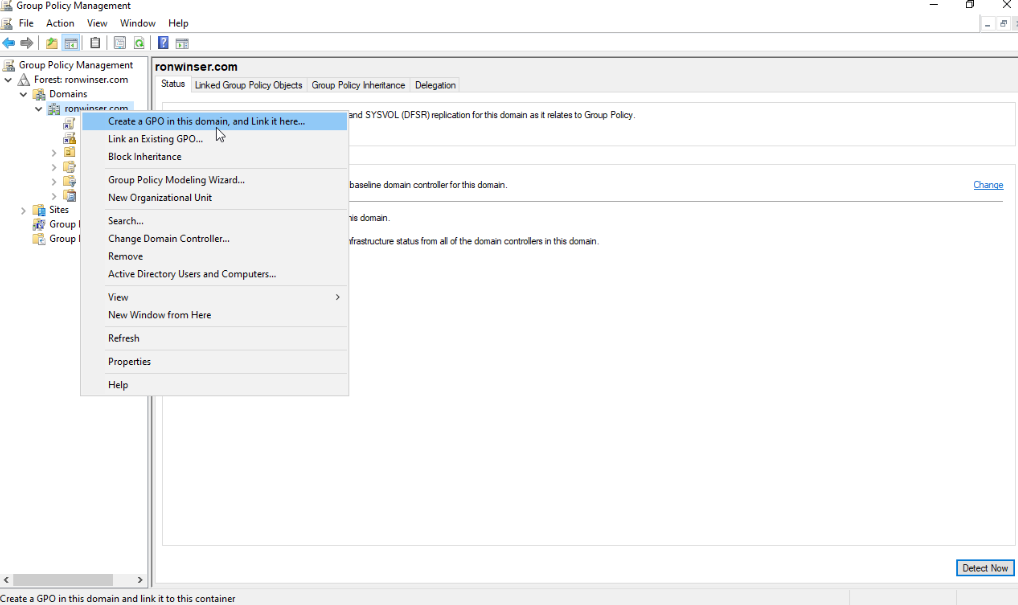
- On the Server Manager click Tools on the upper right side and choose the Group Policy Management.
- Select or double click the Domain.

- Under
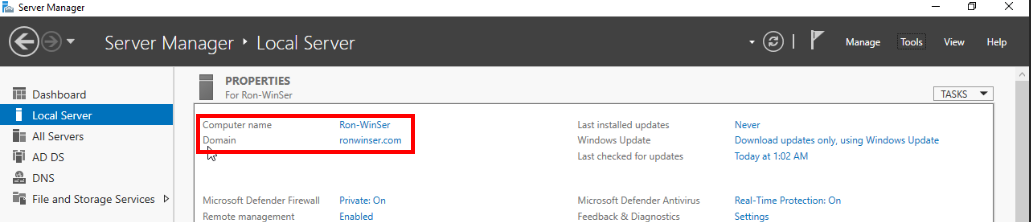
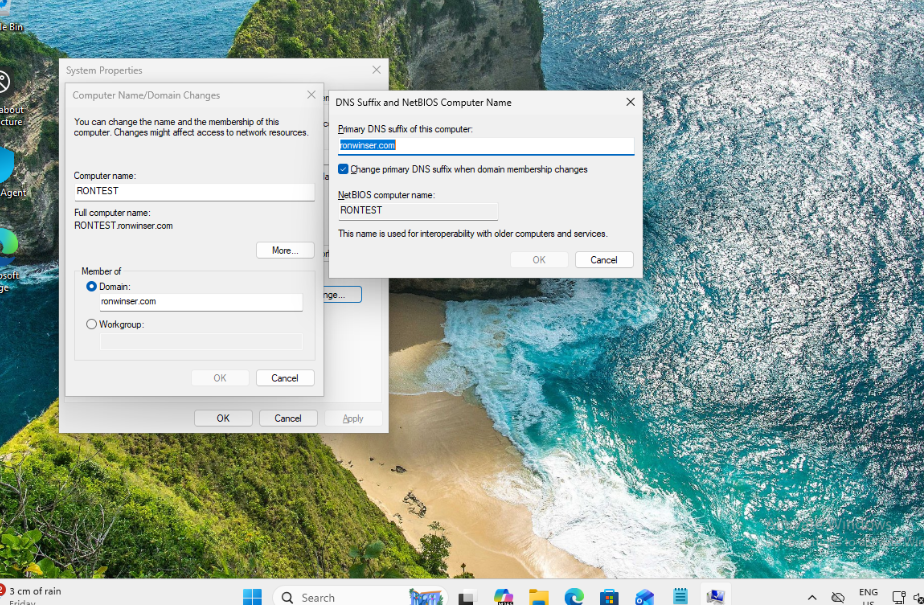
youyour Domain, youwillcan seeyourthe domain name(e.g., ronwinser.com).

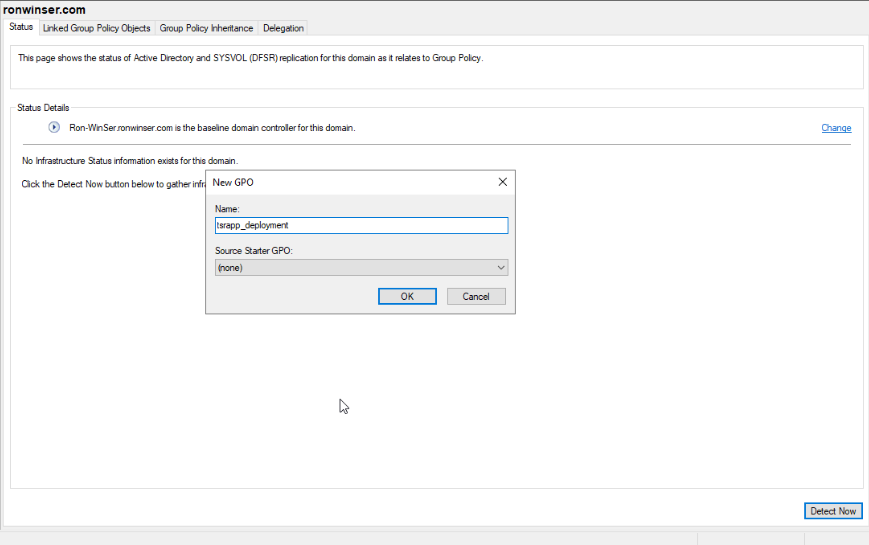
- Right click your domain name and click the Create a GPO in this domain, and Link it here and
putgive a name(e.g., tsrapp_deployment).click OK once done.

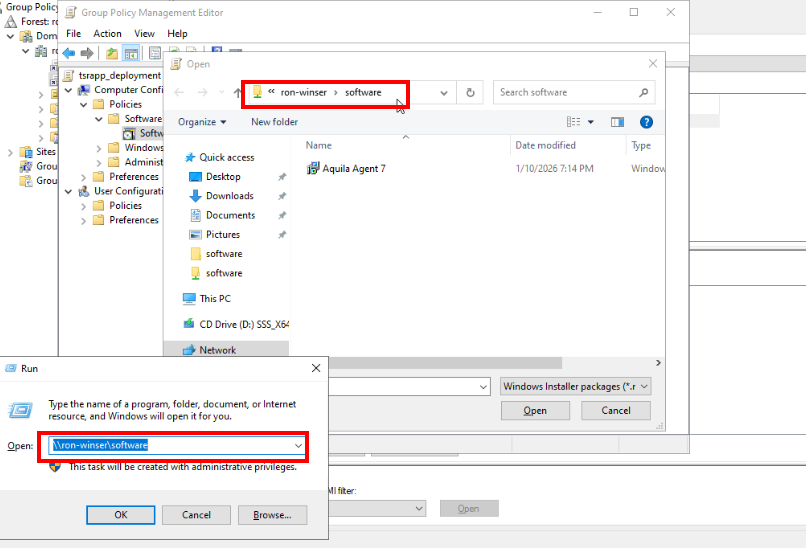
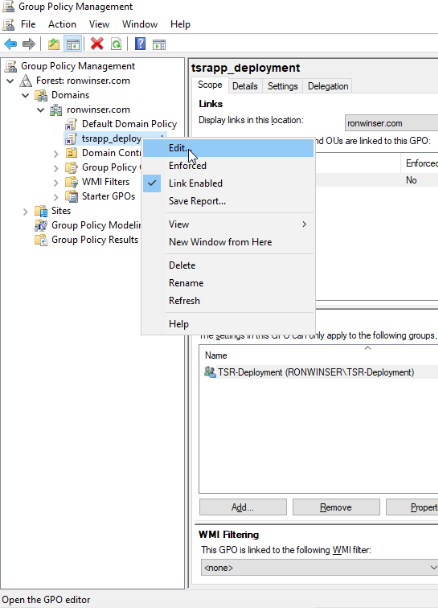
- On the GPO you created, right click and choose the Edit.

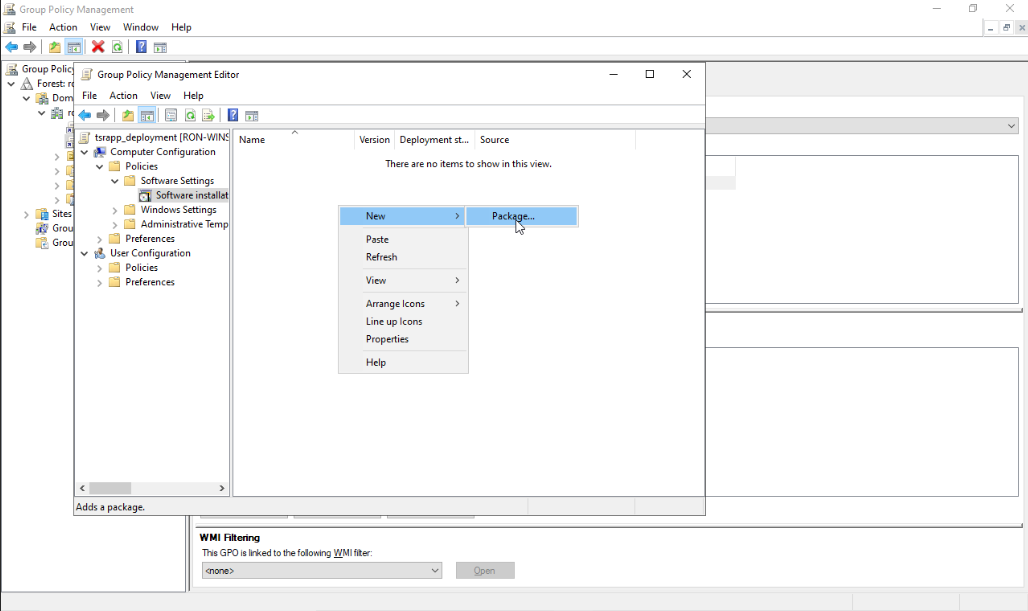
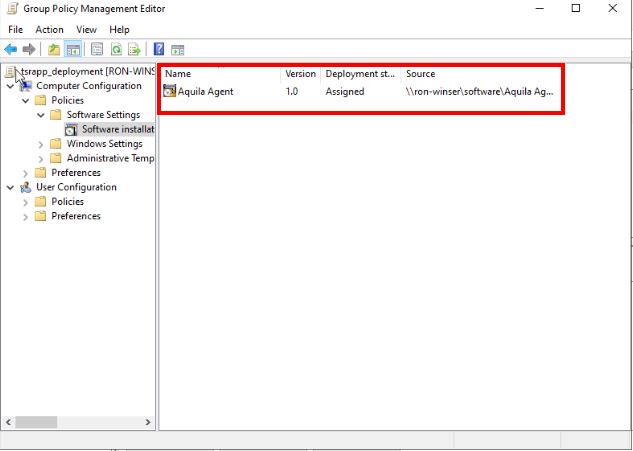
- Once you Edit, the Group Policy Management Editor will be shown just click the arrow from Computer Configuration > Policies > Software Settings > Software installation, inside the Software installation right click
inon the enviroment and choose the New > Package.

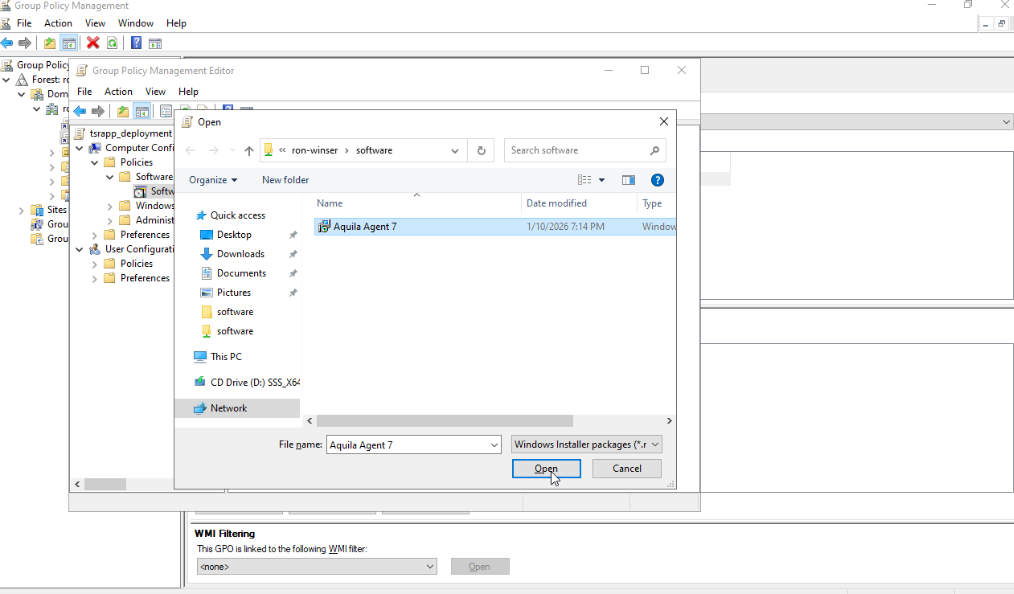
- Once you clicked the Package it will direct you from the folder
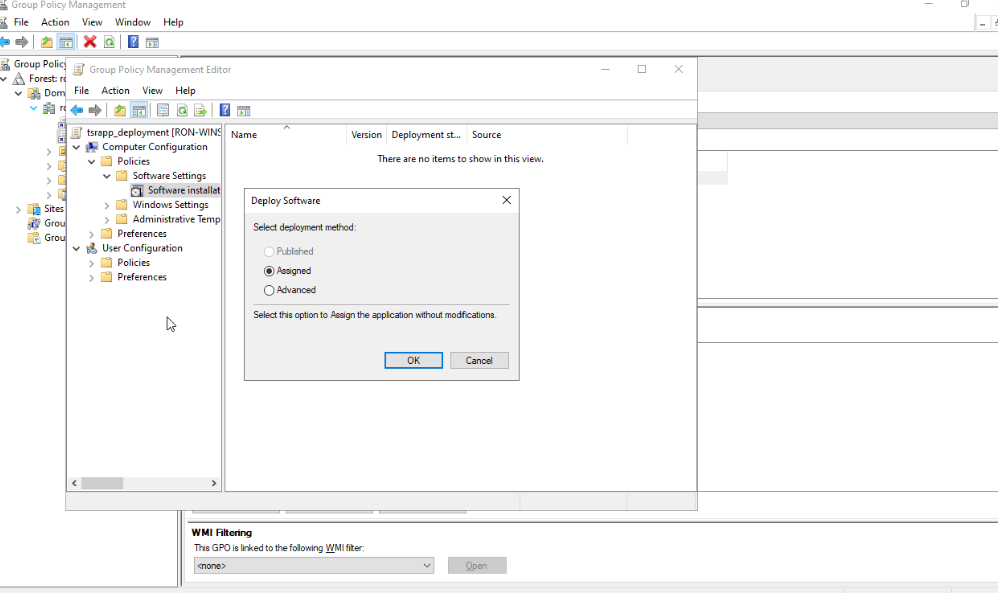
youyou've createdearlierwith a name of "software". Kindly click the Open your software installer (Aquila Agent 7 with MSI format) will be addeditinside to your Group Policy Management Edit or GPO.AsDoisnot change the "Assigned"radio buttonoption from Deploy Software.


- As
weyou can see,we can bewe're able to map out also the Network path of the "software" folder we shared earlier.
- So now your Aquila Agent with .msi format installer is now already added
onin the GPO.


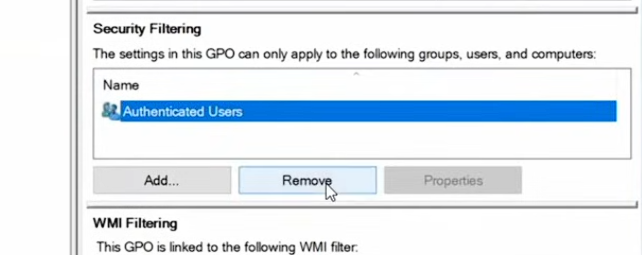
Let's navigate again to the "Group Policy Management.Management".
- On your Group Policy Managent remove
yourthe default Authenticated Users in Security Filtering.
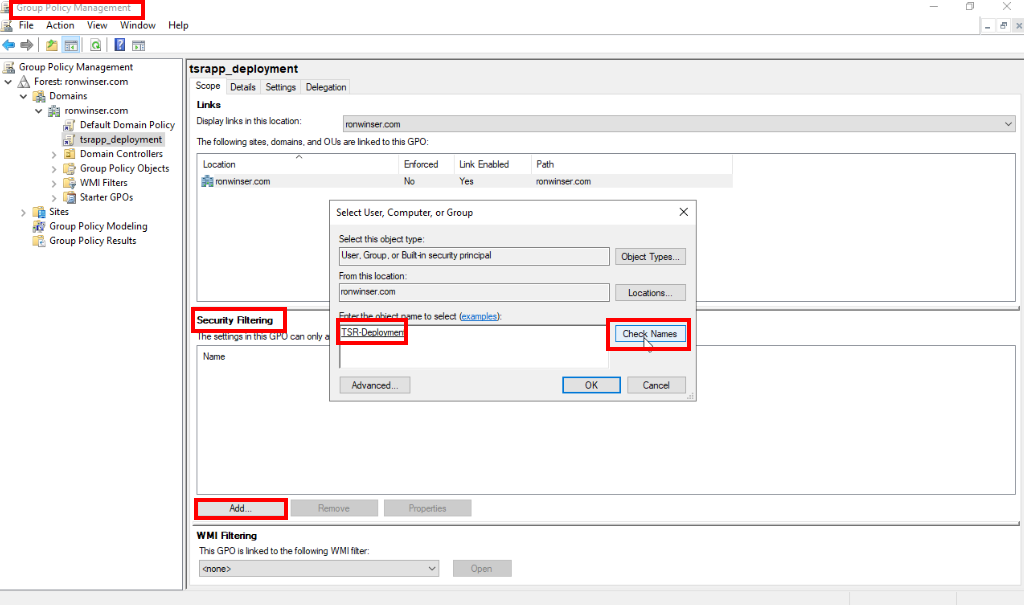
- Then click the Add button from Security Filtering, type Security Groups
youyou've created, but for this case was "TSR-Deployment" and click the Check Names and press OK.

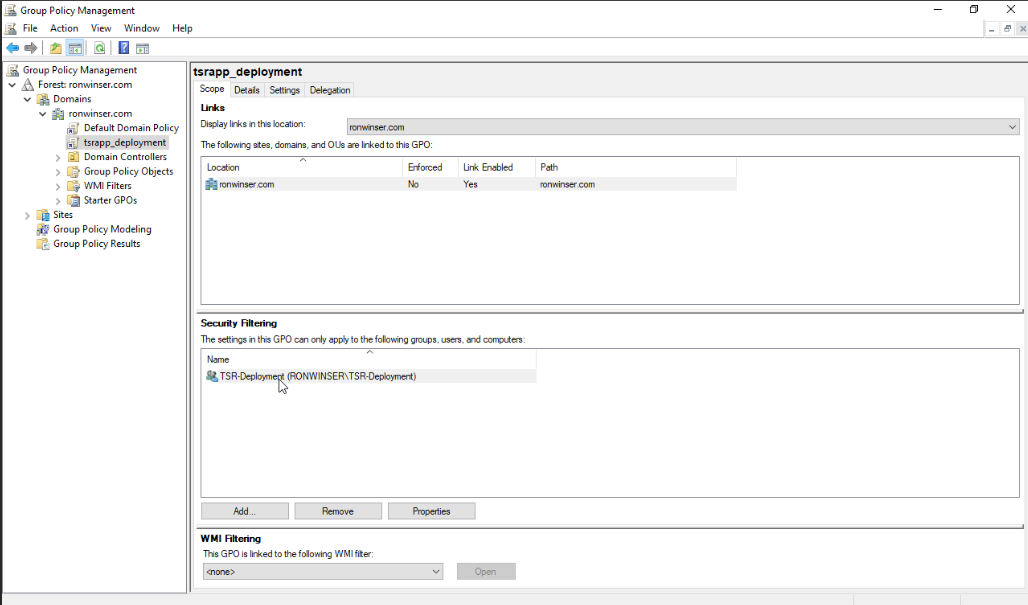
- Your TSR-Deployment which is the Global Security group you've created was already added on the Security
FilteringFiltering..Kindly close the Group Policy Management or leave it open.


In this case, the setup of Active Directory Users and Computers and Group Policy Management for software deployment via Group Policy (GPO) has already been completed. The installer packages have also been added to Group Policy Management and are ready for deployment on the client end.
Let’s proceed to the client-side desktop that is connected to Windows Server domain.
ThisMake sure thePCPC/Desktop is connected to the Windows Server domain.

- Open the CMD as administrator.
- Type gpupdate /force and hit enter.
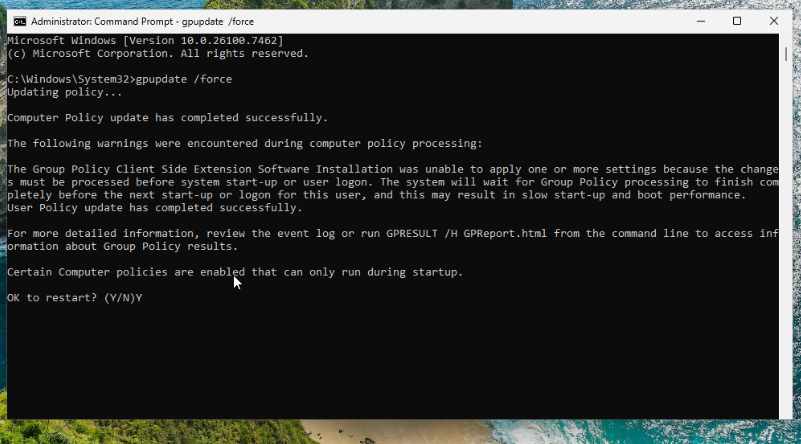
- If the group policy updates successfully, type “Y” to restart your PC. This allows your endpoint to synchronize with the GPO.
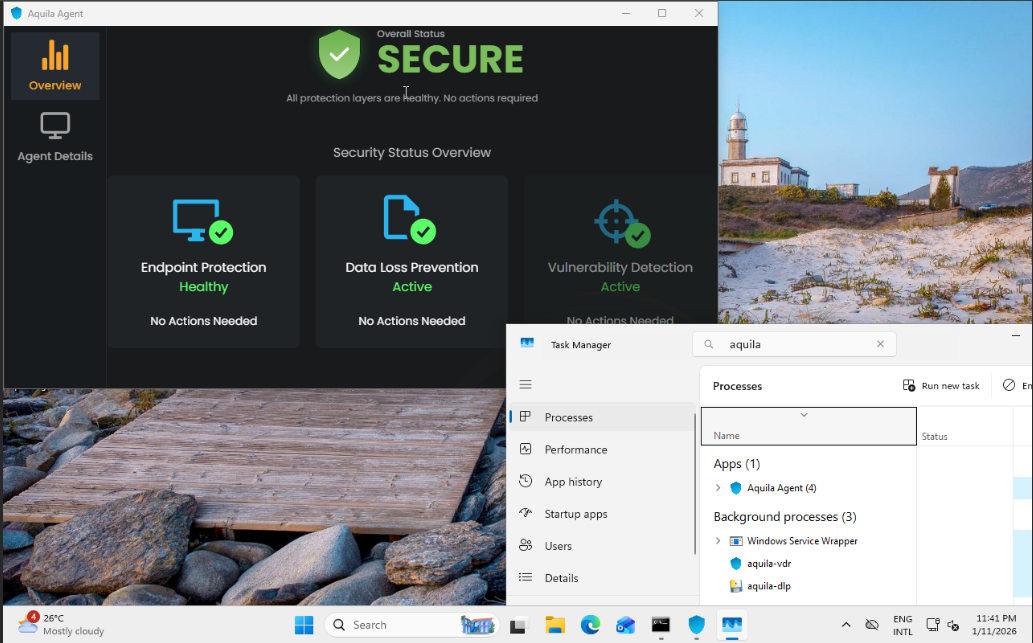
- Once the PC/Desktop is open, the Aquila Agent installer will automatically be installed, to ensure everything is running kindly proceed to task manager and type Aquila on the search bar and check the status of its module.