AQUILA - Salesforce Integration via JWT Authentication
Overview
With the OAuth 2.0 JWT bearer token flow, the client posts a JWT to the Salesforce OAuth token endpoint. Salesforce processes the JWT, which includes a digital signature, and issues an access token based on prior approval of the app.
Check "View Event Log Files" Permission
- Check Your Org's Event Monitoring License:
- Go to Setup > Quick Find > Installed Packages or Company Information (under Quick Find > Company Settings).

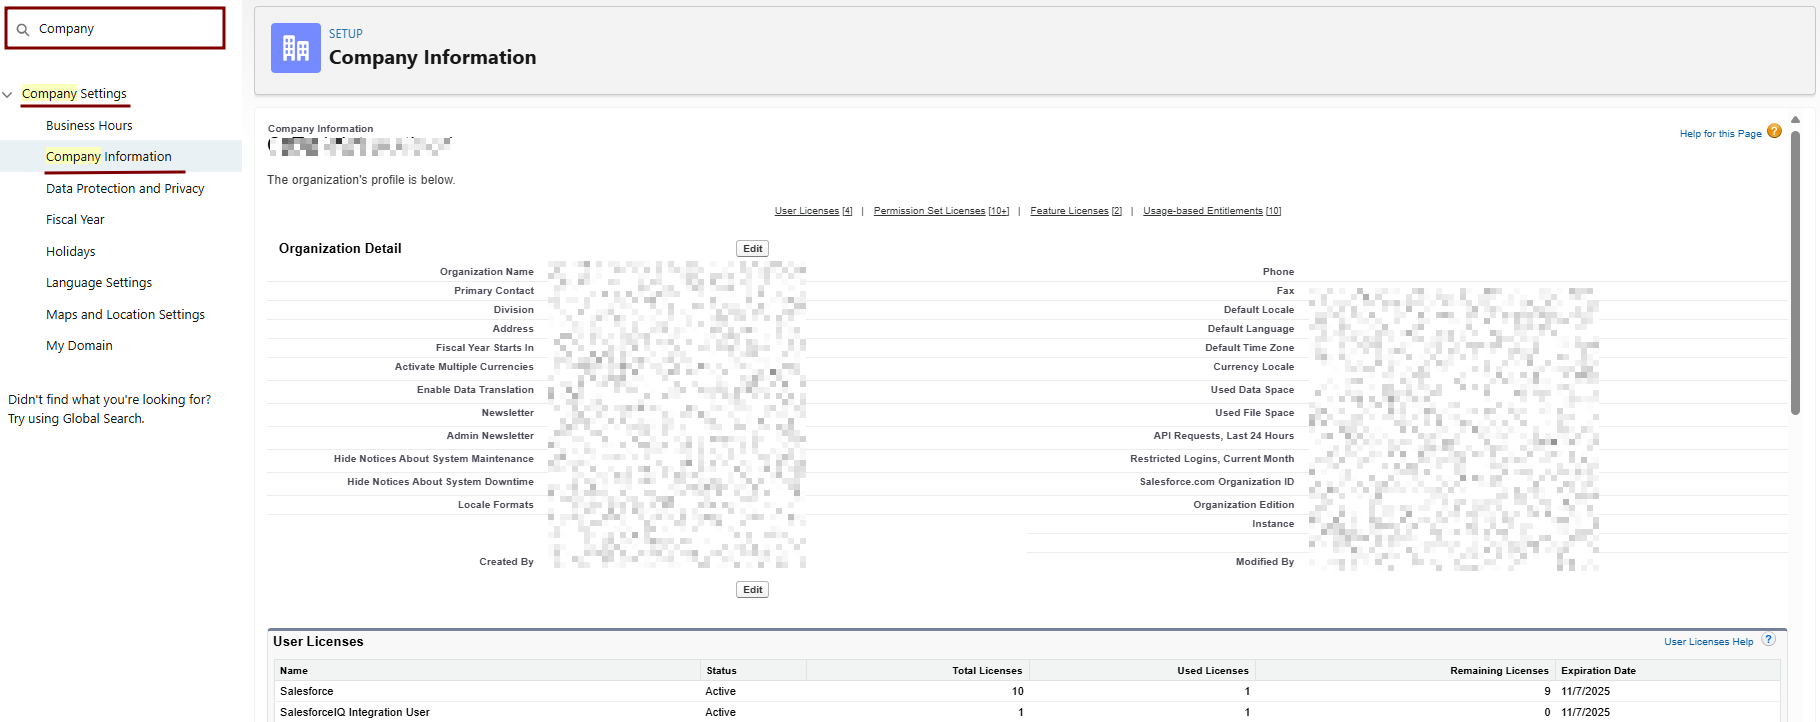
- Look for Event Log File Browser or Event Monitoring and enable it if it shows an option to do so.
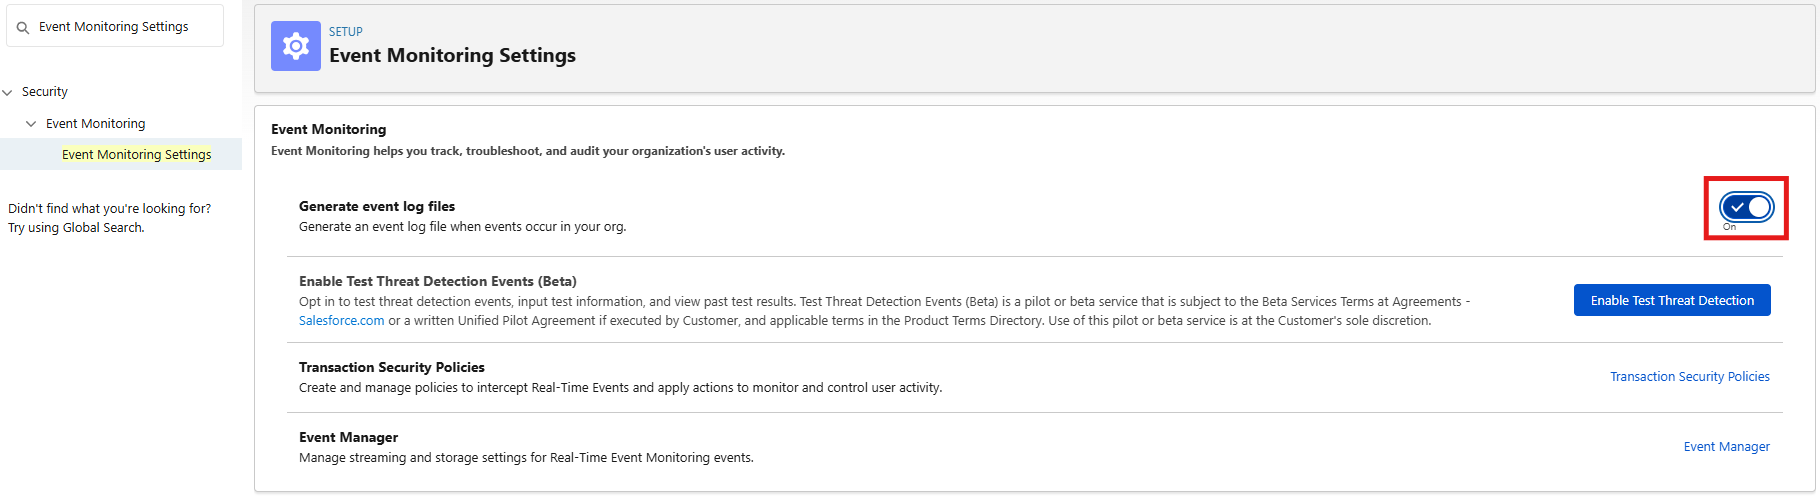
2. Enable Event Monitoring Features:
- Setup > Quick Find > Event Monitoring Settings (or search "Event Log File Browser").
- If the page loads: Check Enable Event Log File Browser > Save.
Clone and Modify the Profile
-
Log in to Salesforce Setup:
-
Go to Setup (gear icon > Setup) as an admin.
-
-
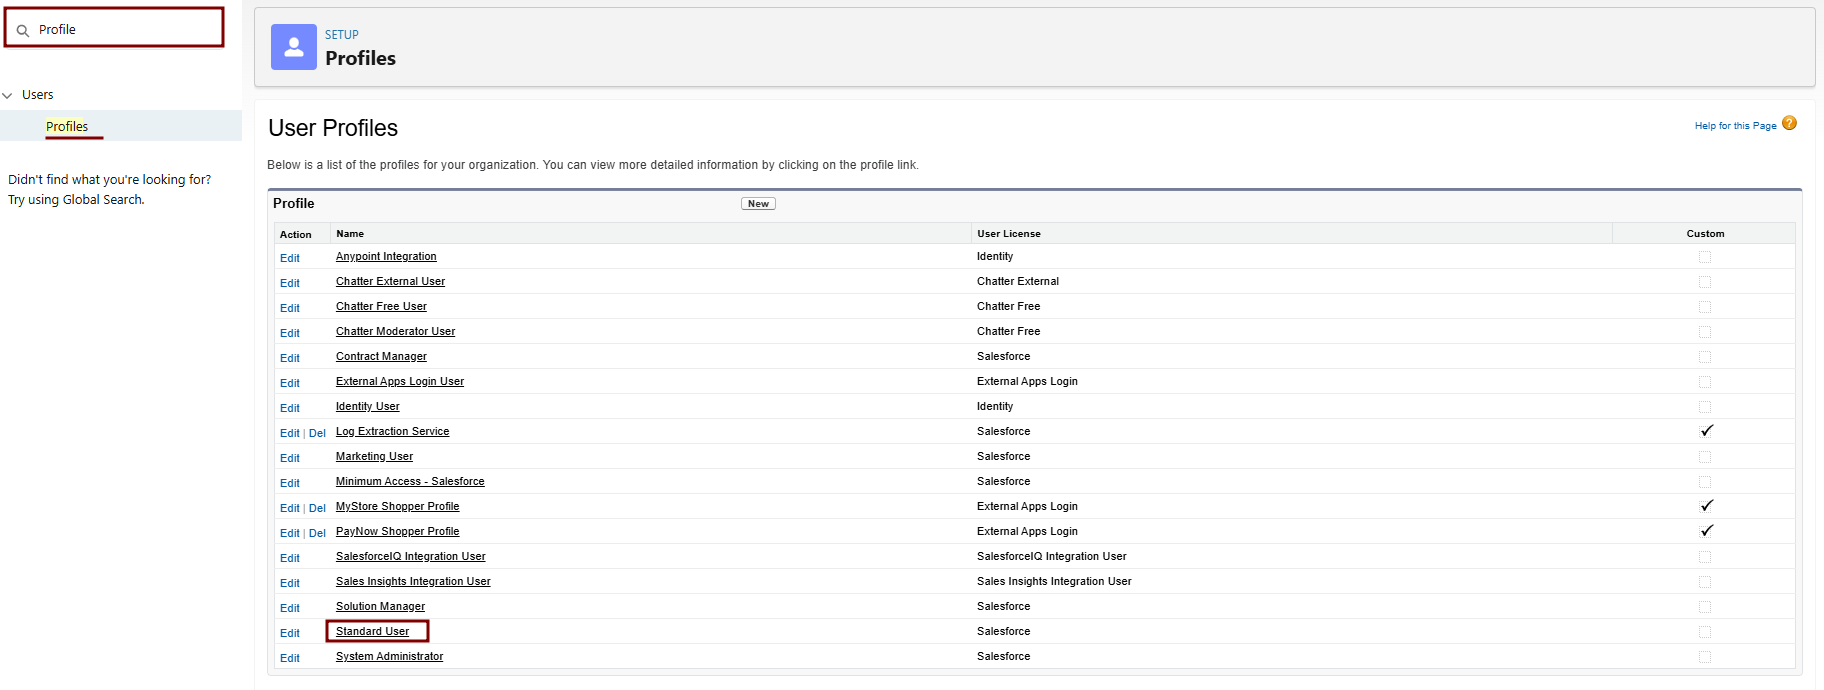
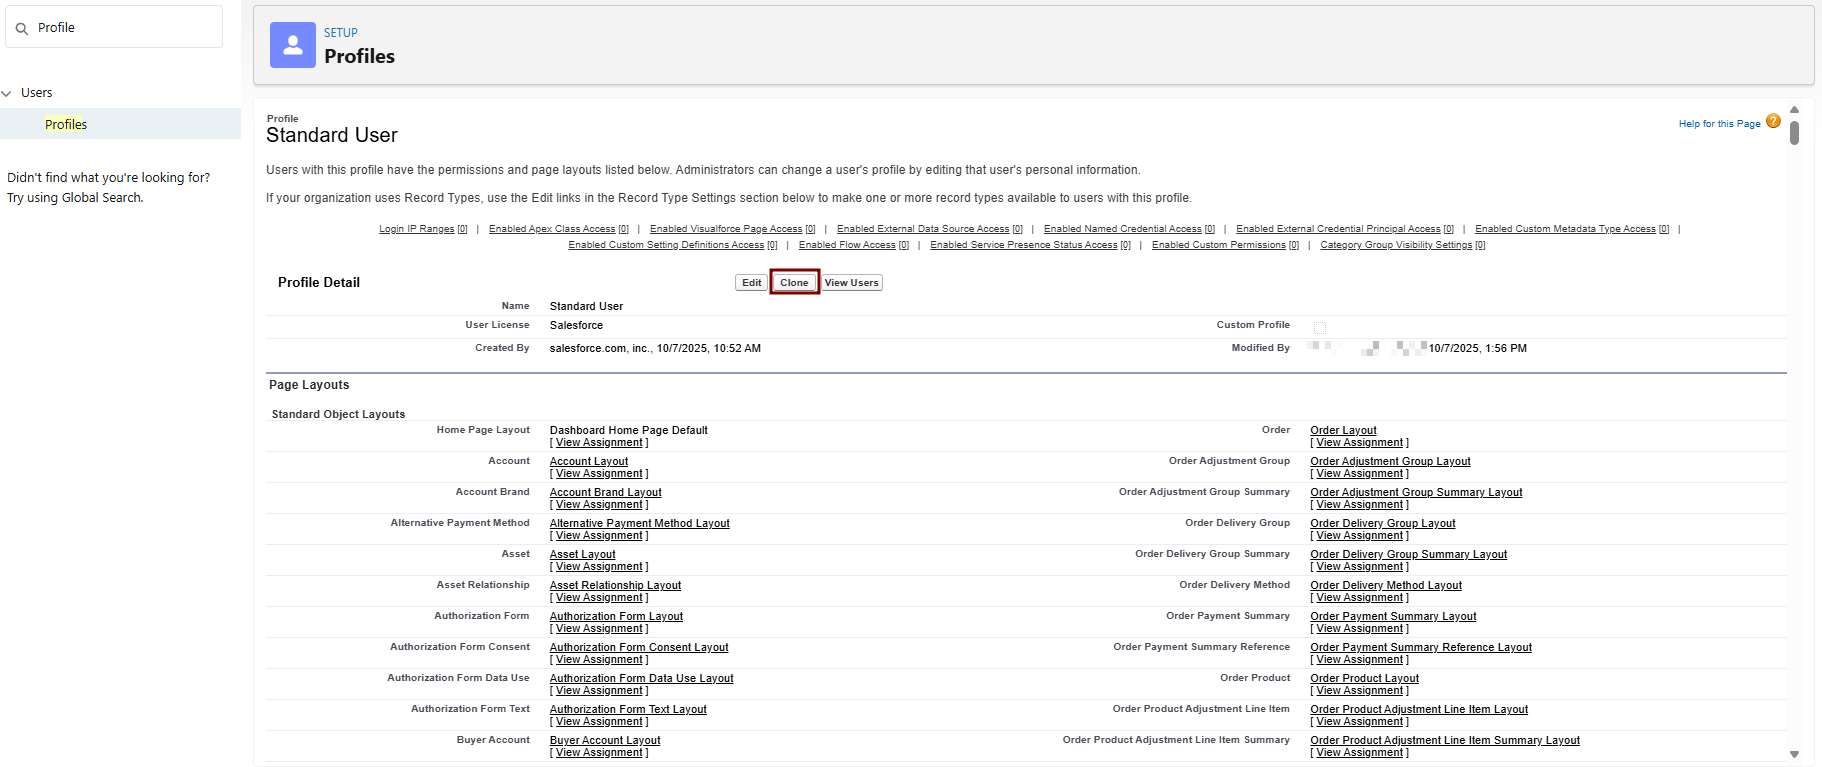
Clone the Standard User Profile:
-
Navigate to Setup > Quick Find > Profiles.
-
Find Standard User > Click Clone next to it.
-
Profile Information:
- Profile Name: e.g., "Standard User - Log Integration".
- Description: "Cloned for Elastic log integration with API and ELF access."
- User License: Salesforce Integration
-
Save. This creates a new custom profile based on Standard User.
-
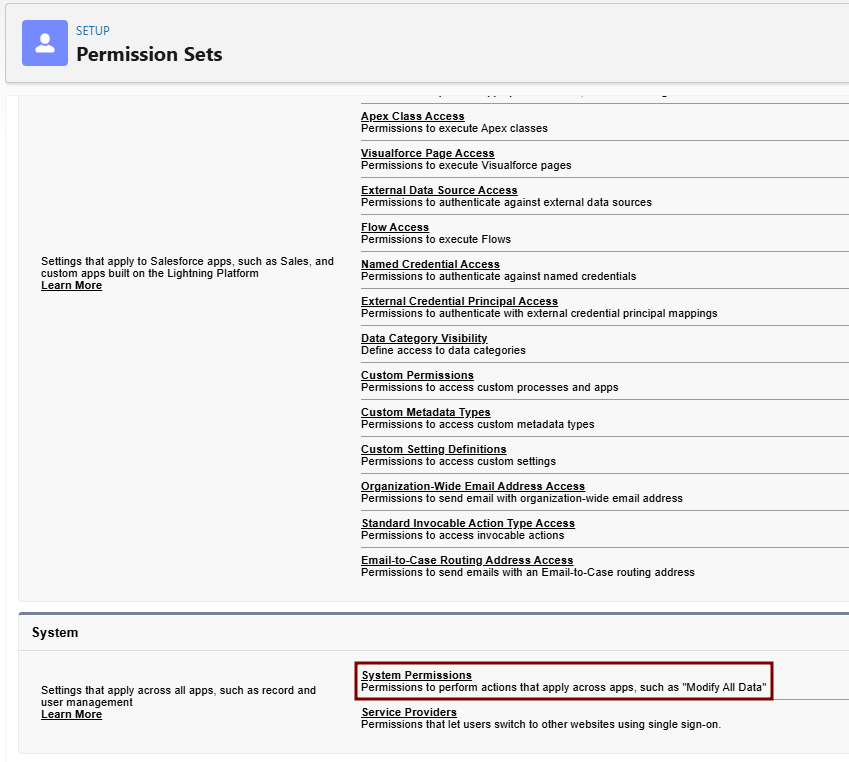
3. Edit System Permissions in the Cloned Profile:
-
In Profiles, find your new cloned profile > Click Edit > Go to the System Permissions section (or use Quick Find for "System Permissions").
-
Enable the following checkboxes (these are the key changes from Standard User, which starts with them disabled for security):
|
Permission |
Change from Standard User |
Why Enable It? |
How to Enable |
|
API Enabled |
Disabled → Enabled |
Allows REST/SOAP API calls for fetching logs (e.g., EventLogFile queries). Essential for Elastic integration. |
Check the box under System Permissions. |
|
View Event Log Files |
Disabled → Enabled |
Grants read access to historical Event Log Files (ELF) like logins and Apex events. Core for log ingestion. |
Check the box under System Permissions. |
|
View All Data |
Disabled → Enabled |
Provides broader object read access if ELF queries fail due to restrictions. |
Check the box under System Permissions. |
-
Do NOT enable unrelated permissions like "Modify All Data" or "Delete All Data" to maintain least-privilege.
-
Save the profile.


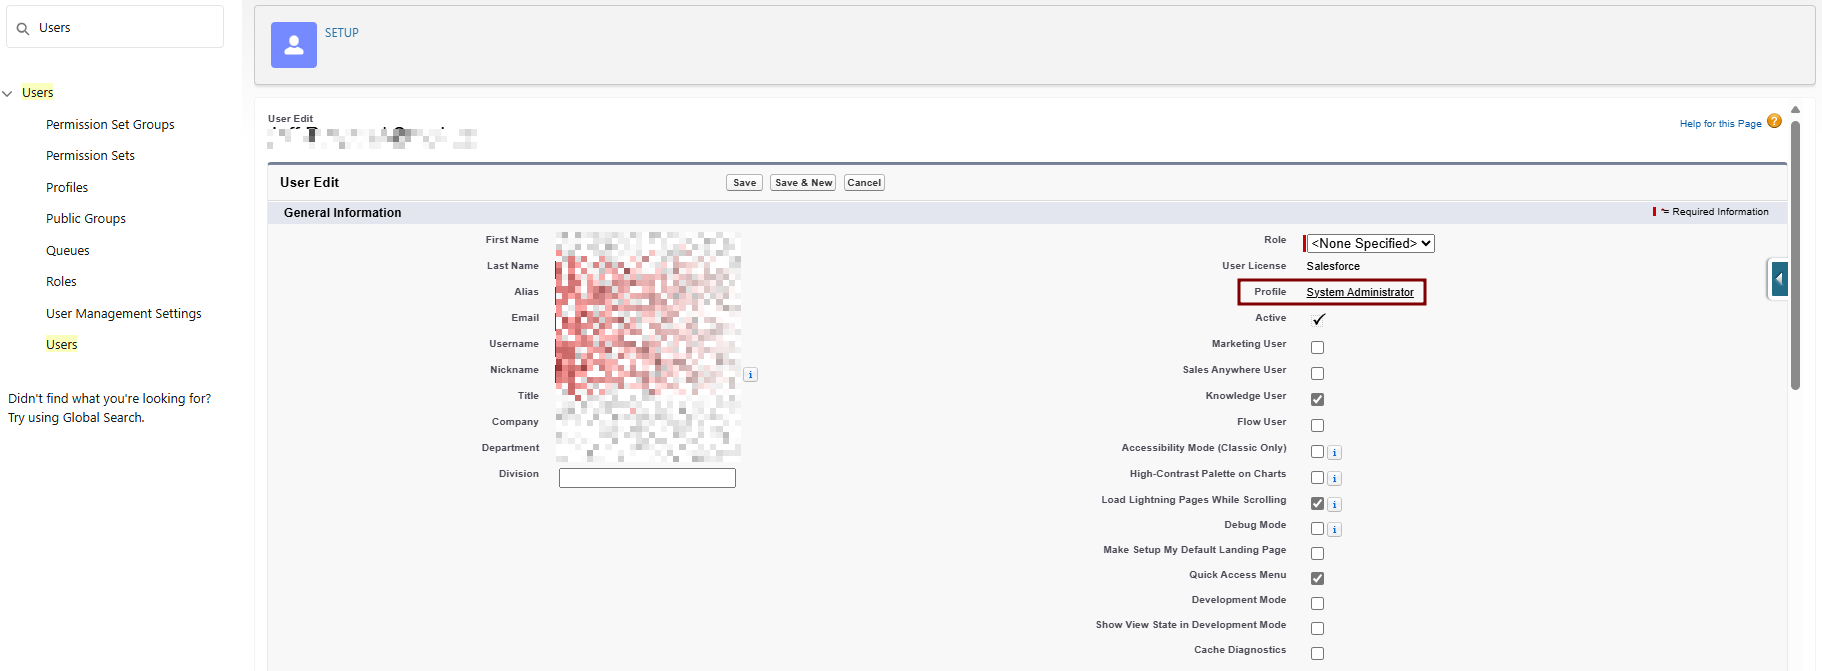
4. Assign the Cloned Profile to Your Integration User:
-
Setup > Quick Find > Users > Select your integration user > Edit.
-
Profile: Select "Standard User - Log Integration".
-
Save.
5. Handle Event Monitoring Permissions (Not in Profile—Use Permission Set):
-
The "View Real-Time Event Monitoring Data" isn't a direct profile permission; it's tied to Event Manager.6. -
the X509 Certificate from the JKS.7. Sign the resulting string using RSA SHA256.8.Create a
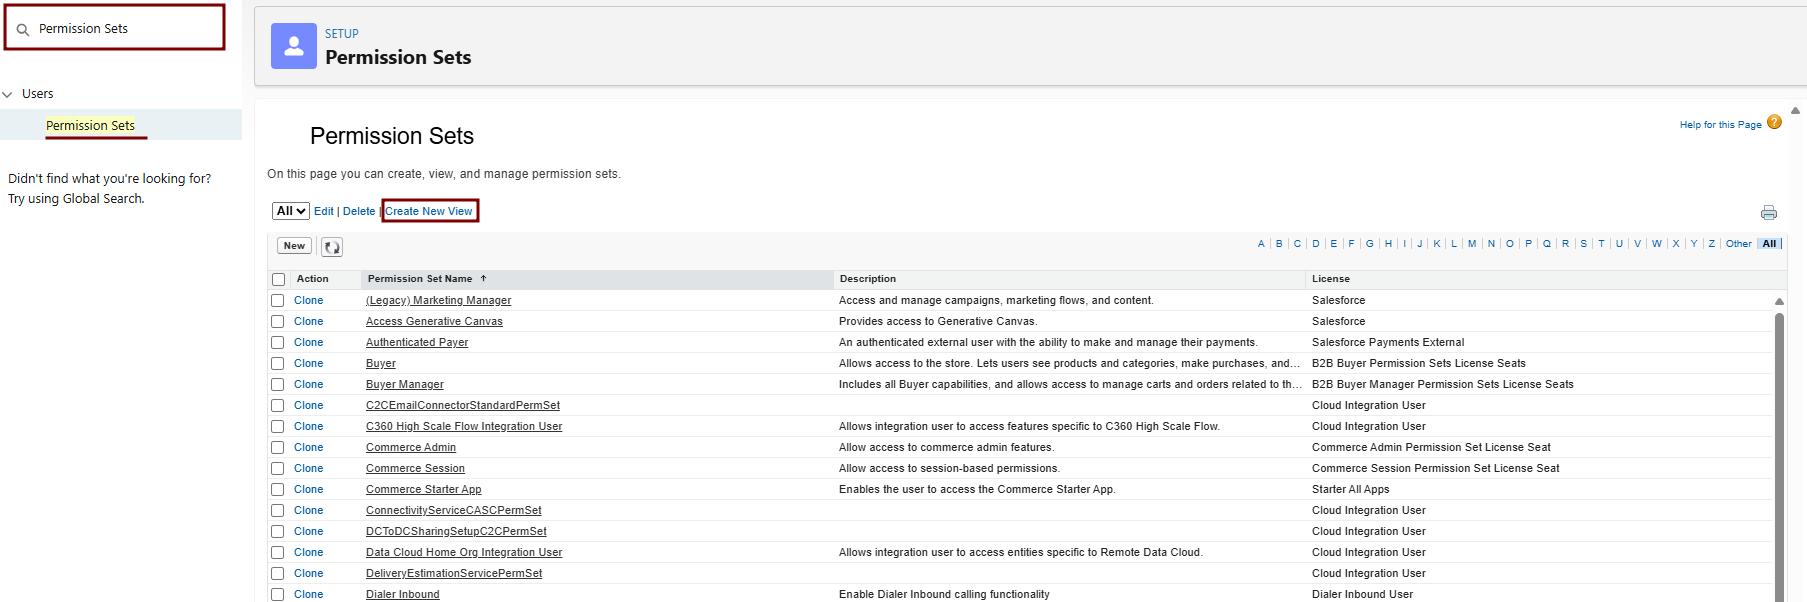
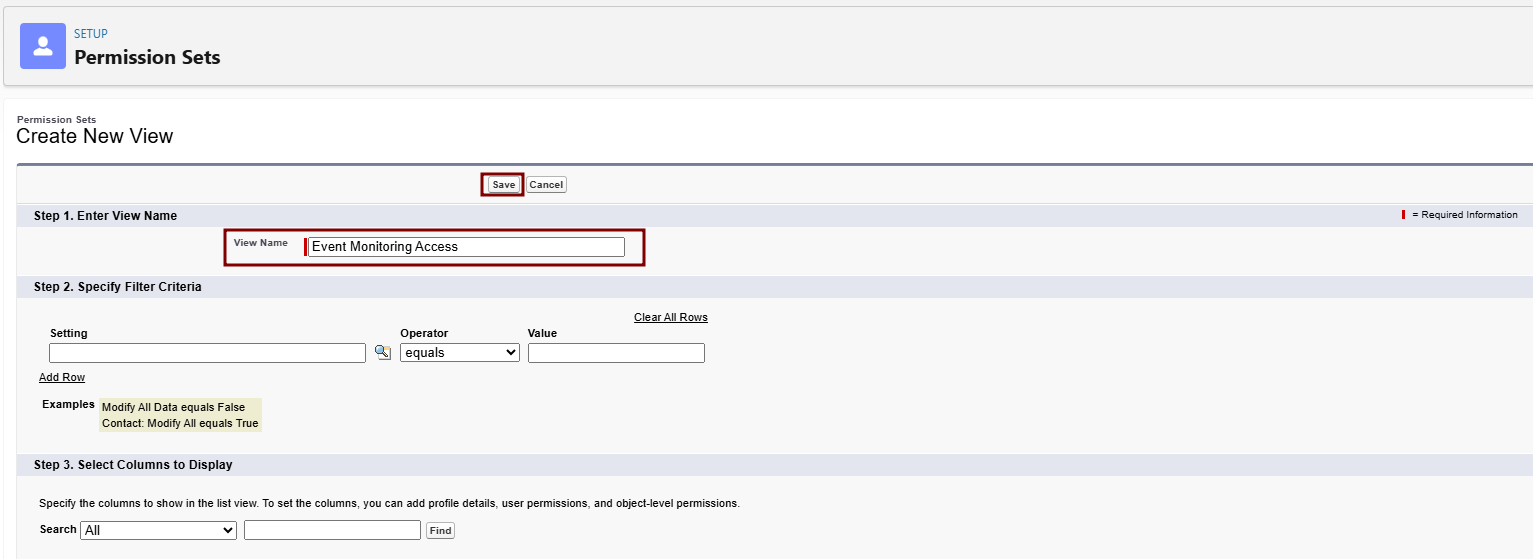
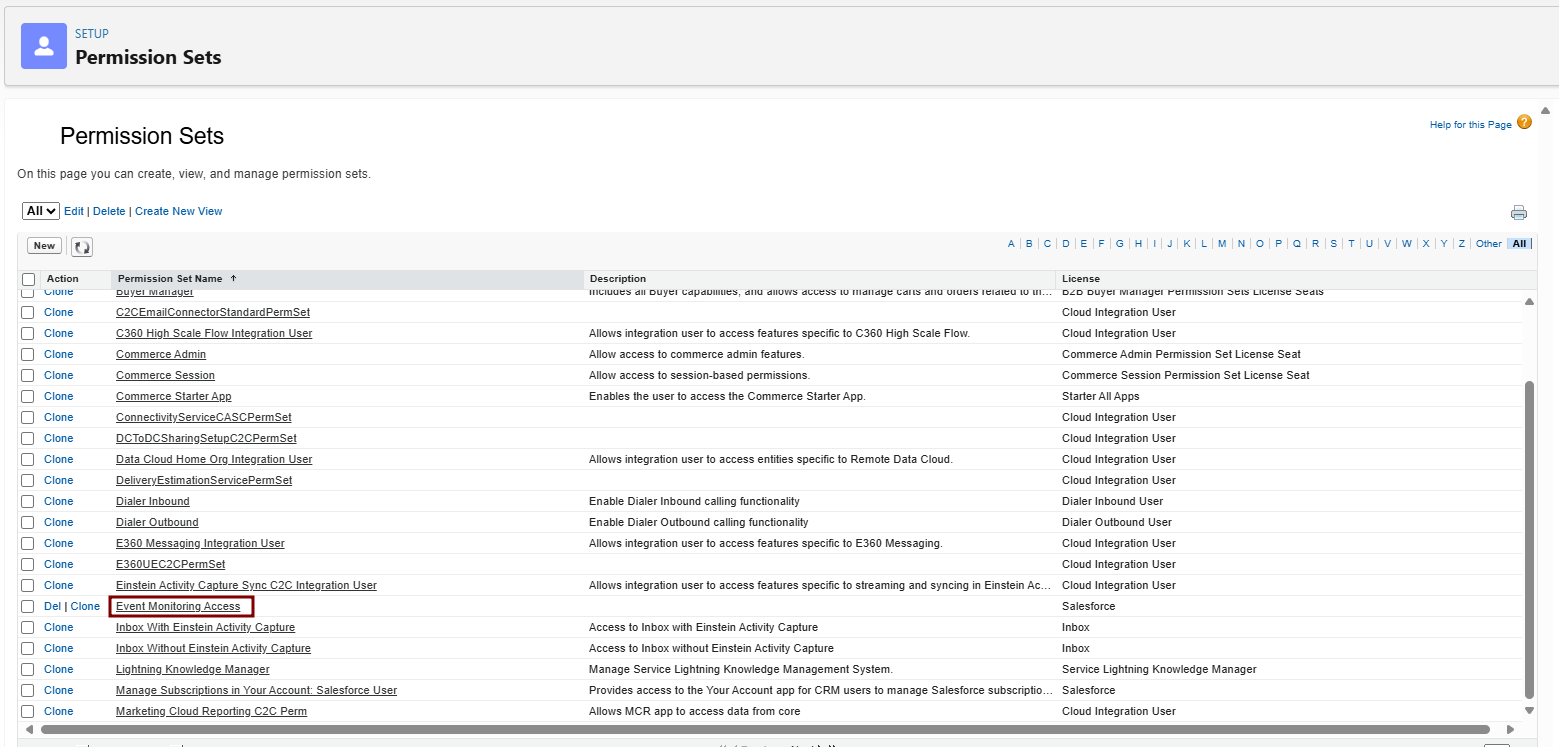
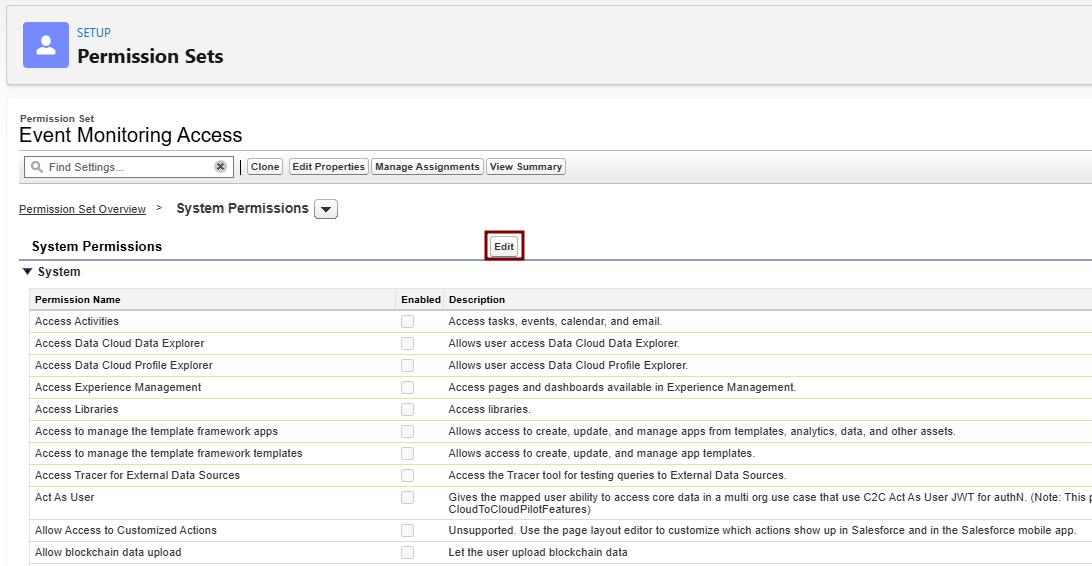
stringPermissionof the string from this step in this format.existing_string + "." + base64_encoded_signatureIn this example, the base64 encoded signature is highlighted.eyJhbGciOiJSUzI1NiJ9.eyJpc3MiOiAiM01WRzk5T3hUeUVNQ1EzZ05wMlBqa3FlWkt4bm1BaUcxeFY0b0hoOUFLTF9yU0suQm9TVlBHWkhRdWtYblZqelJnU3VRcUduNzVOTDd5ZmtRY3l5NyIsICJwcm4iOiAibXlAZW1haWwuY29tIiwgImF1ZCI6ICJodHRwczovL2xvZ2luLnNhbGVzZm9yY2UuY29tIiwgImV4cCI6ICIxMzMzNjg1NjI4In0=.iYCthqWCQucwi35yFs-nWNgpF5NA_a46fXDTNIY8ACko6BaEtQ9E6h4Hn1l_pcwcKSetI_GlmfUO2dJDg1A610t09TeoPagJsZDm_H83bsoZUoI8LpAA1s-2aj_Wbysqb1j4uDToz480WtEbkwIv09sIeS_-QuWak2RXOl1Krnf72mpVGS4WWSULodgNzlKHHyjAMAHiBHIDNt36y2L2Bh7M8TNWiKa_BNM6s1FNKDAwHEWQrNtAeReXgRy0MZgQY2rZtqT2FcDyjY3JVQbEn_CSjH2WV7ZlUwsKHqGfI7hzeEvVdfOjH9NuaJozxvhPF489IgW6cntPuT2V647JWi7ngThis Java code is a simple example of constructing a JWT bearer token.import org.apache.commons.codec.binary.Base64; import java.io.*; import java.security.*; import java.text.MessageFormat; public class JWTExample { public static void main(String[] args) { String header = "{\"alg\":\"RS256\"}"; String claimTemplate = "'{'\"iss\": \"{0}\", \"sub\": \"{1}\", \"aud\": \"{2}\", \"exp\": \"{3}\", \"jti\": \"{4}\"'}'"; try { StringBuffer token = new StringBuffer(); //Encode the JWT Header and add it to our string to sign token.append(Base64.encodeBase64URLSafeString(header.getBytes("UTF-8"))); //Separate with a period token.append("."); //Create the JWT Claims Object String[] claimArray = new String[5]; claimArray[0] = "3MVG99OxTyEMCQ3gNp2PjkqeZKxnmAiG1xV4oHh9AKL_rSK.BoSVPGZHQukXnVjzRgSuQqGn75NL7yfkQcyy7"; claimArray[1] = "my@email.com"; claimArray[2] = "https://login.salesforce.com"; claimArray[3] = Long.toString( ( System.currentTimeMillis()/1000 ) + 300); claimArray[4]=<JTI> MessageFormat claims; claims = new MessageFormat(claimTemplate); String payload = claims.format(claimArray); //Add the encoded claims object token.append(Base64.encodeBase64URLSafeString(payload.getBytes("UTF-8"))); //Load the private key from a keystore KeyStore keystore = KeyStore.getInstance("JKS"); keystore.load(new FileInputStream("./path/to/keystore.jks"), "keystorepassword".toCharArray()); PrivateKey privateKey = (PrivateKey) keystore.getKey("certalias", "privatekeypassword".toCharArray()); //Sign the JWT Header + "." + JWT Claims Object Signature signature = Signature.getInstance("SHA256withRSA"); signature.initSign(privateKey); signature.update(token.toString().getBytes("UTF-8")); String signedPayload = Base64.encodeBase64URLSafeString(signature.sign()); //Separate with a period token.append("."); //Add the encoded signature token.append(signedPayload); System.out.println(token.toString()); } catch (Exception e) { e.printStackTrace(); } } }Request Access TokenTo request an access token, the connected app posts a token request to the Salesforce instance’s token endpoint. It includes the JWT in the post.This example shows a sample token request.POST /services/oauth2/token HTTP/1.1 Host: login.example.com Content-Type: application/x-www-form-urlencoded grant_type= urn:ietf:params:oauth:grant-type:jwt-bearer& assertion=eyJpc3MiOiAiM01WRz...[omitted for brevity]...ZTImportant:When developing OAuth integrations, always pass sensitive information in the body of a POST request or in a request header. Don't use GET parameters in the URL query string to pass sensitive information. Sensitive information includes but isn't limited to usernames, passwords, OAuth tokens, client secrets, and any personally identifiable information. For more information on security best practices, seeStoring Sensitive Datain theSecure Coding Guide.Include these parameters in the post.PARAMETERDESCRIPTIONgrant_typeUse these values for the grant type:urn:ietf:params:oauth:grant-type:jwt-bearer.assertionThe assertion is the entire JWT value.format(Optional) Use to specify the expected return format. This parameter overrides the request’s header. These formats are supported.urlencodedGo to Setup > Quick Find > Permission Sets > New.
json(default)Label/Name: e.g., "Event Monitoring Access".
xmlLicense: "Salesforce Integration" (matches Standard User).
-
Save > System Permissions tab > Enable View All Data, API Enabled and View Event Log Files.
-
Event Log File Browser tab: Enable access to specific events.
Scope ParameterYou can’t specify scopes in a JWT bearer token flow. Scopes are issued according toAssign theconnectedPermissionapp’s Permitted Users policy or your org’s API Access Control settings, as shown in this table.
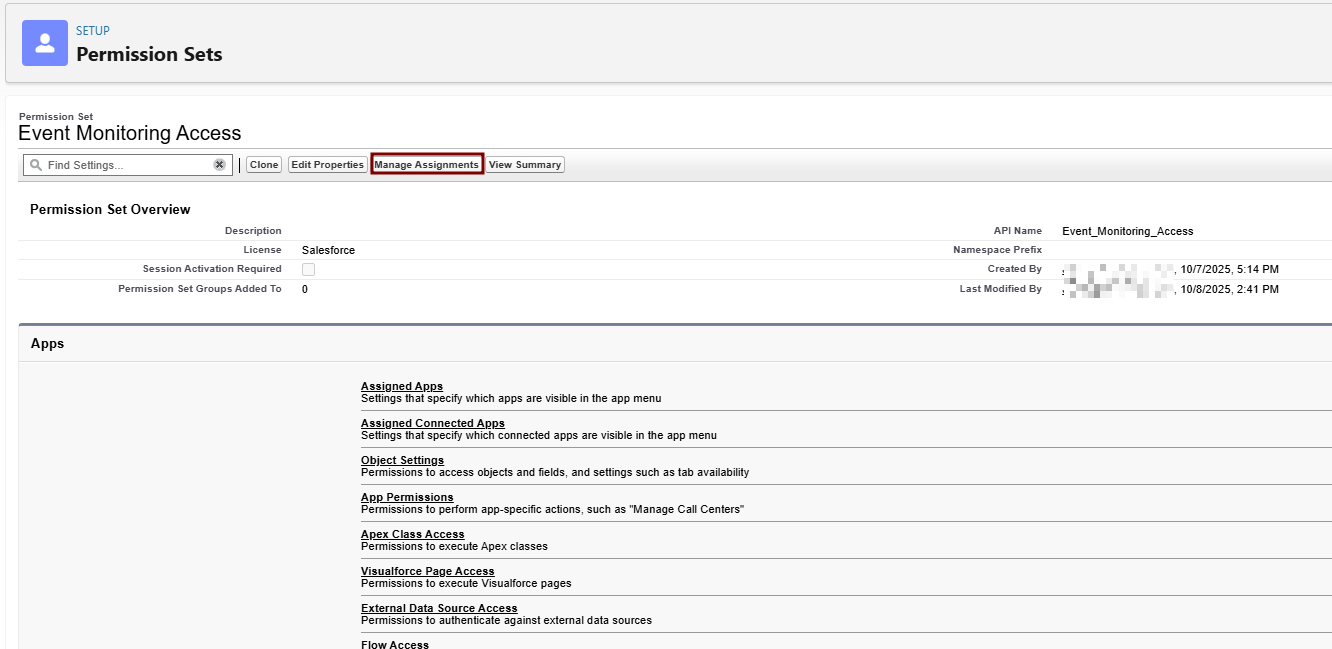
Events in Event ManagerSETTINGSetRESULTPermitted Users policy: All users may self-authorizeWith a successful authorization, the scopes returned with the access token are derived from the scopes of prior approvals.Permitted Users policy: Admin approved users are pre-authorizedStandard and custom scopes assigned to the connected app are returned with the access token.API Access Control: Allowlist connected apps in your orgStandard and custom scopes assigned to the connected app are returned with the access token. If you allowlist connected apps in your org and don’t receive the expected scopes, take these steps.:FromSetup,Permission
inSettheAssignmentsQuick Find box, enterOAuth, and then select>ConnectedNewApps>OAuthSelectUsageyour integration user > Assign.For the allowlisted connected app, clickBlock.For the allowlisted connected app, clickUnblock.
Enable
-
Setup > Quick Find > Event Manager.
-
For desired events (e.g., Login Event), click dropdown > Enable Storage. This requires the Event Log File Browser add-on license.
-
This starts log retention (up to 1 year for ELF; real-time requires add-on license).


Salesforce Grants Access Token
The OAuth 2.0 JWT bearer and SAML assertion bearer flow requests look at all previous approvals for the user that include a refresh token. If Salesforce finds matching approvals, it combines the values of the approved scopes. Salesforce then issues an access token. If Salesforce doesn’t find previous approvals that included a refresh token or any available approved scopes, the request fails as unauthorized.
After a successful verification, the Salesforce instance sends a response to the connected app. A token response for the OAuth 2.0 JWT bearer token flow follows the same format as an authorization code flow, although a refresh token is never issued.
This example shows a response from Salesforce.
{"access_token":"00Dxx0000001gPL!AR8AQJXg5oj8jXSgxJfA0lBog.
39AsX.LVpxezPwuX5VAIrrbbHMuol7GQxnMeYMN7cj8EoWr78nt1u44zU31
IbYNNJguseu",
"scope":"web openid api id","instance_url":"
https://yourInstance.salesforce.com","id":"
https://yourInstance.salesforce.com
/id/00Dxx0000001gPLEAY/005xx000001SwiUAAS","token_type":"Bearer"}
These parameters are in the body of the response.
| |
| |
|
Access Protected Data
After the connected app receives the access_token, it can pass it as a bearer token in the Authorization header request. This example shows a REST API call to Experience Cloud sites:
https://site.force.com/customers/services/data/v32.0/ -H
"Authorization: Bearer 00D50000000IehZ\!AQcAQH0dMHZfz972Szmpkb58urFRkgeBGsxL_QJWwYMfAbUeeG7c1E6 LYUfiDUkWe6H34r1AAwOR8B8fLEz6n04NPGRrq0FM"
Required fields for JWT Authentication Integration:
-
JWT Authentication Audience URL
-
JWT Authentication Client Key Path
-
Username
-
Client ID
-
Instance URL
-
Token URL
Provide this required fields to CyTech Support.
Reference Link:
OAuth 2.0 JWT Bearer Flow for Server-to-Server Integration in Salesforce
If you need further assistance, kindly contact our support at support@cytechint.com for prompt assistance and guidance.