AQUILA EDR - Execute Command and Response Actions
Prerequisites
- Access to CyTech - AQUILA
-
Only users assigned the "Owner" or "Admin" role can access the Log Collector installation resources within the platform.
-
- Host must be online (offline actions queue and expire after ~2 weeks)
What is the Response Console?
The Response Console is a terminal-like interface in Elastic Security that lets you run live response actions directly on an endpoint. It provides near-real-time feedback and supports all major platforms: Linux, macOS, and Windows.
Key Characteristics
- Terminal-style input: Type commands and see results immediately
- Cross-platform: Works on Linux, macOS, and Windows endpoints
- Live interaction: Actions execute on the target host with quick output
How to Open Response Console
Cyber Monitoring→ Endpoind Detection and Response (EDR) → Endpoints
→ Take action → Respond
Core Commands (enter in console + Enter)
| Command | Purpose | Syntax Example | Key Notes / Limitations |
|---|---|---|---|
| isolate | Block all network communication | isolate --comment "Suspicious activity" | Immediate; irreversible without release |
| release | Restore network access | release --comment "False positive" | Reverses isolation |
| status | Show host status (agent, policy, last seen) | status | Quick health check |
| processes | List running processes | processes | Takes ~1 min; get PID or entityId |
| kill-process | Terminate a process | kill-process --pid 123 or --entityId id | Use entityId for reliability; SentinelOne: --processName |
| suspend-process | Pause a process | suspend-process --pid 123 or --entityId id | Reversible by killing or resuming |
| get-file | Download file (as password-protected ZIP) | get-file --path "/path/to/file" | Max 100 MB; password = elastic (may differ for third-party); use quarantine path from alerts |
| execute | Run shell command | execute --command "whoami" --timeout 10s | Output limited (~2000 chars); full in ZIP (password elastic); dangerous—use carefully |
| upload | Upload file to host | upload --file <select file> --overwrite | Max 25 MB (configurable up to 100 MB); default path = Endpoint install dir |
| scan | Malware scan on file/directory | scan --path "/path" | Uses current Defend policy (Detect/Prevent) |
| runscript | Run script (vendor-specific) | CrowdStrike: runscript --CloudFile="script" Defender: runscript --ScriptName="script" SentinelOne: runscript --script="script" | Syntax varies by EDR vendor; timeouts apply |
| cancel | Cancel pending action (Defender only) | cancel --action "runscript" | Microsoft Defender-specific |
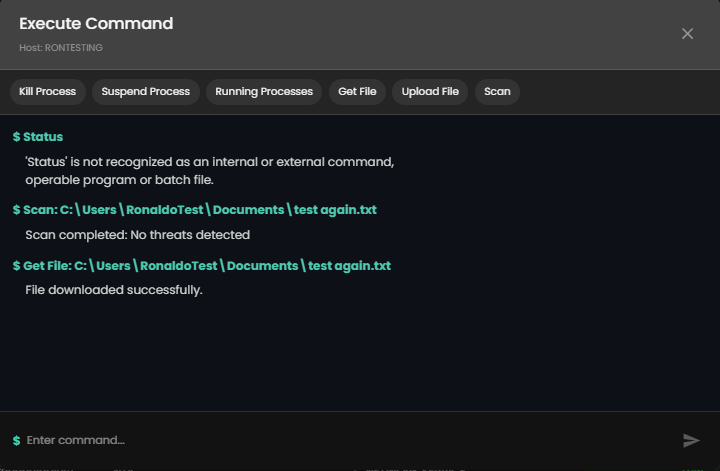
To use the main commands, press the commands above, which are Kill Process, Suspend Process, Running Processes, Get File, Upload File, Scan, Example output below.
Helpful Console Commands
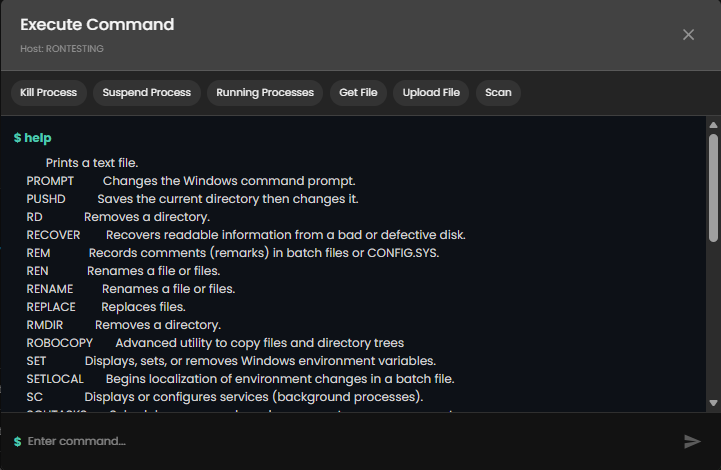
- help → List all available commands
- command --help → Detailed syntax for a command
- --comment "text" → Add note to any action (logged in history)
- clear → Clear console screen

Response Actions History
- Access: From console → Response Actions History link
- Shows: Who ran what, when, outcome, comments
- Use for auditing and troubleshooting
Quick Tips
- Always add --comment for traceability
- For quarantined files: Use get-file with path from alert (file.Ext.quarantine_path)
- Third-party agents (CrowdStrike, Defender, SentinelOne) have vendor-specific syntax
- No way to cancel most actions once submitted—double-check before Enter
If you need further assistance, kindly contact our technical support at support@cytechint.com for prompt assistance and guidance.