AQUILA EDR Deployment via GPO on Windows Server AD
This document provides a step-by-step guide for deploying AQUILA Endpoint Detection and Response (EDR) on Windows Server environments using Group Policy Objects (GPO). The purpose of this guide is to streamline the installation process, ensure consistent configuration across domain-joined systems, and simplify centralized management of the EDR agent. By leveraging Group Policy, administrators can enforce deployment at scale, reduce manual installation efforts, and maintain stronger security coverage across the organization’s Windows Server infrastructure.
Scope & Audience
This guide is intended for system administrators, IT operations teams, and security engineers responsible for managing Windows Server environments within an Active Directory domain. The deployment process outlined here applies to Windows Server editions that support Group Policy and assumes administrative privileges within the domain.
The scope of this document covers:
-
Preparing the Windows Server environment for AQUILA EDR deployment
-
Configuring and applying Group Policy Objects (GPO) for automated agent installation
-
Ensuring consistent and secure deployment across domain-joined systems
This document does not cover post-deployment tasks such as advanced policy tuning, threat hunting, or incident response workflows.
Prerequisites
Before beginning the deployment of AQUILA EDR via Group Policy, ensure the following requirements are met:
- Administrative Permissions
- Domain Administrator or delegated privileges to create and manage Group Policy Objects (GPOs).
- Local Administrator rights on the Windows Server hosting the installer.
- Windows Server Environment
- Active Directory domain configured and operational.
- Supported Windows Server editions (2016, 2019, 2022).
- Network connectivity between domain controllers and target machines.
- AQUILA EDR Installer Package
- Latest version of the AQUILA EDR
MSIZIPinstallerfile obtained - Obtained the script to be setup on the GPO
- Installer stored in a shared network location (UNC path) accessible to all domain-joined endpoints.
- Latest version of the AQUILA EDR
- Group Policy Management Tools
- Group Policy Management Console (GPMC) installed on the Windows Server or administrator workstation.
- Security & Firewall Considerations
- Ensure that outbound communication to AQUILA EDR cloud services is allowed.
- Verify no local security policies block software installation.
- Testing Environment
- At least one test machine joined to the domain to validate deployment before organization-wide rollout.
Creating a UNC Path for the AQUILA EDR InstallerZIP file and for Centralize Logs
To ensure domain-joined computers can access the AQUILA EDR installationZIP package,file package and folder for centralizing logs, create a shared network folder and configure appropriate permissions.
- Create a
Software ShareZIP Folder- On a file server, create a folder (e.g.,
C:\).SoftwareShareZIP - Copy the
Aquila Agent.msiedr-agent-8.18.1-windows-x86_64.zipinstallerfile into this folder.
- On a file server, create a folder (e.g.,
- Enable Folder Sharing
- Right-click the
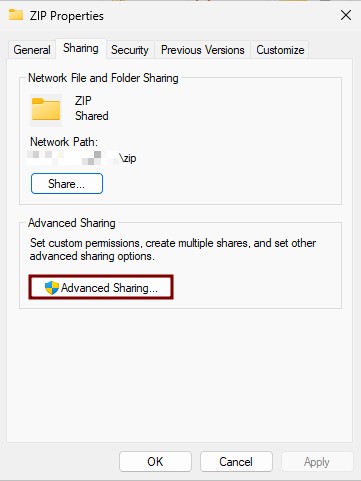
SoftwareShareZIP - Navigate to the Sharing tab and click Advanced Sharing.
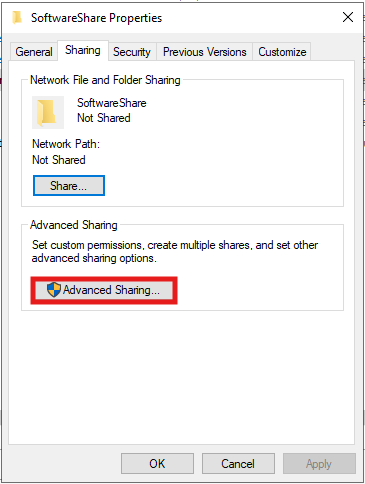

- Check the box Share this folder.
- Check the box Share this folder.
- Right-click the
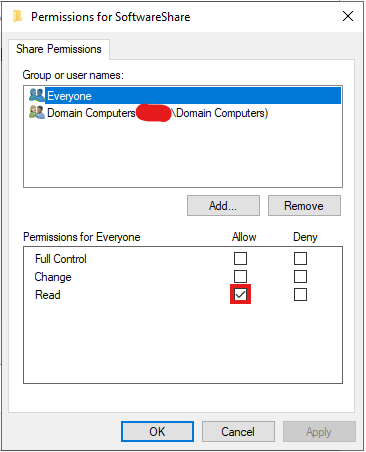
- Set Permissions
- Click Permissions.
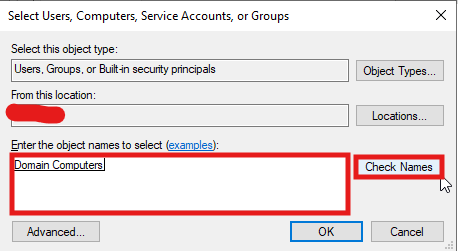
SelectAddand in theEnter the object namesfield, typeDomain Computers.ClickCheck Names, then selectOK.
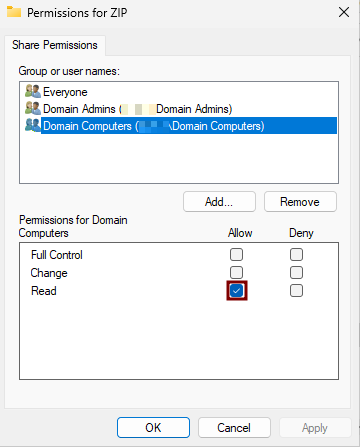
- Grant the Read permission to
Domain Computers. - Grant the Full Control permission to
Domain Admins.
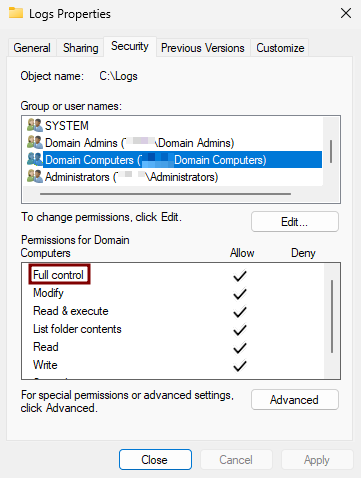
- Also, in the Security tab, grant the Read & execute permission to
Domain Computersand Full control permission toDomain Admins.


- Click Apply, then OK to confirm the changes.
4.
-
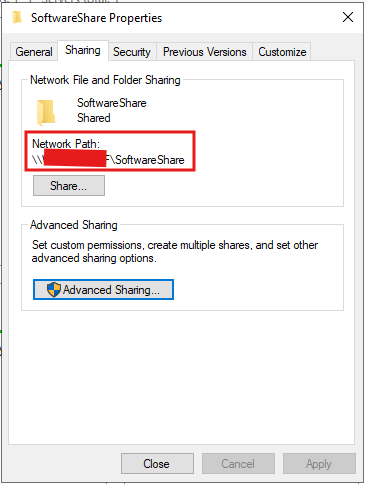
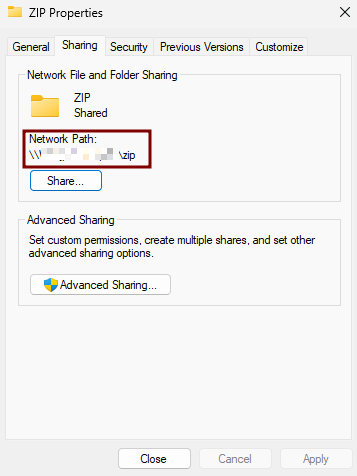
- Note the Network Path displayed in the Sharing tab (e.g.,
\\).ServerName\SoftwareShare<ServerHostName>\ZIP
- Note the Network Path displayed in the Sharing tab (e.g.,
- This UNC path will be required when configuring the script for the Group Policy Object (GPO)
fordeployment.

5. Create the Logs Folder
The purpose of this Logs folder is to centralize all log processes from every endpoint where the EDR is deployed within the domain. This setup allows us to verify whether each endpoint has successfully installed the EDR and to easily identify and troubleshoot any errors that may occur during deployment.
- On a file server, create a folder (e.g.,
C:\Logs).
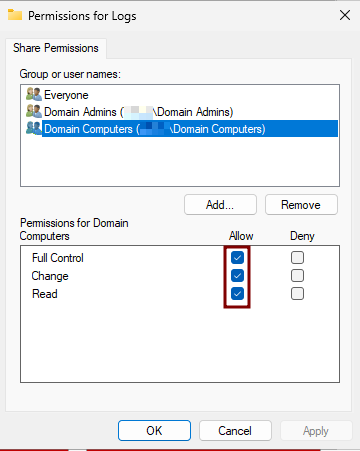
6. Set Permissions
- Grant the Full Control permission to both
Domain ComputersandDomain Admins. - Do the same on the Security tab.
- Note the Network Path displayed in the Sharing tab (e.g.,
\\<ServerHostName>\Logs)
- Also don't forget to create one folder where you can save the script and should be shared advance and that has the same permission as the ZIP folder since when creating a GPO policy, it only accepts UNC Path.
NOTE:
If you already have a dedicated folder for storing the ZIP file and centralized logs, we can use that location. Just make sure to take note of its UNC path, as we’ll need it when updating the deployment script later.
Alternatively, we can update the script for you and send it back—so all you need to do is save the script and configure the Group Policy to deploy it. If you prefer this option, please email us at support@cytechint.com.
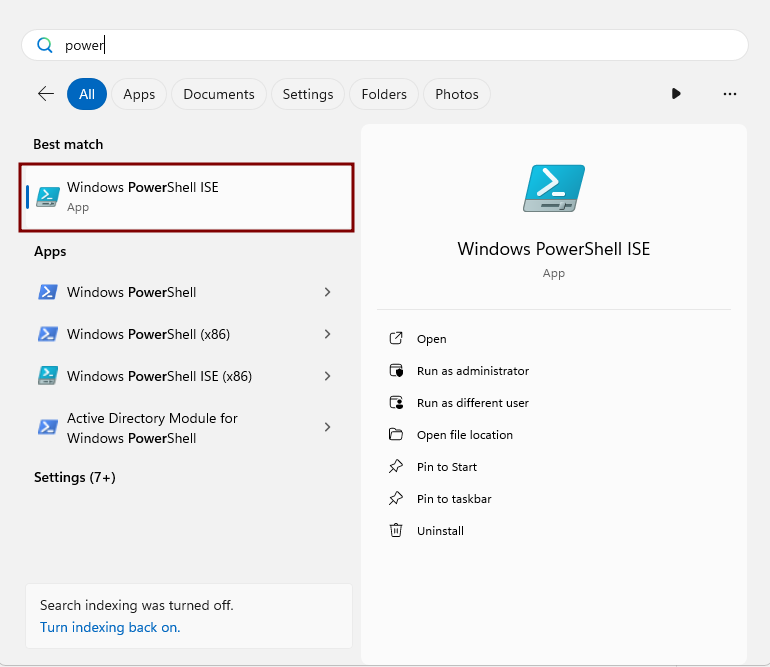
Editing the Script
To edit the provided script, you can use PowerShell ISE by following these steps:
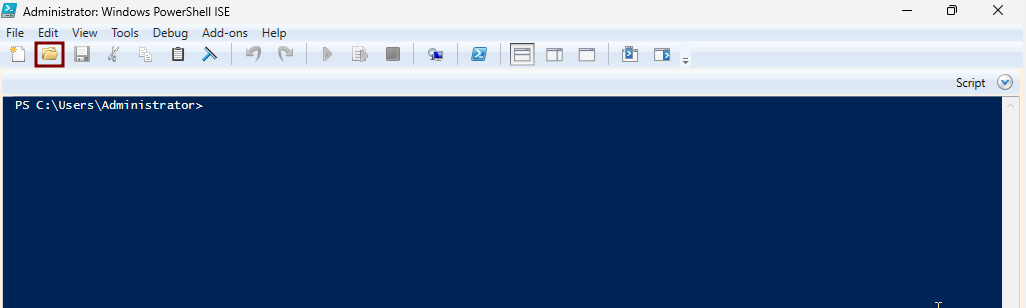
-
In the upper-right corner, click the Open Script icon (folder symbol).
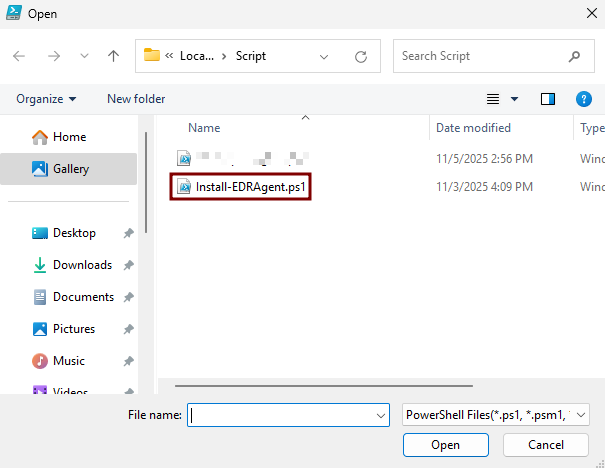
- Variables need to change:
- $elasticZipFile: put the UNC path where the ZIP file was saved. (e.g. \\WINJDHSGFYR\ZIP\edr-agent-8.18.1-windows-x86_64.zip).
- $logServerPath: put the UNC path of the created Logs folder. (e.g. \\WINJDHSGFYR\Logs).
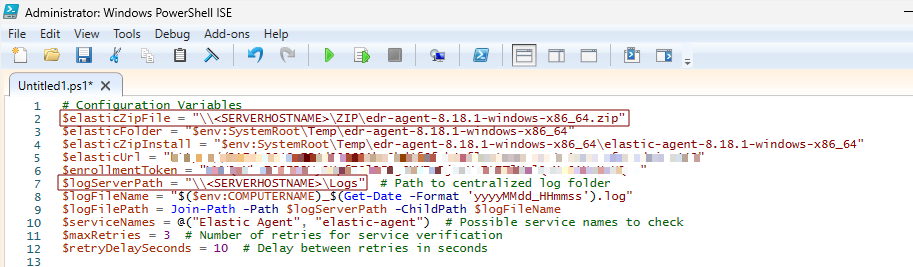
- Then Save Script.
Deploying AQUILA EDR via Group Policy
Use Group Policy Management to create and link a Group Policy Object (GPO) that deploys the AQUILA EDR agent to domain-joined computers.
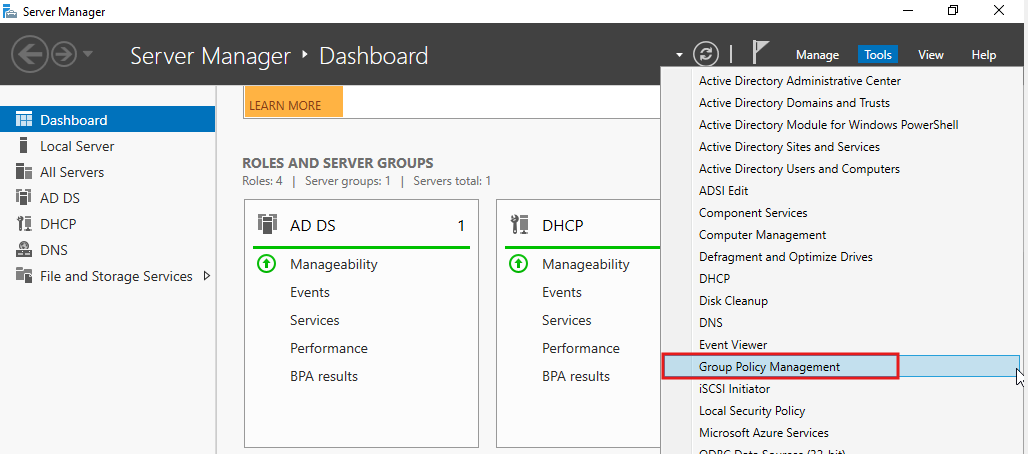
- Open Group Policy Management
- In Server Manager, go to Tools → Group Policy Management.

- In Server Manager, go to Tools → Group Policy Management.
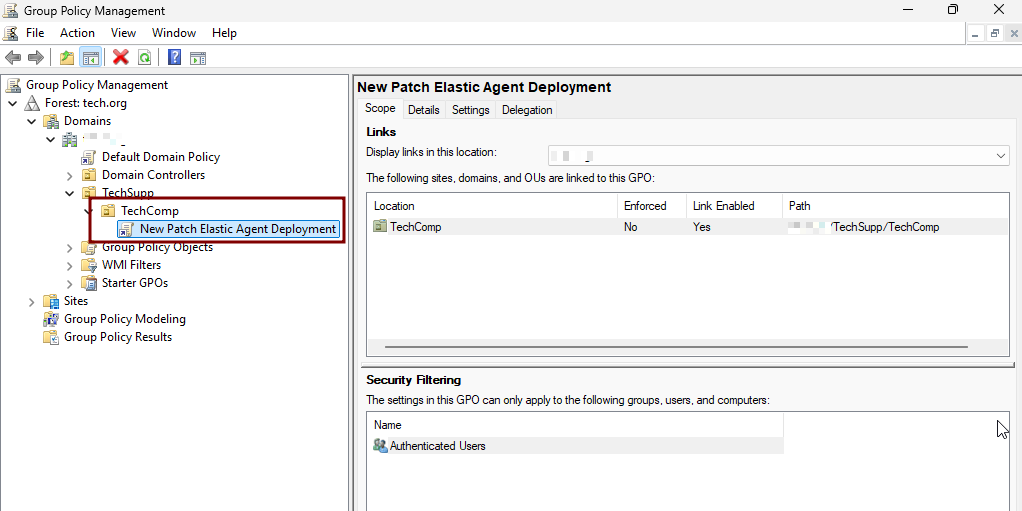
- Create a New GPO
- In the Group Policy Management Console, expand your domain and right-click the Domain Controllers container (or the appropriate Organizational Unit (OU)).
- Select Create a GPO in this domain, and Link it here.
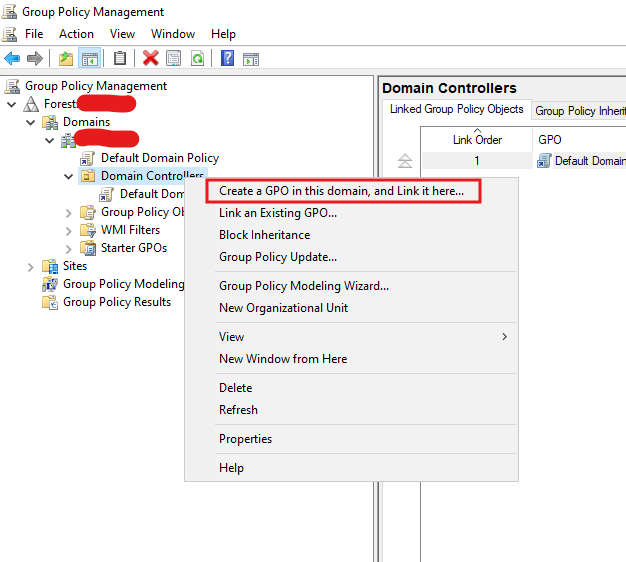
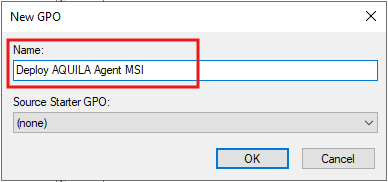
- Provide a descriptive name (e.g.,
DeployNewAQUILAPatch Elastic AgentMSIDeployment), then click OK.
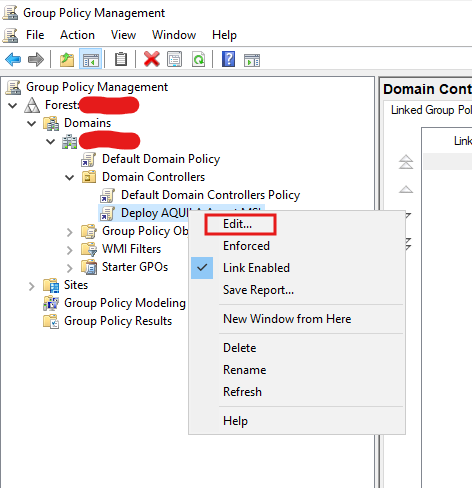
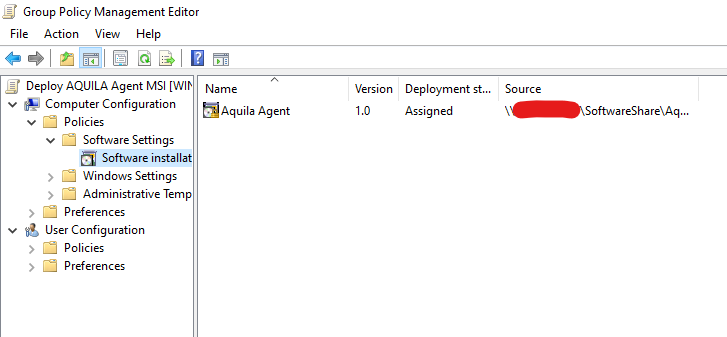
- Edit the GPO
- Right-click the newly created GPO and select Edit.
- In the Group Policy Management Editor, navigate to:
Computer Configuration →PoliciesPreferences →SoftwareControl Panel Settings →SoftwareScheduledInstallationTasks
- Right-click the newly created GPO and select Edit.
AddScheduledthe MSI PackageTasks- Right-click then choose
Software InstallationNew →NewScheduled→TaskPackage(At least Windows 7).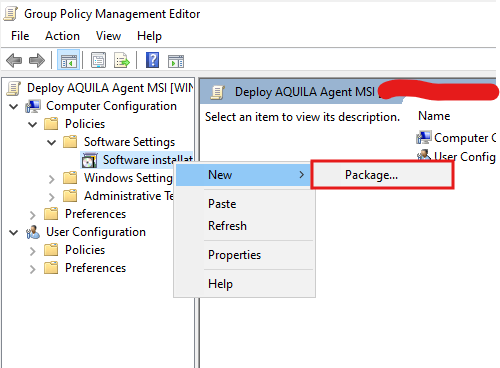
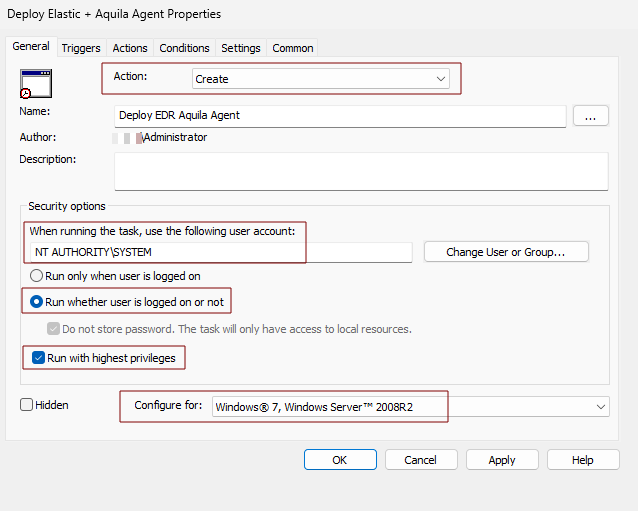
IntheGeneral
fileTabdialog,- Action:
toCreate - Name:
UNCyoupathcan set a name of theinstallerscheduled task. (e.g.,\\ServerName\SoftwareShare\Deploy EDR AquilaAgent.msi)Agent) - When
selectrunningOpenthe task, use the following user account:.
browsetheand
NT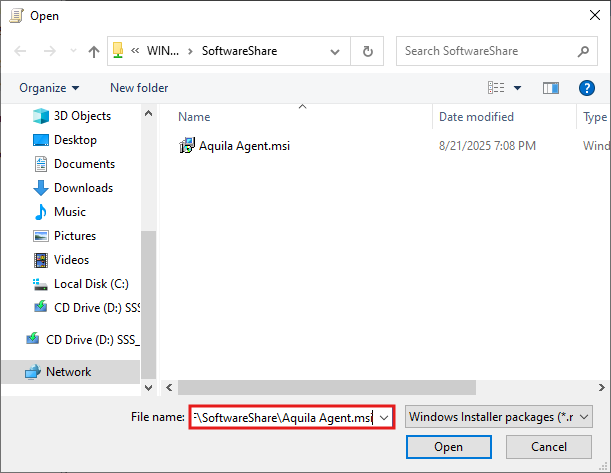
- Action:
ChooseEnableAssignedRun whether user is logged on or not- Enable Run with highest privileges
- Configure for:
toWindowsensure7,theWindowsagentServerinstalls automatically for all targeted computers.
2008R2
- Right-click then choose


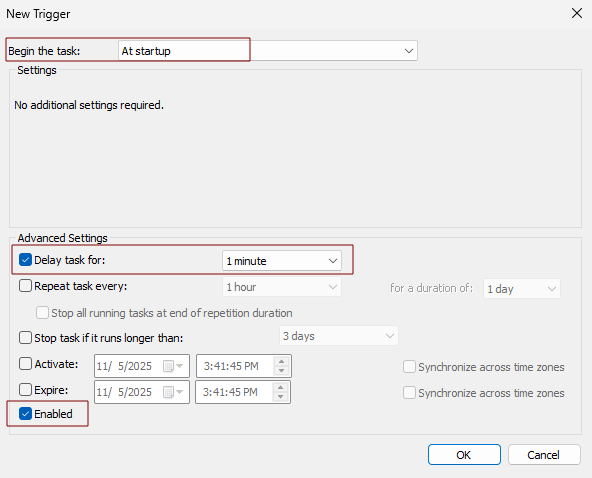
- Triggers Tab
- Click New
- Begin the task: At startup
- Delay task for: 1 minute
- Enabled
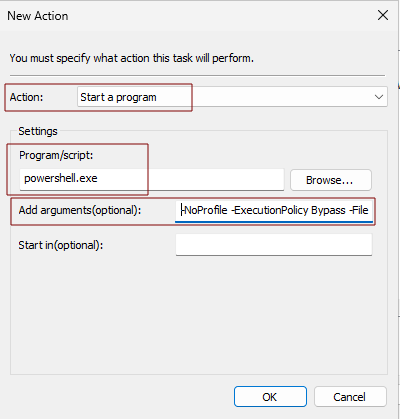
- Actions Tab
- Click New
- Action: Start a program
- Program/script: powershell.exe
- Add arguments(optional): -NoProfile -ExecutionPolicy Bypass -File "\\<SERVERHOSTNAME>\Script\Install-EDRAgent.ps1" (e.g. \\WINSJHGJDHR\Script\Install-EDRAgent.ps1)
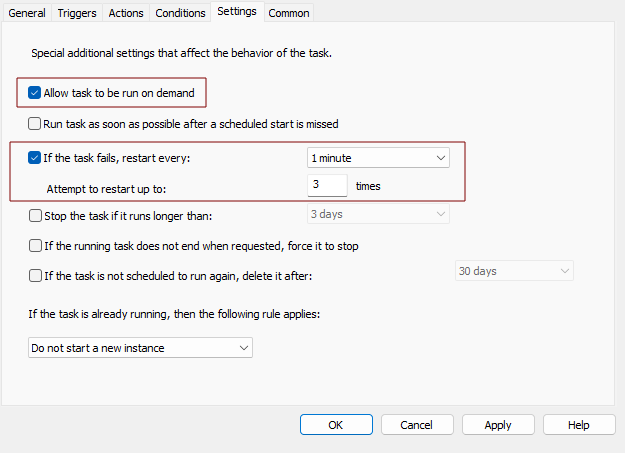
- Settings Tab
- Enabled Allow task to be run on demand
- If the task fails, restart every: 1 minute
- Attempt to restart up to: 3 times
- Finalize the GPO
- Close the Group Policy Management Editor.
ApplyTest in thePolicyClient Computer before Deployment- Go to the test client computer that is connected to the domain.
- Open
CommandPowershellPromptAdministrator.administrator - Run the command:
gpupdate /force - Running it
hererefreshes the Group Policy on the server itself. - Open Task Scheduler and check if the scheduled task was reflected on the Task Scheduler Library.
- If confirmed go back to Powershell
- Run the command:
- shutdown /r /t 0
- To restart the test client computer
- Verify Installation
Reboot the domain-joined computer, theAQUILA EDRagent should install automatically during startup.Confirm the agent appears in thePrograms and Featureslist or within theAQUILA EDRmanagement console.
Troubleshooting Tips
If the AQUILA EDR agent does not install as expected after deploying the GPO, consider the following checks:
Verify UNC Path AccessibilityEnsure the network share (e.g.,\\ServerName\SoftwareShare\Aquila Agent.msi) is accessible from target machines.Confirm thatDomain ComputershaveReadpermissions on the shared folder.
Check GPO ApplicationRungpresult /ron a target machine to confirm the deployment GPO is applied.Verify that the GPO is linkedLogin to thecorrecttestOrganizationalclientUnitcomputer(OU)andcontainingwait for thetarget1computers.minute
ConfirmYouMSIcanInstaller IntegrityTestopen theAquilaTaskAgent.msifileagainbyandmanuallycheckinstallingTaskitScheduleronLibrarya test machine.Re-download the installerif thepackagetask iscorrupted.
Ensure Policy RefreshRungpupdate /forceonConfirm theclientagent,machine.Restart the computer to trigger software installation.
Check Event Viewer LogsOpencheckEventTaskViewerManager→andWindows Logs → Application.Looksearch forGroupelastic-agentPolicy or MSI installation errors (Event IDs 103, 104, 108).
Review Software Installation SettingsConfirm that the package was added underandComputer Configuration → Policies → Software Settings → Software Installationelastic-endpoint(not under User Configuration).Ensure the package was configured asAssigned, not Published.
Firewall or Security Software ConflictsVerify that local security software is not blocking MSI execution.Ensure firewall rules allow communication toAQUILA EDRservices.
If you need further assistance, kindly contact our support at support@cytechint.com for prompt assistance and guidance.