# Resource Manager Endpoint Integration
The Azure Resource Manager (ARM) endpoint is the primary entry point for interacting with the Azure platform's resource management services. It allows users to deploy, manage, and organize resources like virtual machines, storage accounts, and networks within a defined Azure subscription. The ARM endpoint serves as a REST API that facilitates the creation, modification, and deletion of resources, ensuring secure and scalable management of Azure resources. It also supports role-based access control (RBAC), policy enforcement, and resource tagging for effective governance. In essence, the ARM endpoint enables seamless communication between Azure services and clients for infrastructure management.
---
#### **Requirements:**
- Microsoft Azure account
---
#### **Setup:**
##### **How to Create an Azure Resource Manager Service Endpoint**
##### **1. Create Service Principal**
To create a Service Principal we must first register an application in the Azure Active Directory, which we will do now. As of this writing this can only be done in the original Azure portal. However, many of us are being forced into the new portal upon login. If you are, simply click on **Browse** and select **Active Directory** and you will be redirected to the original Azure portal.
1. Click on **Applications** of the selected Active directory
2. Click the **Add** button at the button of the page
3. Enter a name for your application and make sure Web Application and/or Web API is selected
4. Enter two URLs based on your application name
They do not have to be real. I used the same value for both.
5. Once the application is created, click on **Configure**
6. Make note of the **Client ID** because we will need it in a moment
7. Select a key duration under the keys section and click **Save** at the bottom of the page
8. Once the key is saved copy the value and place it with your Client ID
This will be your only chance to collect this value.
##### **2. Find Tenant ID**
With the Active Directory select on the Applications page, we can harvest the Tenant ID.
1. Click **View Endpoints** at the bottom of the page
2. Copy any of the URLS and paste into an editor
3. The GUID in the URL is your **Tenant ID**
##### **3. Find Subscription Name and ID**
You will also need the subscription name and ID to complete the service endpoint. We can get them while we are in the old portal.
1. Click **Settings** in the left vertical menu
2. Copy the **Subscription** and **Subscription ID** values
##### **4. Grant access**
Now that we have a service principal we need to give it access to create resources in your subscription. Return to the new Azure Portal.
1. Click **Browse** and select **Subscriptions**
2. Select the subscription you are using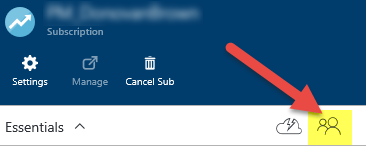
3. Click the **Access** button
4. Click **Add**
5. Select **Contributor** as the roll
6. Search and select the name of the application you just created
7. Click **OK** to grant the service principal access to your subscription
There is a script that can do all of this for you [here ](https://raw.githubusercontent.com/Microsoft/vso-agent-tasks/master/Tasks/DeployAzureResourceGroup/SPNCreation.ps1)on GitHub.
##### **5. Create Service Endpoint**
With the Service Principal created, we can now create the Service Endpoint in VSTS.
1. Log in to VSTS and select a project
2. Click the manage project gear icon in the upper right hand corner of the page
3. Select the **Services** tab
4. Select **Azure Resource Manager** from the **New Service Endpoint** drop down
| **Field** | **Value** |
| Connection Name | {AnyValueYouLike} |
| Subscription Id | Subscription Id |
| Subscription Name | Subscription Name |
| Service Principal Id | Client Id |
| Service Principal Key | Key |
| Tenant Id | Tenant Id |
5. Click **OK**
##### **How to navigate and locate Resource Manager Endpoint.**
1.Sign in to the Azure portal.
2.Select **Resource groups** from the left panel.
3.Select the resource group that you have already created specifically for Azure Integration.
4.Hover to "Overview".
5.Verify the following resources were created in the resource group: "Endpoint Name" and type "Endpoint".
6.Copy the Endpoint Name for integration requirement. Ex. contosocdn123(myCDNProfile/contosocdn123)

*If you need further assistance, kindly contact our support at for prompt assistance and guidance.*