# CSPM-AWS Integration

# Get started with CSPM for AWS

## [](https://www.elastic.co/guide/en/security/current/cspm-get-started.html#cspm-overview)Overview

<div class="book" id="bkmrk--1" lang="en"><div class="section">  
</div></div>This page explains how to get started monitoring the security posture of your cloud assets using the Cloud Security Posture Management (CSPM) feature.

**Requirements**

<div class="book" id="bkmrk-minimum-privileges-v" lang="en"><div><div class="section"><div class="sidebar"><div class="ulist itemizedlist">- Minimum privileges vary depending on whether you need to read, write, or manage CSPM data and integrations. Refer to [CSPM privilege requirements](https://www.elastic.co/guide/en/security/current/cspm-required-permissions.html "CSPM privilege requirements").
- The CSPM integration is available to all Elastic Cloud users. On-premise deployments require an [Enterprise subscription](https://www.elastic.co/pricing).
- CSPM only works in the `Default` Kibana space. Installing the CSPM integration on a different Kibana space will not work.
- CSPM is supported only on AWS, GCP, and Azure commercial cloud platforms, and AWS GovCloud. Other government cloud platforms are not supported. [Click here to request support](https://github.com/elastic/kibana/issues/new/choose).
- The user who gives the CSPM integration AWS permissions must be an AWS account `admin`.

</div></div></div></div></div>## [](https://www.elastic.co/guide/en/security/current/cspm-get-started.html#cspm-setup)Set up CSPM for AWS

You can set up CSPM for AWS either by enrolling a single cloud account, or by enrolling an organization containing multiple accounts. Either way, first you will add the CSPM integration, then enable cloud account access. Two deployment technologies are available: agentless, and agent-based. [Agentless deployment](https://www.elastic.co/guide/en/security/current/cspm-get-started.html#cspm-aws-agentless "Agentless deployment") allows you to collect cloud posture data without having to manage the deployment of Elastic Agent in your cloud. [Agent-based deployment](https://www.elastic.co/guide/en/security/current/cspm-get-started.html#cspm-aws-agent-based "Agent-based deployment") requires you to deploy and manage Elastic Agent in the cloud account you want to monitor.[](https://www.elastic.co/guide/en/security/current/cspm-get-started.html#cspm-aws-agentless)

## [](https://www.elastic.co/guide/en/security/current/cspm-get-started.html#cspm-aws-agent-based)Agent-based deployment

<div class="book" id="bkmrk--5" lang="en"><div><div class="section"></div></div></div>### [](https://www.elastic.co/guide/en/security/current/cspm-get-started.html#cspm-add-and-name-integration)Add the CSPM integration

<div class="book" id="bkmrk-find%C2%A0integrations%C2%A0in" lang="en"><div class="section">  
<div class="olist orderedlist">1. Find <span class="strong strong">**Integrations**</span> in the navigation menu or use the [global search field](https://www.elastic.co/guide/en/kibana/8.17/introduction.html#kibana-navigation-search).
2. Search for `CSPM`, then click on the result.
3. Click <span class="strong strong">**Add Cloud Security Posture Management (CSPM)**</span>.
4. Select <span class="strong strong">**AWS**</span>, then either <span class="strong strong">**AWS Organization**</span> to onboard multiple accounts, or <span class="strong strong">**Single Account**</span> to onboard an individual account.
5. Give your integration a name that matches the purpose or team of the AWS account/organization you want to monitor, for example, `dev-aws-account`.

</div><div class="position-relative">  
</div></div></div>### [](https://www.elastic.co/guide/en/security/current/cspm-get-started.html#cspm-set-up-cloud-access-section)Set up cloud account access

<div class="book" id="bkmrk--8" lang="en"><div class="section">  
</div></div>The CSPM integration requires access to AWS’s built-in [`SecurityAudit` IAM policy](https://docs.aws.amazon.com/IAM/latest/UserGuide/access_policies_job-functions.html#jf_security-auditor) in order to discover and evaluate resources in your cloud account. There are several ways to provide access.

For most use cases, the simplest option is to use AWS CloudFormation to automatically provision the necessary resources and permissions in your AWS account. This method, as well as several manual options, are described below.

### [](https://www.elastic.co/guide/en/security/current/cspm-get-started.html#cspm-set-up-cloudformation)CloudFormation (recommended)

<div class="book" id="bkmrk-in-the%C2%A0add-cloud-sec" lang="en"><div class="section">  
<div class="olist orderedlist">1. In the <span class="strong strong">**Add Cloud Security Posture Management (CSPM) integration**</span> menu, under <span class="strong strong">**Setup Access**</span>, select <span class="strong strong">**CloudFormation**</span>.
2. In a new browser tab or window, log in as an admin to the AWS account or organization you want to onboard.
3. Return to your Kibana tab. Click <span class="strong strong">**Save and continue**</span> at the bottom of the page.
4. Review the information, then click <span class="strong strong">**Launch CloudFormation**</span>.
5. A CloudFormation template appears in a new browser tab.
6. For organization-level deployments only, you must enter the ID of the organizational units where you want to deploy into the CloudFormation template’s `OrganizationalUnitIds` field. You can find organizational unit IDs in the AWS console under <span class="strong strong">**AWS Organizations → AWS Accounts**</span> (under each organization’s name). You can also use this field to specify which accounts in your organization to monitor, and which to skip.
7. (Optional) Switch to the AWS region where you want to deploy using the controls in the upper right corner.
8. Tick the checkbox under <span class="strong strong">**Capabilities**</span> to authorize the creation of necessary resources.
    
    <div class="imageblock"><div class="content">![The Add permissions screen in AWS](https://www.elastic.co/guide/en/security/current/images/cspm-cloudformation-template.png)</div></div>
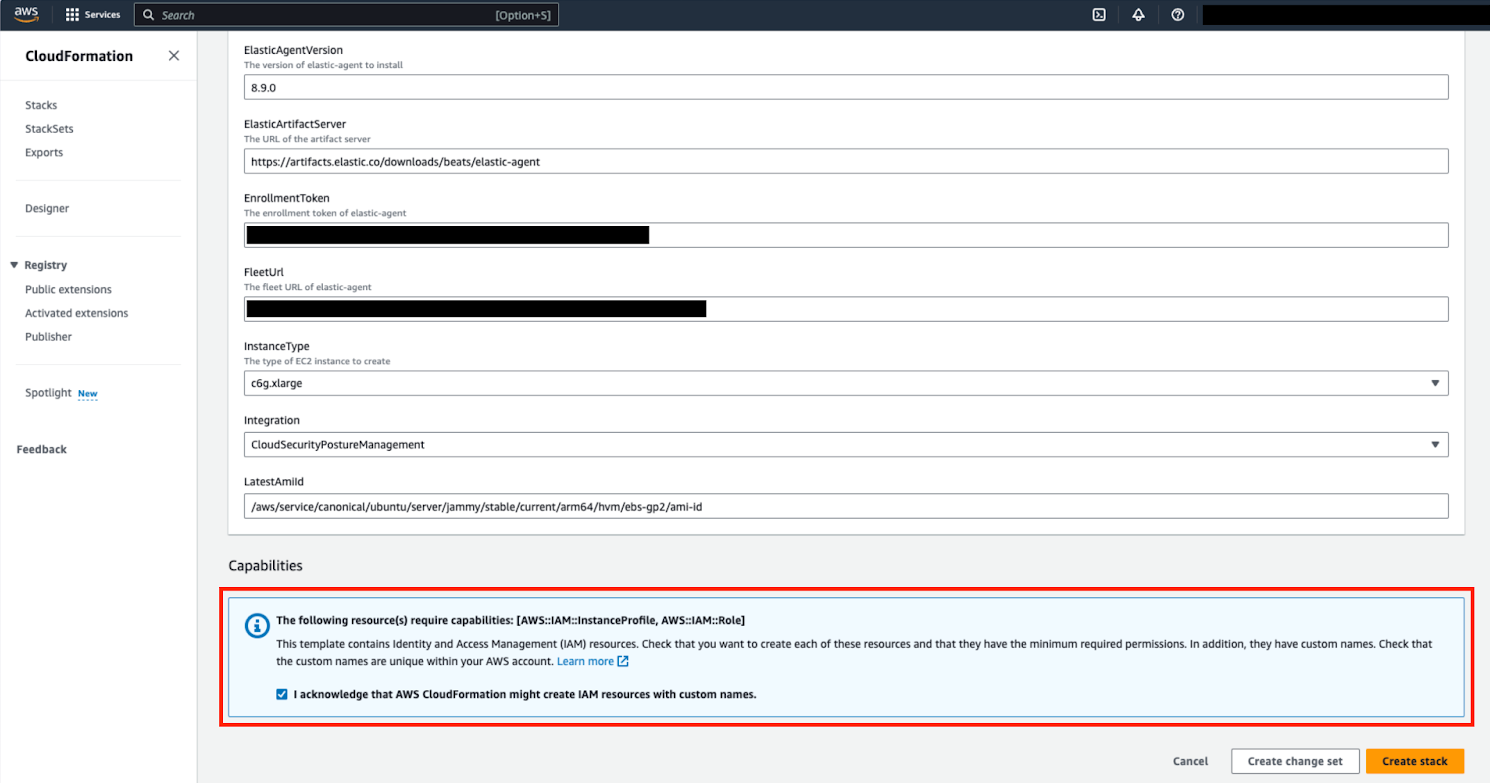
9. At the bottom of the template, select <span class="strong strong">**Create stack**</span>.

</div></div></div>When you return to Kibana, click <span class="strong strong">**View assets**</span> to review the data being collected by your new integration.

### [](https://www.elastic.co/guide/en/security/current/cspm-get-started.html#cspm-setup-organization-manual)Manual authentication for organization-level onboarding

<div class="book" id="bkmrk--11" lang="en"><div class="section"></div></div>If you’re onboarding a single account instead of an organization, skip this section.

When using manual authentication to onboard at the organization level, you need to configure the necessary permissions using the AWS console for the organization where you want to deploy:

<div class="book" id="bkmrk-in-the-organization%E2%80%99" lang="en"><div><div class="section"><div class="ulist itemizedlist">- In the organization’s management account (root account), create an IAM role called `cloudbeat-root` (the name is important). The role needs several policies:
    
    <div class="ulist itemizedlist">
    - The following inline policy:
    
    </div>

</div><details><summary class="title">Click to expand policy</summary>

```
```

</details><div class="ulist itemizedlist">- The following trust policy:

</div><details><summary class="title">Click to expand policy</summary>

```
```

</details><div class="ulist itemizedlist">- The AWS-managed `SecurityAudit` policy.

</div><div class="important admon"><div class="icon">  
</div><div class="admon_content">  
</div></div></div></div></div>You must replace `<Management account ID>` in the trust policy with your AWS account ID.

<div class="book" id="bkmrk-next%2C-for-each-accou" lang="en"><div><div class="section"><div class="important admon"><div class="admon_content">  
</div></div><div class="ulist itemizedlist">- Next, for each account you want to scan in the organization, create an IAM role named `cloudbeat-securityaudit` with the following policies:
    
    <div class="ulist itemizedlist">
    - The AWS-managed `SecurityAudit` policy.
    - The following trust policy:
    
    </div>

</div><details><summary class="title">Click to expand policy</summary>

```
```

</details><div class="important admon"><div class="icon">  
</div><div class="admon_content">  
</div></div></div></div></div>You must replace `<Management account ID>` in the trust policy with your AWS account ID.

After creating the necessary roles, authenticate using one of the manual authentication methods.

When deploying to an organization using any of the authentication methods below, you need to make sure that the credentials you provide grant permission to assume `cloudbeat-root` privileges.

### [](https://www.elastic.co/guide/en/security/current/cspm-get-started.html#cspm-set-up-manual)Manual authentication methods

<div class="book" id="bkmrk-default-instance-rol" lang="en"><div class="section">  
<div class="ulist itemizedlist">- [Default instance role (recommended)](https://www.elastic.co/guide/en/security/current/cspm-get-started.html#cspm-use-instance-role "Option 1 - Default instance role")
- [Direct access keys](https://www.elastic.co/guide/en/security/current/cspm-get-started.html#cspm-use-keys-directly "Option 2 - Direct access keys")
- [Temporary security credentials](https://www.elastic.co/guide/en/security/current/cspm-get-started.html#cspm-use-temp-credentials "Option 3 - Temporary security credentials")
- [Shared credentials file](https://www.elastic.co/guide/en/security/current/cspm-get-started.html#cspm-use-a-shared-credentials-file "Option 4 - Shared credentials file")
- [IAM role Amazon Resource Name (ARN)](https://www.elastic.co/guide/en/security/current/cspm-get-started.html#cspm-use-iam-arn "Option 5 - IAM role Amazon Resource Name (ARN)")

</div></div></div>Whichever method you use to authenticate, make sure AWS’s built-in [`SecurityAudit` IAM policy](https://docs.aws.amazon.com/IAM/latest/UserGuide/access_policies_job-functions.html#jf_security-auditor) is attached.

#### [](https://www.elastic.co/guide/en/security/current/cspm-get-started.html#cspm-use-instance-role)Option 1 - Default instance role

If you are deploying to an AWS organization instead of an AWS account, you should already have [created a new role](https://www.elastic.co/guide/en/security/current/cspm-get-started.html#cspm-setup-organization-manual "Manual authentication for organization-level onboarding"), `cloudbeat-root`. Skip to step 2 "Attach your new IAM role to an EC2 instance", and attach this role. You can use either an existing or new EC2 instance.

Follow AWS’s [IAM roles for Amazon EC2](https://docs.aws.amazon.com/AWSEC2/latest/UserGuide/iam-roles-for-amazon-ec2.html) documentation to create an IAM role using the IAM console, which automatically generates an instance profile.

<div class="book" id="bkmrk-create-an-iam-role%3A-" lang="en"><div><div class="section"><div class="olist orderedlist">1. Create an IAM role:
    
    <div class="olist orderedlist">
    1. In AWS, go to your IAM dashboard. Click <span class="strong strong">**Roles**</span>, then <span class="strong strong">**Create role**</span>.
    2. On the <span class="strong strong">**Select trusted entity**</span> page, under <span class="strong strong">**Trusted entity type**</span>, select <span class="strong strong">**AWS service**</span>.
    3. Under <span class="strong strong">**Use case**</span>, select <span class="strong strong">**EC2**</span>. Click <span class="strong strong">**Next**</span>.
        
        <div class="imageblock"><div class="content">![The Select trusted entity screen in AWS](https://www.elastic.co/guide/en/security/current/images/cspm-aws-auth-1.png)</div></div>
    4. On the <span class="strong strong">**Add permissions**</span> page, search for and select `SecurityAudit`. Click <span class="strong strong">**Next**</span>.
        
        <div class="imageblock"><div class="content">![The Add permissions screen in AWS](https://www.elastic.co/guide/en/security/current/images/cspm-aws-auth-2.png)</div></div>
    5. On the <span class="strong strong">**Name, review, and create**</span> page, name your role, then click <span class="strong strong">**Create role**</span>.
    
    </div>
2. Attach your new IAM role to an EC2 instance:
    
    <div class="olist orderedlist">
    1. In AWS, select an EC2 instance.
    2. Select <span class="strong strong">**Actions &gt; Security &gt; Modify IAM role**</span>.
        
        <div class="imageblock"><div class="content">![The EC2 page in AWS](https://www.elastic.co/guide/en/security/current/images/cspm-aws-auth-3.png)</div></div>
    3. On the <span class="strong strong">**Modify IAM role**</span> page, search for and select your new IAM role.
    4. Click <span class="strong strong">**Update IAM role**</span>.
    5. Return to Kibana and [finish manual setup](https://www.elastic.co/guide/en/security/current/cspm-get-started.html#cspm-finish-manual "Finish manual setup").
    
    </div>

</div></div></div></div>Make sure to deploy the CSPM integration to this EC2 instance. When completing setup in Kibana, in the <span class="strong strong">**Setup Access\* section, select \*Assume role**</span>. Leave <span class="strong strong">**Role ARN**</span> empty for agentless deployments. For agent-based deployments, leave it empty unless you want to specify a role the Elastic Agent should assume instead of the default role for your EC2 instance. Click <span class="strong strong">**Save and continue**</span>.

#### [](https://www.elastic.co/guide/en/security/current/cspm-get-started.html#cspm-use-keys-directly)Option 2 - Direct access keys

Access keys are long-term credentials for an IAM user or AWS account root user. To use access keys as credentials, you must provide the `Access key ID` and the `Secret Access Key`. After you provide credentials, [finish manual setup](https://www.elastic.co/guide/en/security/current/cspm-get-started.html#cspm-finish-manual "Finish manual setup").

For more details, refer to [Access Keys and Secret Access Keys](https://docs.aws.amazon.com/general/latest/gr/aws-sec-cred-types.html).

You must select <span class="strong strong">**Programmatic access**</span> when creating the IAM user.

#### [](https://www.elastic.co/guide/en/security/current/cspm-get-started.html#cspm-use-temp-credentials)Option 3 - Temporary security credentials

You can configure temporary security credentials in AWS to last for a specified duration. They consist of an access key ID, a secret access key, and a session token, which is typically found using `GetSessionToken`.

Because temporary security credentials are short term, once they expire, you will need to generate new ones and manually update the integration’s configuration to continue collecting cloud posture data. Update the credentials before they expire to avoid data loss.

IAM users with multi-factor authentication (MFA) enabled need to submit an MFA code when calling `GetSessionToken`. For more details, refer to AWS’s [Temporary Security Credentials](https://docs.aws.amazon.com/IAM/latest/UserGuide/id_credentials_temp.html) documentation.

You can use the AWS CLI to generate temporary credentials. For example, you could use the following command if you have MFA enabled:

<div class="book" id="bkmrk--16" lang="en"><div><div class="section"><div class="pre_wrapper lang-console"><div class="console_code_copy" title="Copy to clipboard">  
</div></div></div></div></div>```
sts get-session-token --serial-number arn:aws:iam::1234:mfa/your-email@example.com --duration-seconds 129600 --token-code 123456
```

<div class="book" id="bkmrk-copy-as-curltry-in-e" lang="en"><div><div class="section"><div class="pre_wrapper lang-console"></div><div class="console_widget" data-snippet="snippets/9.console"><div class="u-space-between"><div>  
</div><div class="u-space-between"><a class="sense_widget copy_as_curl">Copy as curl</a>[Try in Elastic](http://localhost:5601/zzz/app/kibana#/dev_tools/console?load_from=https://www.elastic.co/guide/en/security/current/snippets/9.console "Try in Elastic")<a class="console_settings" title="Configure Console URL"> </a></div></div></div></div></div></div>The output from this command includes the following fields, which you should provide when configuring the KSPM integration:

<div class="book" id="bkmrk-access-key-id%3A-the-f" lang="en"><div><div class="section"><div class="ulist itemizedlist">- `Access key ID`: The first part of the access key.
- `Secret Access Key`: The second part of the access key.
- `Session Token`: The required token when using temporary security credentials.

</div></div></div></div>After you provide credentials, [finish manual setup](https://www.elastic.co/guide/en/security/current/cspm-get-started.html#cspm-finish-manual "Finish manual setup").

#### [](https://www.elastic.co/guide/en/security/current/cspm-get-started.html#cspm-use-a-shared-credentials-file)Option 4 - Shared credentials file

If you use different AWS credentials for different tools or applications, you can use profiles to define multiple access keys in the same configuration file. For more details, refer to AWS' [Shared Credentials Files](https://docs.aws.amazon.com/sdkref/latest/guide/file-format.html) documentation.

Instead of providing the `Access key ID` and `Secret Access Key` to the integration, provide the information required to locate the access keys within the shared credentials file:

<div class="book" id="bkmrk-credential-profile-n" lang="en"><div><div class="section"><div class="ulist itemizedlist">- `Credential Profile Name`: The profile name in the shared credentials file.
- `Shared Credential File`: The directory of the shared credentials file.

</div></div></div></div>If you don’t provide values for all configuration fields, the integration will use these defaults:

<div class="book" id="bkmrk-if%C2%A0access-key-id%2C%C2%A0se" lang="en"><div><div class="section"><div class="ulist itemizedlist">- If `Access key ID`, `Secret Access Key`, and `ARN Role` are not provided, then the integration will check for `Credential Profile Name`.
- If there is no `Credential Profile Name`, the default profile will be used.
- If `Shared Credential File` is empty, the default directory will be used.
- For Linux or Unix, the shared credentials file is located at `~/.aws/credentials`.

</div></div></div></div>After providing credentials, [finish manual setup](https://www.elastic.co/guide/en/security/current/cspm-get-started.html#cspm-finish-manual "Finish manual setup").

#### [](https://www.elastic.co/guide/en/security/current/cspm-get-started.html#cspm-use-iam-arn)Option 5 - IAM role Amazon Resource Name (ARN)

An IAM role Amazon Resource Name (ARN) is an IAM identity that you can create in your AWS account. You define the role’s permissions. Roles do not have standard long-term credentials such as passwords or access keys. Instead, when you assume a role, it provides temporary security credentials for your session.

To use an IAM role ARN, select <span class="strong strong">**Assume role**</span> under <span class="strong strong">**Preferred manual method**</span>, enter the ARN, and continue to Finish manual setup.

### [](https://www.elastic.co/guide/en/security/current/cspm-get-started.html#cspm-finish-manual)Finish manual setup

Once you’ve provided AWS credentials, under <span class="strong strong">**Where to add this integration**</span>:

If you want to monitor an AWS account or organization where you have not yet deployed Elastic Agent:

<div class="book" id="bkmrk-select%C2%A0new-hosts.-na" lang="en"><div><div class="section"><div class="ulist itemizedlist">- Select <span class="strong strong">**New Hosts**</span>.
- Name the Elastic Agent policy. Use a name that matches the purpose or team of the cloud account or accounts you want to monitor. For example, `dev-aws-account`.
- Click <span class="strong strong">**Save and continue**</span>, then <span class="strong strong">**Add Elastic Agent to your hosts**</span>. The <span class="strong strong">**Add agent**</span> wizard appears and provides Elastic Agent binaries, which you can download and deploy to your AWS account.

</div></div></div></div>If you want to monitor an AWS account or organization where you have already deployed Elastic Agent:

<div class="book" id="bkmrk-select%C2%A0existing-host" lang="en"><div><div class="section"><div class="ulist itemizedlist">- Select <span class="strong strong">**Existing hosts**</span>.
- Select an agent policy that applies the AWS account you want to monitor.
- Click <span class="strong strong">**Save and continue**</span>.

</div></div></div></div>source: <span style="color: rgb(53, 152, 219);">*https://www.elastic.co/guide/en/security/current/cspm-get-started.html*</span>