# AQUILA CSPM - AWS Integration
#### [](https://www.elastic.co/guide/en/security/current/cspm-get-started.html#cspm-overview)**Overview**
This page explains how to get started monitoring the security posture of your cloud assets using the Cloud Security Posture Management (CSPM) feature.
#### [](https://www.elastic.co/guide/en/security/current/cspm-get-started.html#cspm-set-up-cloud-access-section)**Set up cloud account access**
The CSPM integration requires access to AWS’s built-in [`SecurityAudit` IAM policy](https://docs.aws.amazon.com/IAM/latest/UserGuide/access_policies_job-functions.html#jf_security-auditor) in order to discover and evaluate resources in your cloud account. To provide access we need:
- **IAM Role**
- **[Direct access keys](https://www.elastic.co/guide/en/security/current/cspm-get-started.html#cspm-use-keys-directly "Option 2 - Direct access keys")**
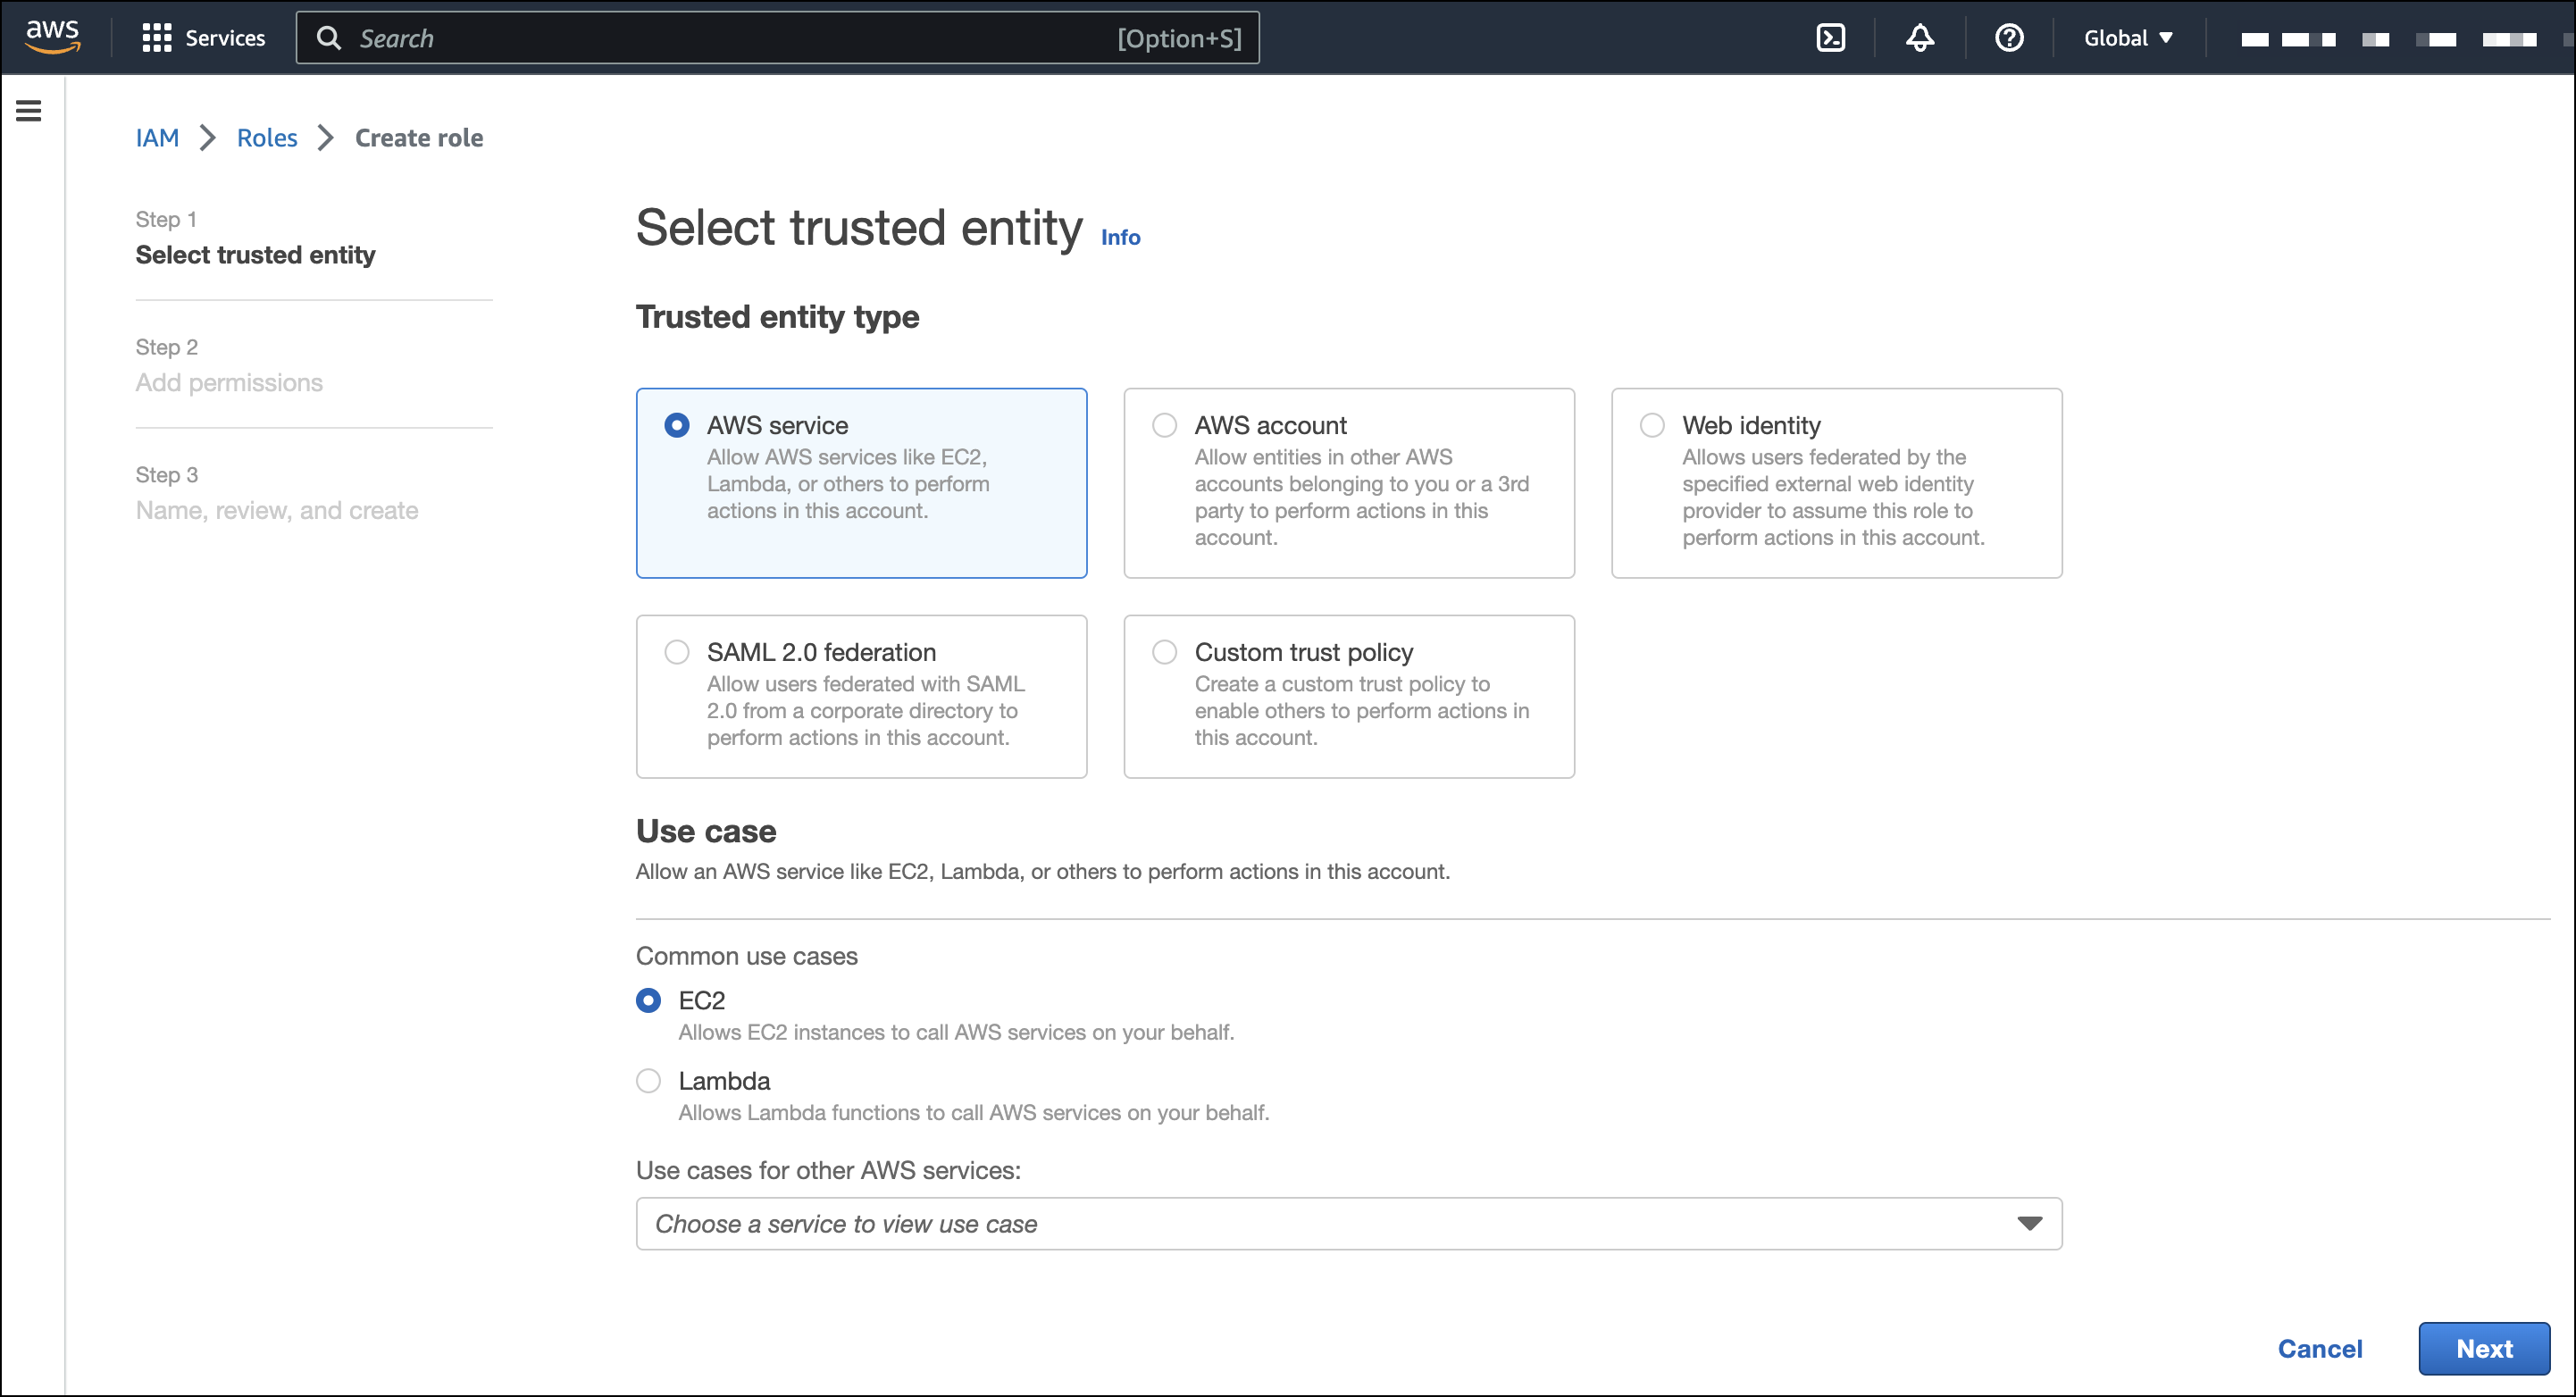
1.
Create an IAM role:
1.
In AWS, go to your IAM dashboard. Click **Roles**, then **Create role**.
2.
On the **Select trusted entity** page, under **Trusted entity type**, select **AWS service**.
3.
Under **Use case**, select **EC2**. Click **Next**.
4.
On the **Add permissions** page, search for and select `SecurityAudit`. Click **Next**.
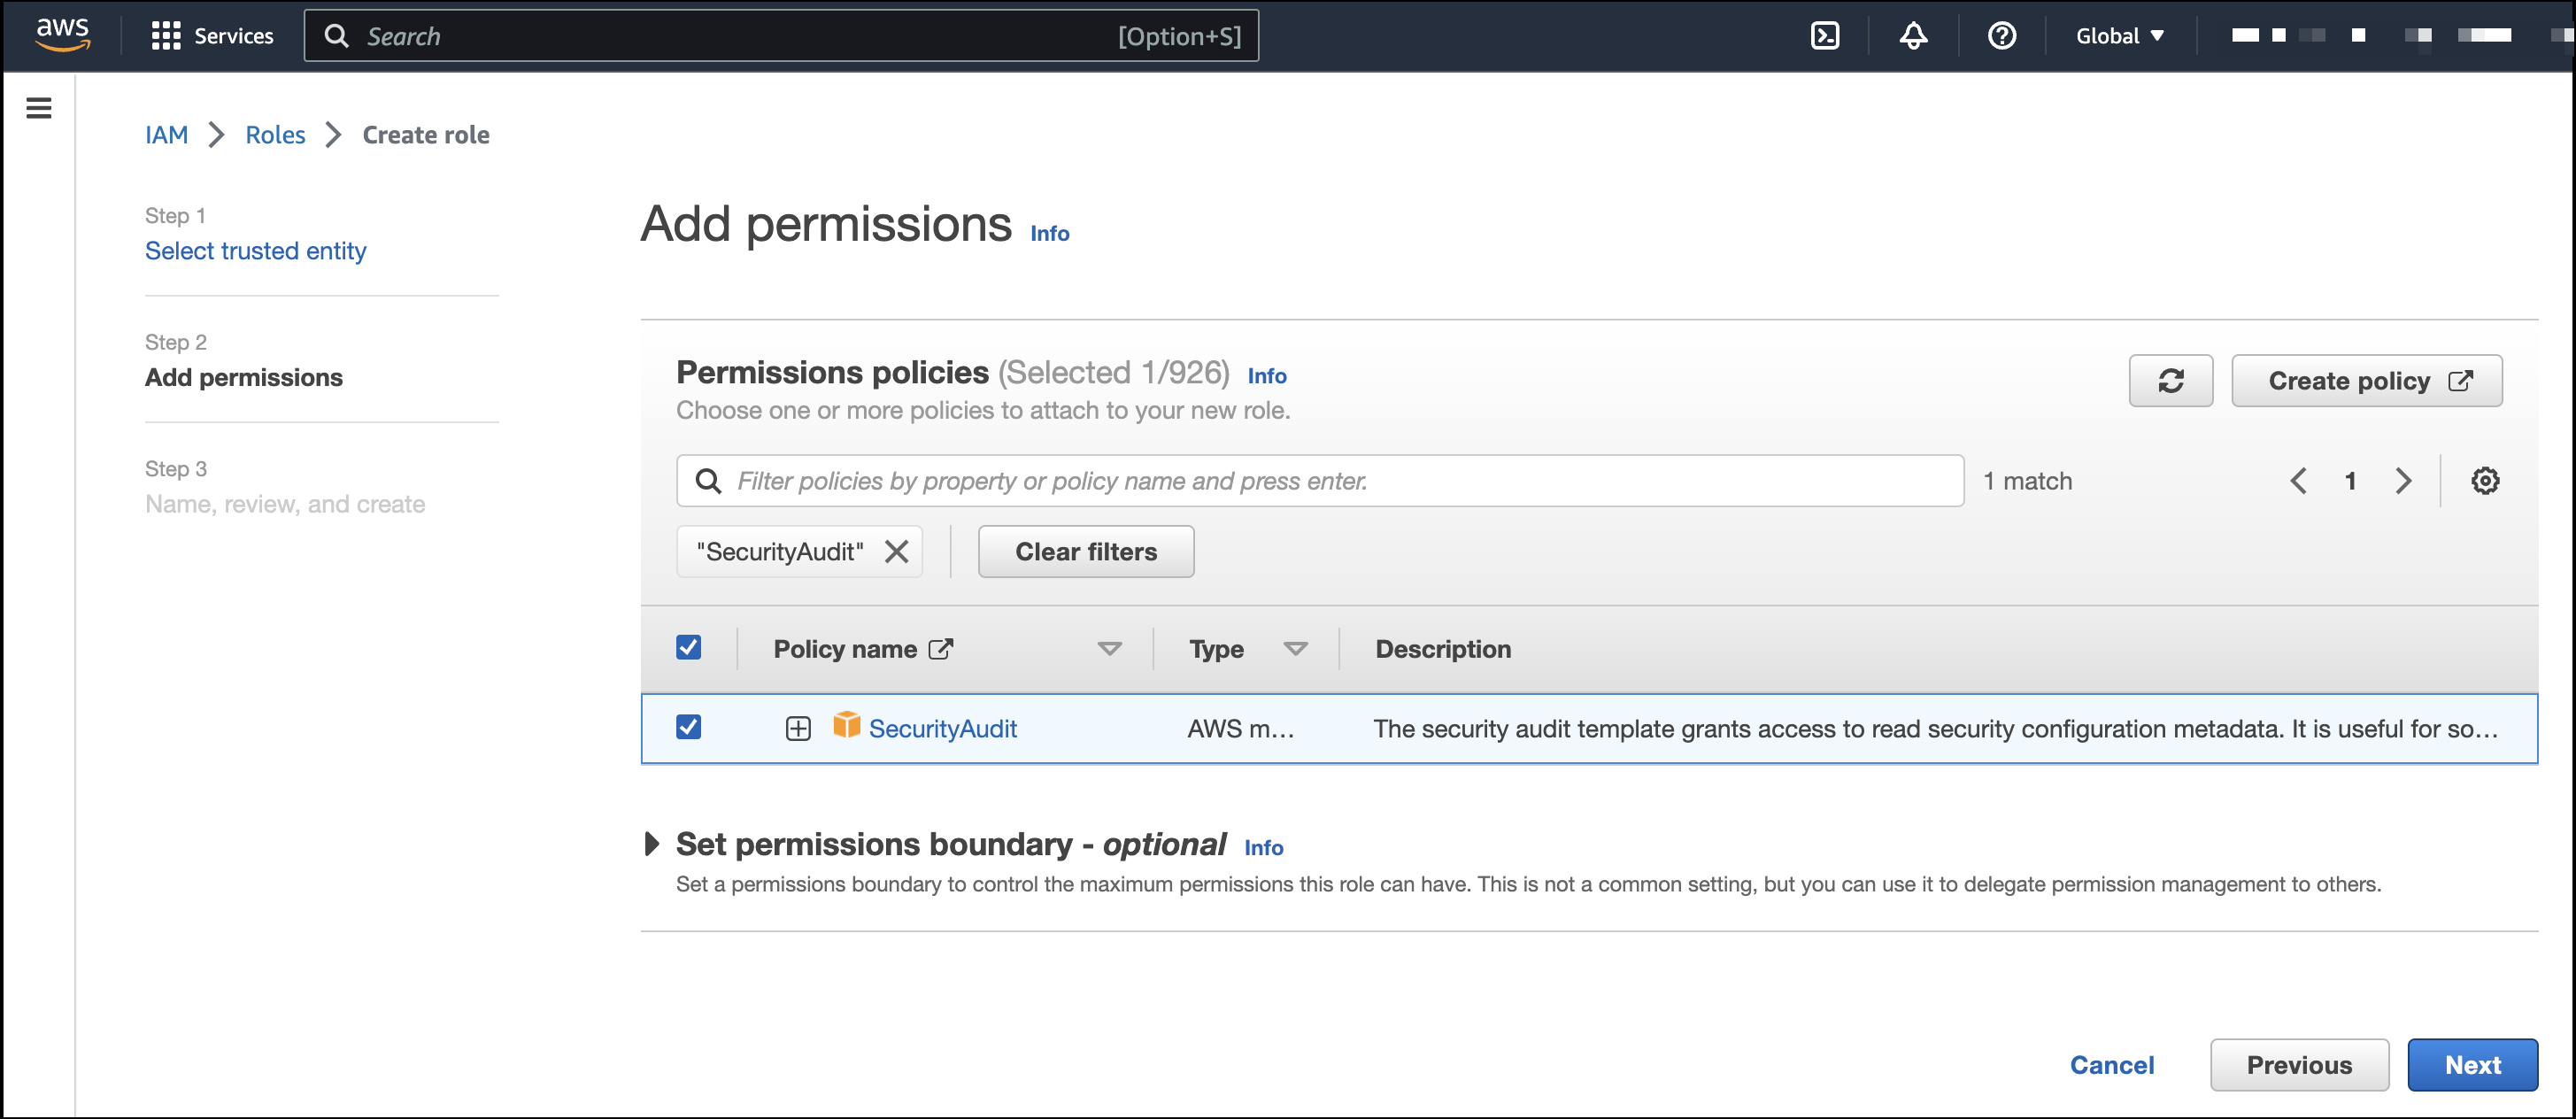
5.
On the **Name, review, and create** page, name your role, then click **Create role**.
2.
Attach your new IAM role to an EC2 instance:
1.
In AWS, select an EC2 instance.
2.
Select **Actions > Security > Modify IAM role**.
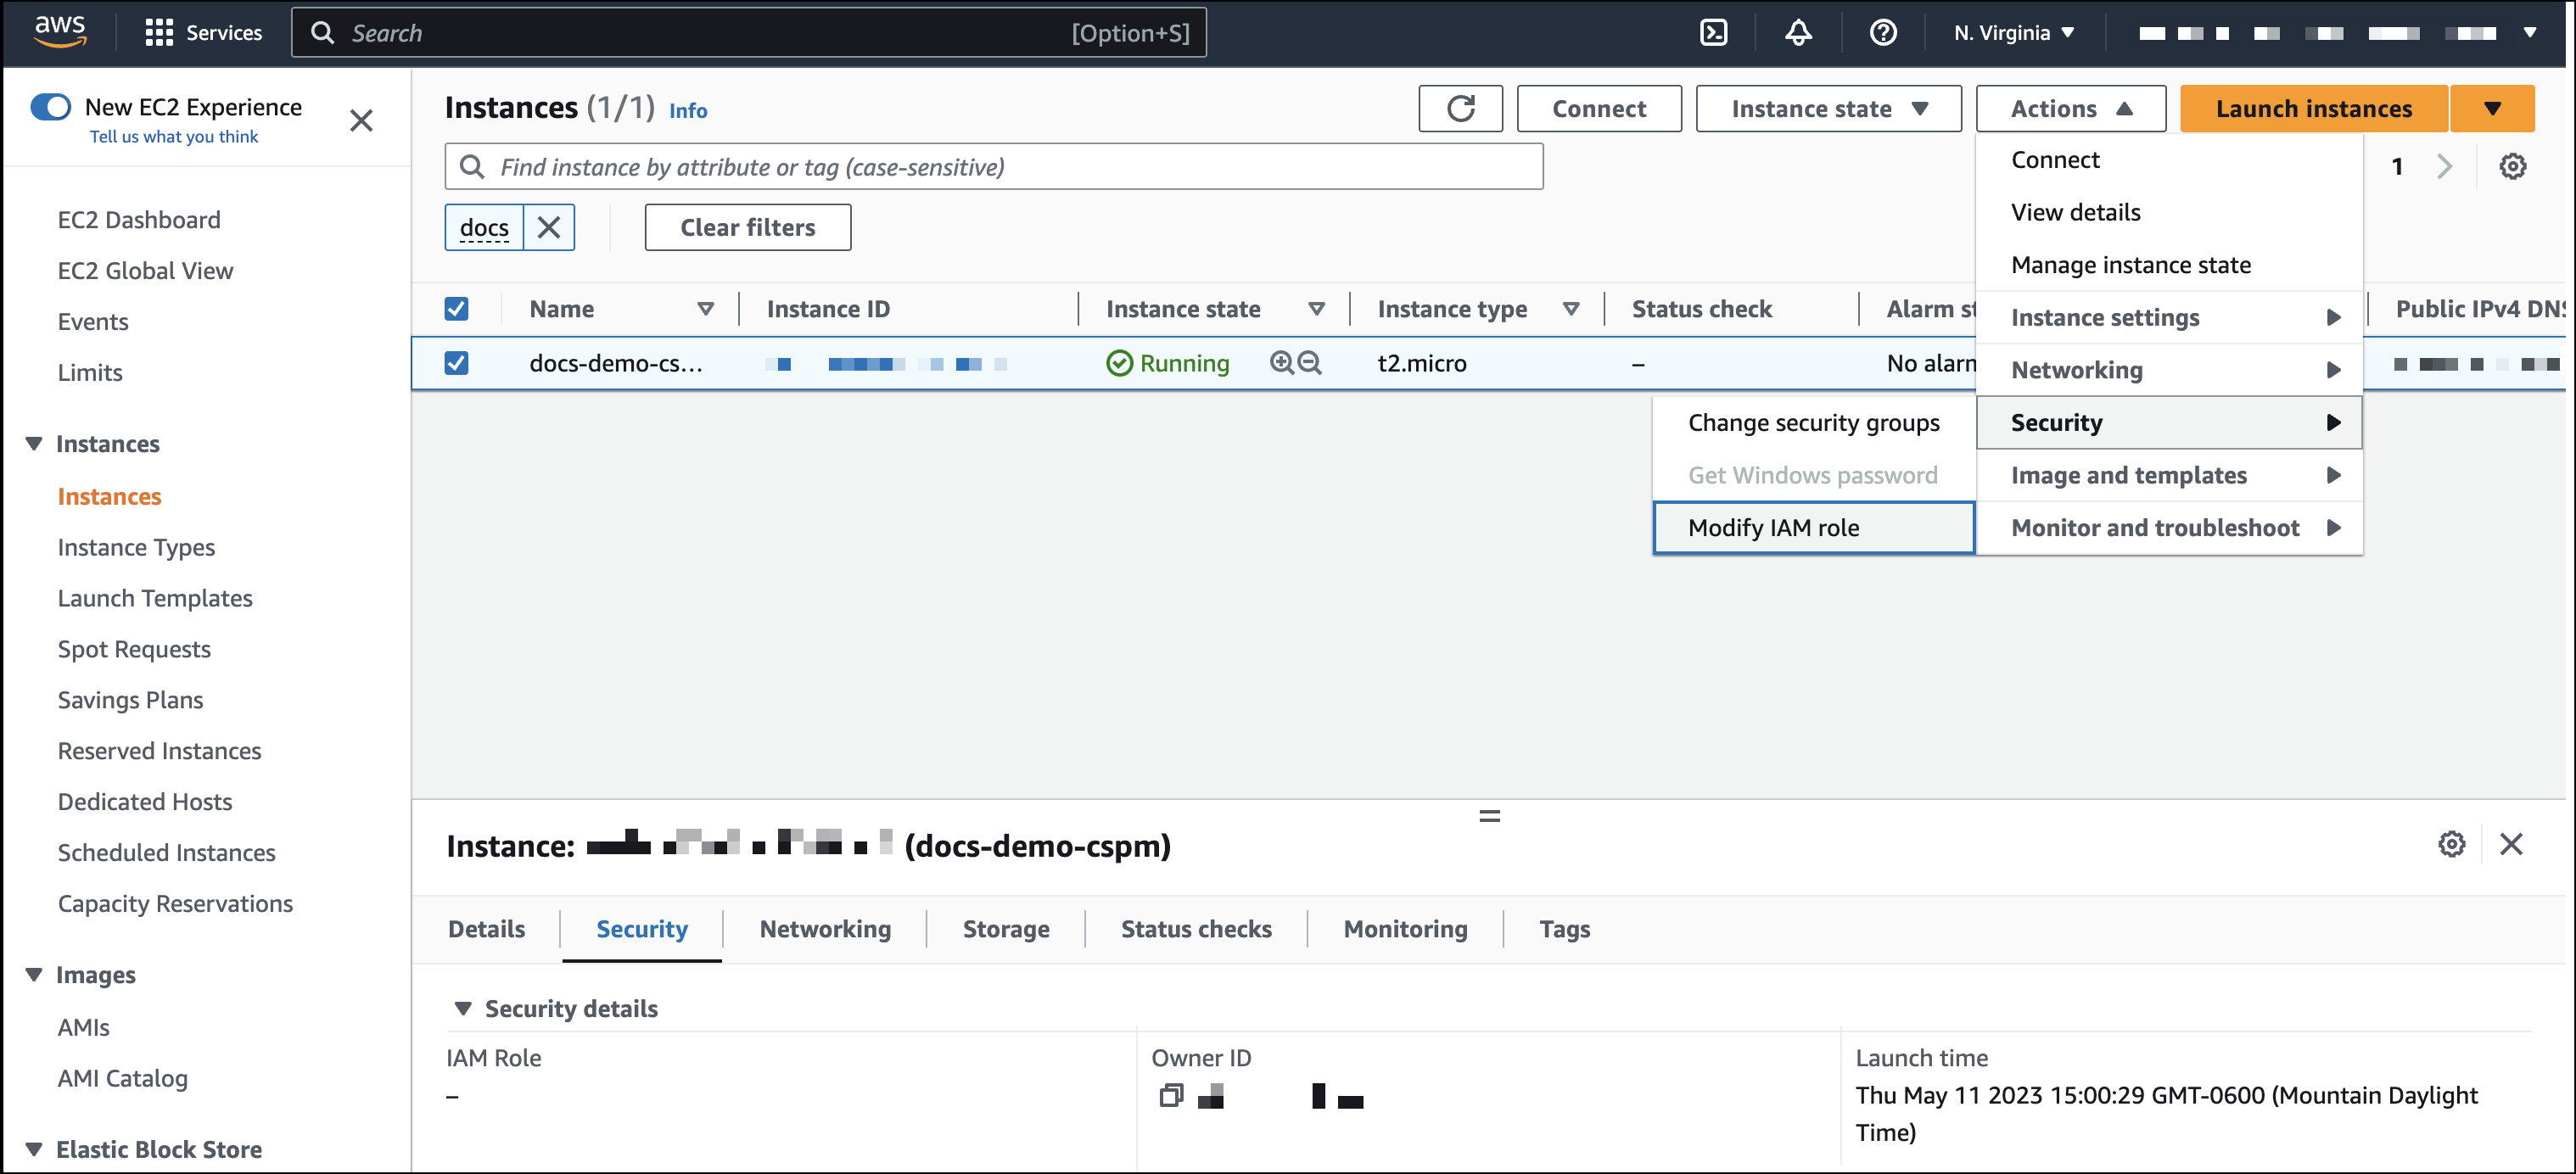
3.
On the **Modify IAM role** page, search for and select your new IAM role.
4.
Click **Update IAM role**.
- `Access key ID`: The first part of the access key.
- `Secret Access Key`: The second part of the access key.
**Please provide the following information to CyTech Support: **
- **Access key ID**
- **Secret Access Key**
#### **How to integrate to AQUILA CSPM Module**
##### **Pre-requisites**
1. **Access to CyTech - AQUILA**
- Only users assigned the **"Owner"** or **"Admin"** role can access the Log Collector installation resources within the platform.
**To navigate to CSPM Module please follow the instructions below:**
**Step 1: Log in to CyTech - AQUILA. Click here --> [AQUILACYBER.ai](https://aquilacyber.ai/overview-v3/dashboard/maindashboard)**
**Step 2: Click on Cyber Monitoring.**
[](https://cytechint-docs-bookstack.s3.amazonaws.com/uploads/images/gallery/2025-06/hItzqzN09q61CMZZ-image.png)
**Step 3: Choose Cloud Security Posture Management (CSPM).**
[](https://cytechint-docs-bookstack.s3.amazonaws.com/uploads/images/gallery/2025-06/EbsP1Kz74gmIWnyZ-image.png)
**Step 4: Click the "Let's Go" or "Onboard CSPM" icon to launch installation window.**
[](https://cytechint-docs-bookstack.s3.amazonaws.com/uploads/images/gallery/2025-06/h53Z6TJIUeSrsoc5-image.png)
**Step 5: Click "Let's go" to start the integration process.**
[](https://cytechint-docs-bookstack.s3.amazonaws.com/uploads/images/gallery/2025-06/7DPNcbHQ3TI5nSmY-image.png)
**Step 6: Choose your log collector. If you haven't installed a log collector yet choose "New Log Collector" click here -->** [Log Collector Installation](https://docs.cytechint.io/books/log-collector-installations). **If you have already have an existing log collector choose "Current Log Collector" and click "Next".**
[](https://cytechint-docs-bookstack.s3.amazonaws.com/uploads/images/gallery/2025-06/YmaKgMpQPUBQOutG-image.png)
**Step 7: Click "Next" if the requirements are met.**
[](https://cytechint-docs-bookstack.s3.amazonaws.com/uploads/images/gallery/2025-06/9XREDs3GMrovq966-image.png)
**Step 8: Choose your current log collector. This will collect the logs coming from your log sources.**
[](https://cytechint-docs-bookstack.s3.amazonaws.com/uploads/images/gallery/2025-06/6JtsLkQBByfBwsLN-image.png)
**Step 9: Choose Amazon Web Services and click "Next" to proceed.**
[](https://cytechint-docs-bookstack.s3.amazonaws.com/uploads/images/gallery/2025-06/tnsMSyjrIYJJrPQC-image.png)
**Step 10: Input all the required credentials from the previous AWS configurations and click "Next" to initiate the integration process. Wait for couple of minutes until a success window shows up.**
[](https://cytechint-docs-bookstack.s3.amazonaws.com/uploads/images/gallery/2025-06/W3Utk1FQhuv2qKTK-image.png)
**Please refer to this manual for the full guidelines of our CSPM Module. *click here-->* [CyTech - AQUILA CSPM Manual ](https://docs.cytechint.io/books/log-collector-installations/page/cytech-aquila-cloud-security-posture-management-cspm-module)**
[](https://www.elastic.co/guide/en/security/current/cspm-get-started.html#cspm-finish-manual)
*If you need further assistance, kindly contact our support at **[support@cytechint.com](mailto:info@cytechint.com)** for prompt assistance and guidance.*