# Log Collector Installation Old - Windows

#### **Log Collector Installation in CISO Workplace**

This guide provides step-by-step instructions for installing the Elastic Agent as a log collector in the CISO Workplace environment. By following these steps, you’ll set up a secure, automated method for gathering and managing system logs, enabling centralized monitoring and analysis essential for cybersecurity operations.

##### **Pre-requisites:**

- Access to CISO Workplace (Only users with "Owner" or "Admin" role are able to access the Log Collector Installation information).

##### **Steps to Add Log Collector**  


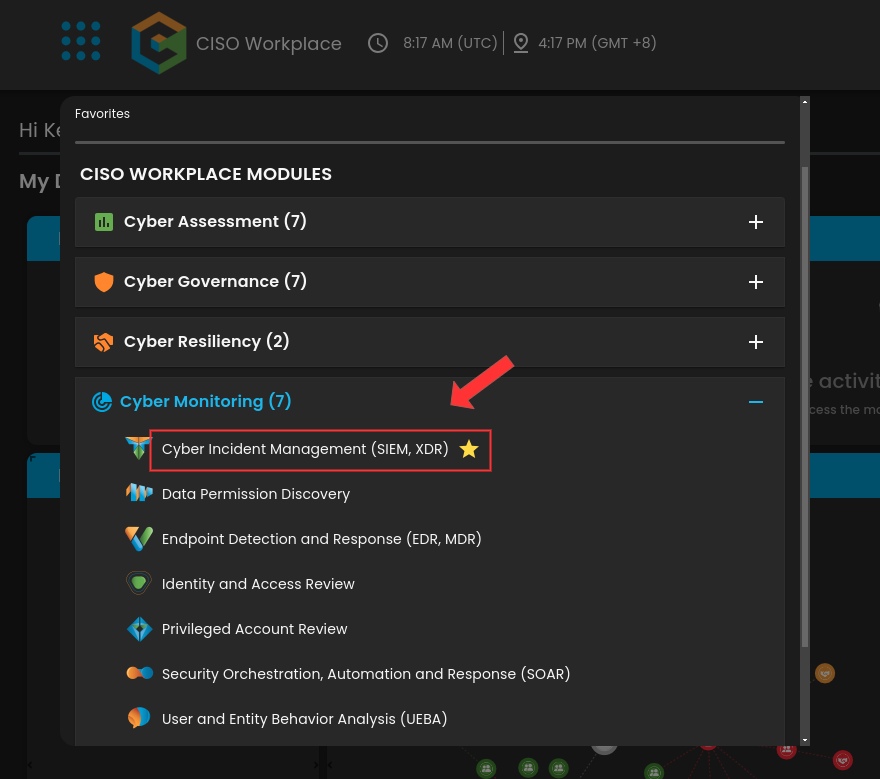
1\. Go to the CIM Module.

<div drawio-diagram="1769"><img src="https://cytechint-docs-bookstack.s3.amazonaws.com/uploads/images/drawio/2024-11/BBp7x6YhSmUt32dO-drawing-30-1730881214.png" alt=""/></div>

2\. In the CIM Dashboard, click on the button that says "Let's Go". This will then display the Windows log collector installation.

[![image.png](https://cytechint-docs-bookstack.s3.amazonaws.com/uploads/images/gallery/2024-11/scaled-1680-/5Q1ryeTb5wANyXKn-image.png)](https://cytechint-docs-bookstack.s3.amazonaws.com/uploads/images/gallery/2024-11/5Q1ryeTb5wANyXKn-image.png)

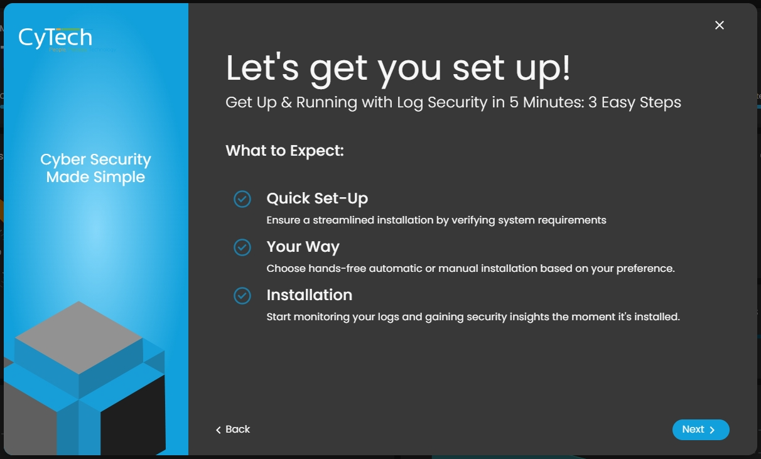
3\. Once the installation display is shown, click next to proceed.

<div ccp_infra_copy_id="" ccp_infra_timestamp="1730881565624" ccp_infra_user_hash="1723791988" ccp_infra_version="3" data-ccp-timestamp="1730881565624" id="bkmrk--3">![](https://cytechint-docs-bookstack.s3.amazonaws.com/uploads/images/gallery/2024-11/1z9ufS7c8EcEorjm-embedded-image-tyuruc2r.png)</div><div ccp_infra_copy_id="" ccp_infra_timestamp="1730881565624" ccp_infra_user_hash="1723791988" ccp_infra_version="3" data-ccp-timestamp="1730881565624" id="bkmrk-4.-carefully-review-">4. Carefully review the system requirements for your operating system to ensure compatibility and prevent potential issues during installation or usage. It is important to verify these prerequisites before proceeding.</div>[![image.png](https://cytechint-docs-bookstack.s3.amazonaws.com/uploads/images/gallery/2024-11/scaled-1680-/cbFz7qFNP6EGR4c1-image.png)](https://cytechint-docs-bookstack.s3.amazonaws.com/uploads/images/gallery/2024-11/cbFz7qFNP6EGR4c1-image.png)

5\. From the options, select the Automatic installation option.

<div ccp_infra_copy_id="" ccp_infra_timestamp="1730881819587" ccp_infra_user_hash="1723791988" ccp_infra_version="3" data-ccp-timestamp="1730881819587" id="bkmrk--5">![](https://cytechint-docs-bookstack.s3.amazonaws.com/uploads/images/gallery/2024-11/ryU2RF56Oifes30q-embedded-image-tjqvmgjw.png)</div><div ccp_infra_copy_id="" ccp_infra_timestamp="1730881819587" ccp_infra_user_hash="1723791988" ccp_infra_version="3" data-ccp-timestamp="1730881819587" id="bkmrk-6.-carefully-follow-">
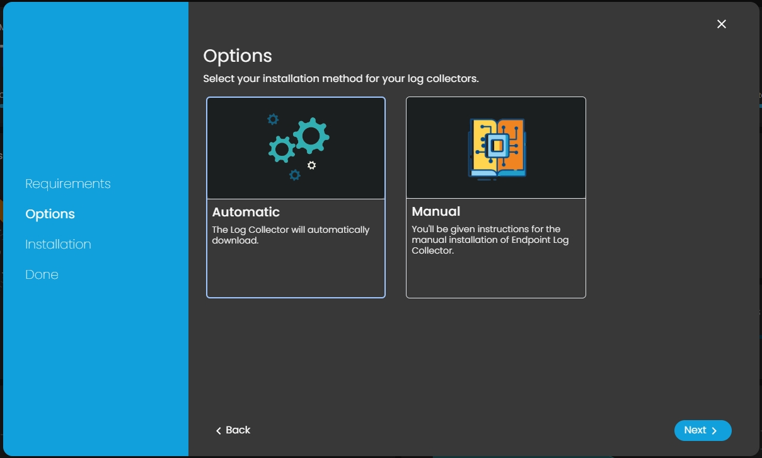
6. Carefully follow the instructions for the automatic installation.</div>6a. **Download the Windows Installer**

<div ccp_infra_copy_id="" ccp_infra_timestamp="1730881819587" ccp_infra_user_hash="1723791988" ccp_infra_version="3" data-ccp-timestamp="1730881819587" id="bkmrk-click-on-the-%22downlo">- Click on the **"Download Installer"** button to download the Windows MSI Package for Elastic Agent.
- The URL can also be found on [https://artifacts.elastic.co/downloads/beats/elastic-agent/elastic-agent-8.15.1-windows-x86\_64.msi](https://artifacts.elastic.co/downloads/beats/elastic-agent/elastic-agent-8.15.1-windows-x86_64.msi)

</div>6b. Copy the command displayed on the installation page. You will need this command to complete the installation process for the log collector in the next steps.

[![image.png](https://cytechint-docs-bookstack.s3.amazonaws.com/uploads/images/gallery/2024-11/scaled-1680-/DCNh3iJZPtzAN5OA-image.png)](https://cytechint-docs-bookstack.s3.amazonaws.com/uploads/images/gallery/2024-11/DCNh3iJZPtzAN5OA-image.png)

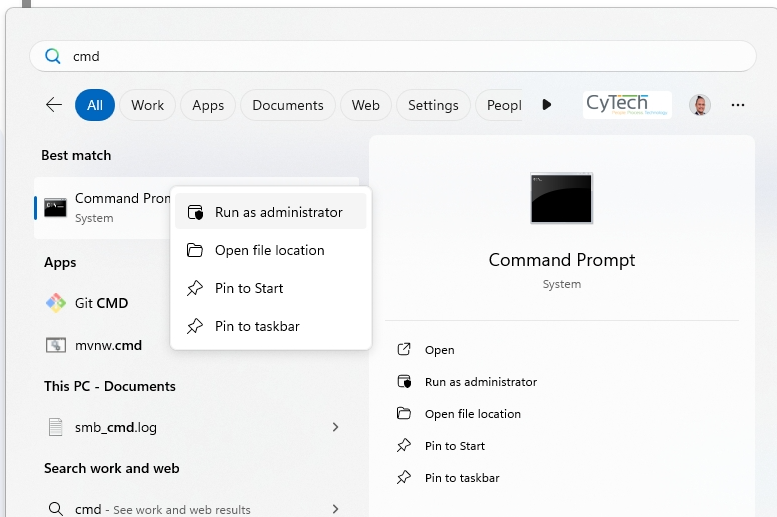
7\. Open the Command Prompt and run as Administrator.

<div ccp_infra_copy_id="" ccp_infra_timestamp="1730882195141" ccp_infra_user_hash="1723791988" ccp_infra_version="3" data-ccp-timestamp="1730882195141" id="bkmrk--7">![](https://cytechint-docs-bookstack.s3.amazonaws.com/uploads/images/gallery/2024-11/z5FQsOeeXxZU30eC-embedded-image-xyvnpwia.png)</div><div ccp_infra_copy_id="" ccp_infra_timestamp="1730882195141" ccp_infra_user_hash="1723791988" ccp_infra_version="3" data-ccp-timestamp="1730882195141" id="bkmrk-8.-execute-the-comma">8. Execute the command displayed in **Figure 6b** as shown in the manual.</div><div ccp_infra_copy_id="" ccp_infra_timestamp="1730882195141" ccp_infra_user_hash="1723791988" ccp_infra_version="3" data-ccp-timestamp="1730882195141" id="bkmrk-for-example-%28elastic">For example (elastic-agent-&lt;VERSION&gt;-windows-x86_64.msi INSTALLARGS="--url=&lt;URL&gt; --enrollment-token=&lt;TOKEN&gt;").</div>[![image.png](https://cytechint-docs-bookstack.s3.amazonaws.com/uploads/images/gallery/2024-11/scaled-1680-/Rt6IkauOIW2gGqs5-image.png)](https://cytechint-docs-bookstack.s3.amazonaws.com/uploads/images/gallery/2024-11/Rt6IkauOIW2gGqs5-image.png)

*If you need further assistance, kindly contact our support at <support@cytechint.com> for prompt assistance and guidance.*