For a more detailed report and in-depth analysis, navigate to **CyTech - AQUILA > Cyber Monitoring > Endpoint Detection and Response(EDR)**. This section provides comprehensive visibility into endpoint activity, detection timelines, threat classifications, and response actions to support advanced threat analysis and incident investigation.
[](https://cytechint-docs-bookstack.s3.amazonaws.com/uploads/images/gallery/2025-06/JTplpsqWMr83Ufbi-image.png) [](https://cytechint-docs-bookstack.s3.amazonaws.com/uploads/images/gallery/2025-06/jWMnSkzvcm89lb8x-image.png) [](https://cytechint-docs-bookstack.s3.amazonaws.com/uploads/images/gallery/2025-06/YIdIVQT0fcq3P8IZ-image.png) *If you need further assistance, kindly contact our technical support at **If prompted with a User Account Control (UAC) dialog stating that the app is from an unknown publisher, click **‘Yes’** to allow the installer to make changes and proceed with the installation.
**Step 2:** After the installation finished, the AQUILA Agent would now be displayed on the Desktop, [](https://cytechint-docs-bookstack.s3.amazonaws.com/uploads/images/gallery/2025-08/AMq60ycKzqggJhhj-image.png) **Step 3:** Right click or click Mouse 2 on the AQUILA Agent then run it as Administrator. [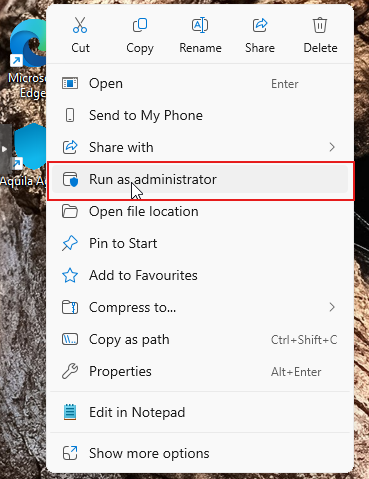](https://cytechint-docs-bookstack.s3.amazonaws.com/uploads/images/gallery/2025-08/J0VjddCPKqLhpYSn-image.png)If prompted with a User Account Control (UAC) dialog stating that the app is from an unknown publisher, click **‘Yes’** to allow the installer to make changes and proceed with the installation.
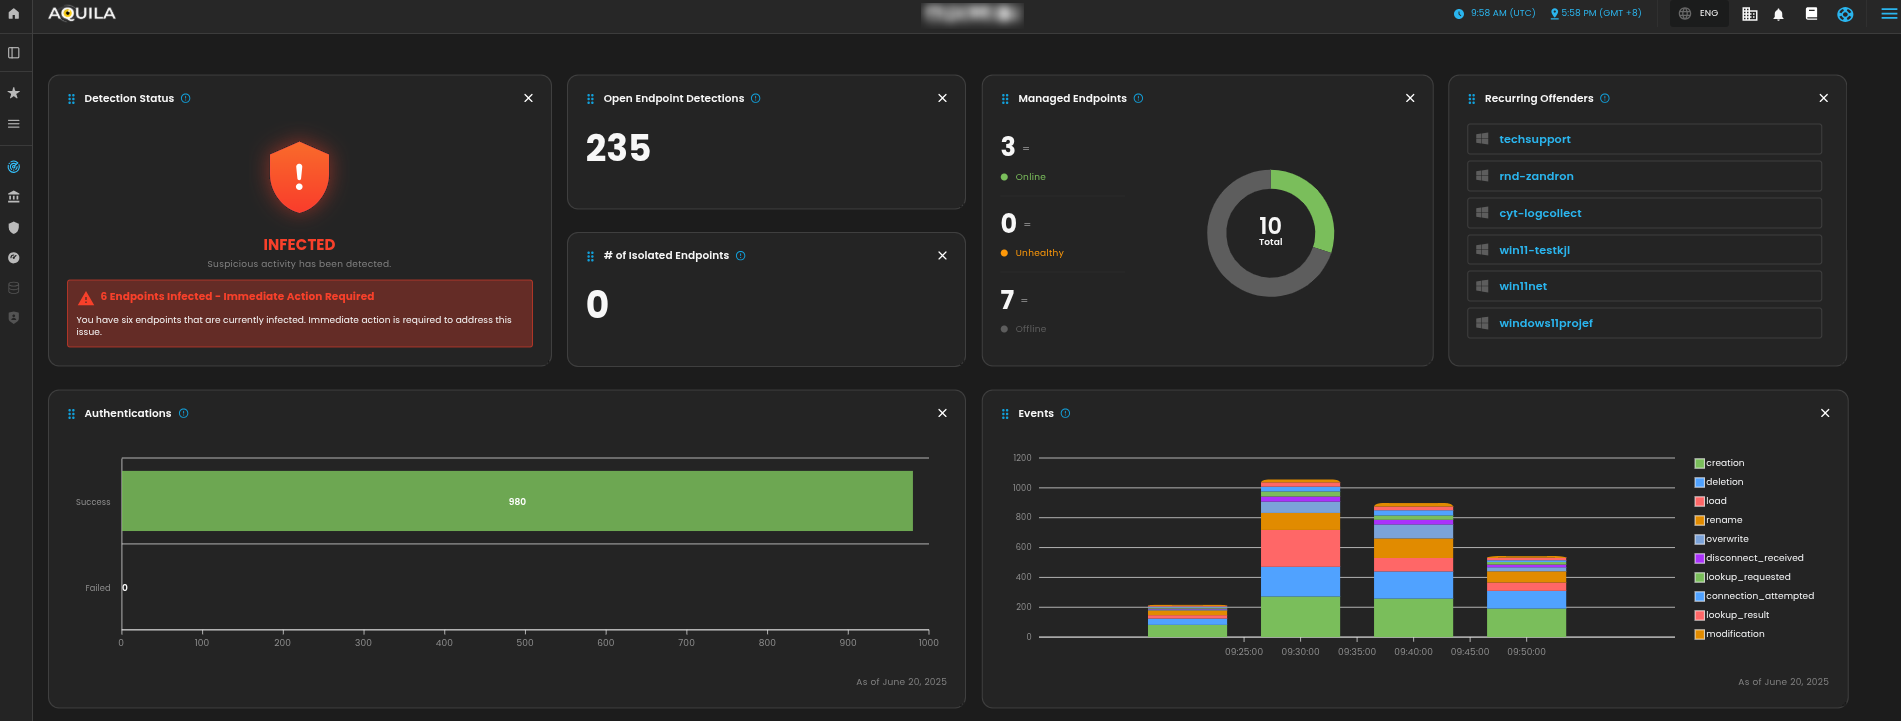
**Step 4:** Proceed with the installation. Click "**Install Agent**" to proceed. Please wait a few minutes for the installation process to complete. This will automatically initiate enrollment into the CyTech - AQUILA platform. [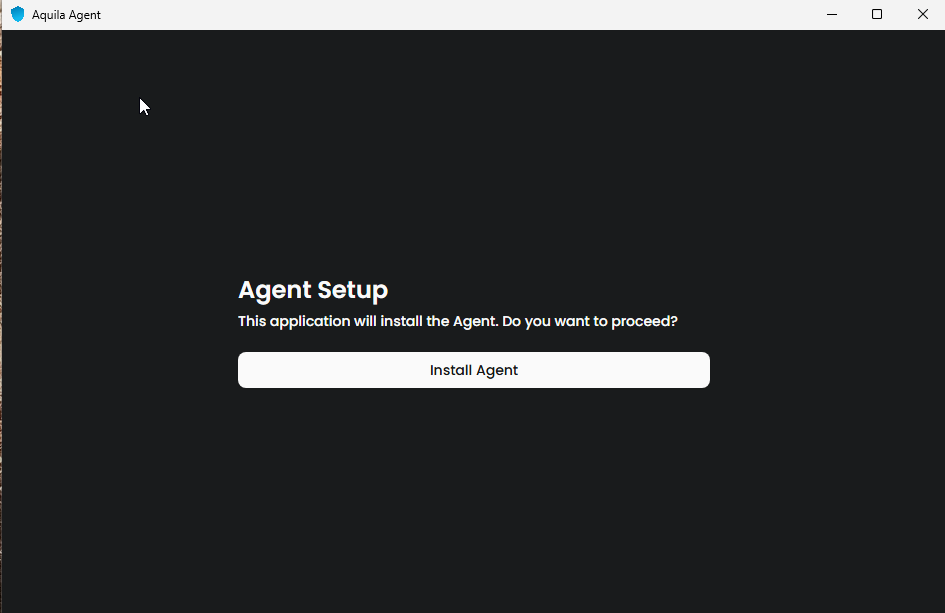](https://cytechint-docs-bookstack.s3.amazonaws.com/uploads/images/gallery/2025-08/8Xr6s80WmC5k2Rfy-image.png) **Step 5:** After successful enrollment, an overview window will be displayed. Please note that it may take some time for the device to reflect an online status. Ensure the device remains connected to the network for the EDR policy to be properly applied. [](https://cytechint-docs-bookstack.s3.amazonaws.com/uploads/images/gallery/2025-06/ln4ghMC9isi5CerI-image.png)The Overview page provides a centralized dashboard displaying all recent detections related to your endpoint devices. This real-time monitoring allows security teams to quickly identify potential threats, analyze attack vectors, and prioritize response efforts based on severity and impact. By consolidating detection data, the Overview page supports proactive threat hunting and continuous endpoint security management as part of a comprehensive cybersecurity monitoring strategy.
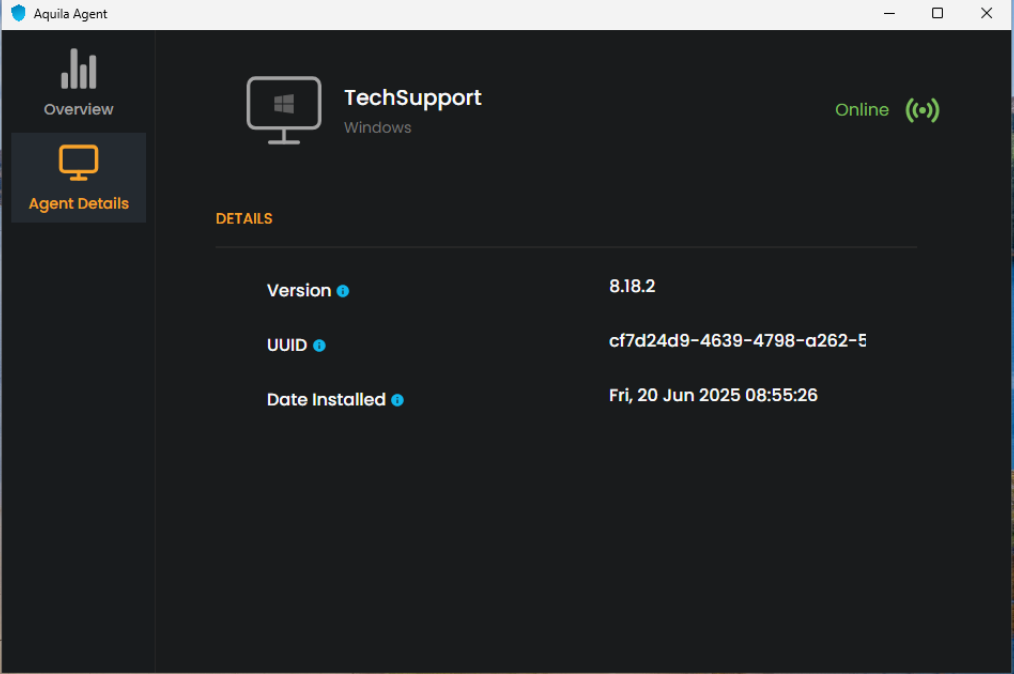
[](https://cytechint-docs-bookstack.s3.amazonaws.com/uploads/images/gallery/2025-06/dU8R6czWUg0E8kGg-image.png)The Agent Details panel allows you to verify the status and identity of your endpoint device.
[](https://cytechint-docs-bookstack.s3.amazonaws.com/uploads/images/gallery/2025-06/n5Jyu4liWfqQERlk-image.png)You may also access AQUILA Agent Secure through the Windows taskbar's side dock panel.
[](https://cytechint-docs-bookstack.s3.amazonaws.com/uploads/images/gallery/2025-06/JUUlbRcGAxMcwrI0-image.png) 7\. **Before you can proceed to the final installation set-up make sure you check off each steps required. Then you can click "Next".** [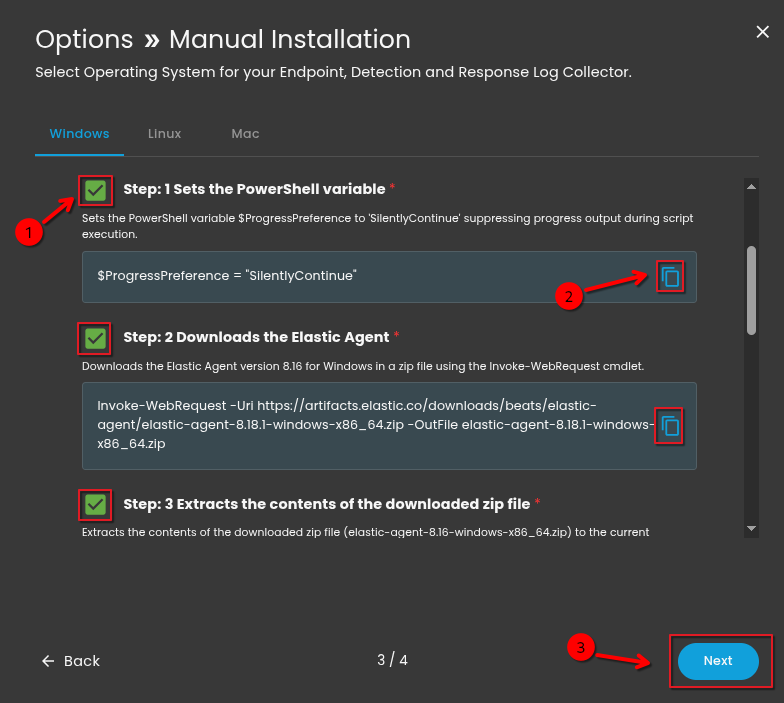](https://cytechint-docs-bookstack.s3.amazonaws.com/uploads/images/gallery/2025-07/cWjeJVZIRWQcoTlL-image.png) 8\. **A new window will appear and will check the log collector status and update the latest installation of EDR agent. Wait for it to finish and after successfull installation the endpoint will displayed in the dashboard.** [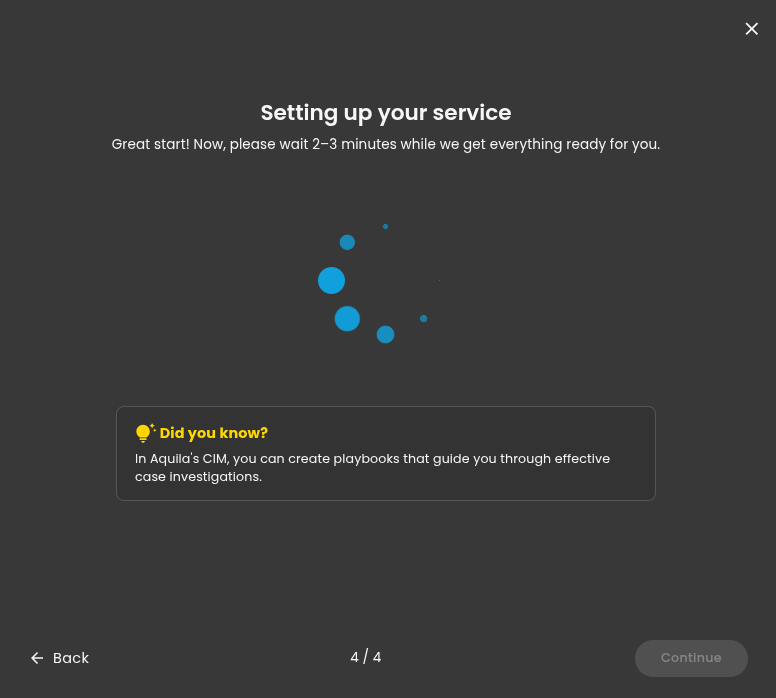](https://cytechint-docs-bookstack.s3.amazonaws.com/uploads/images/gallery/2025-07/D2CsxzzQdp5L2Z6z-image.png) **9. This step confirms the successful installation and enrollment of the EDR Agent with the fleet server.** [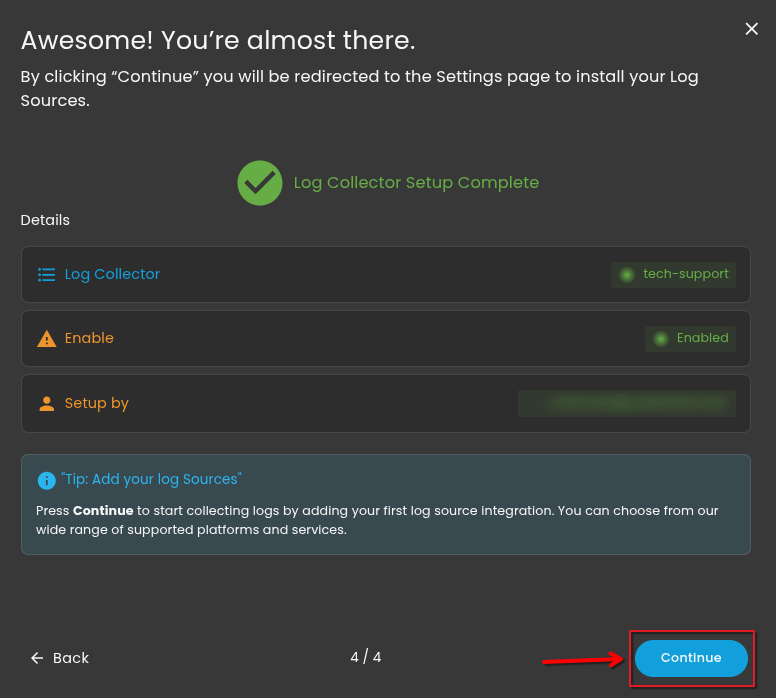](https://cytechint-docs-bookstack.s3.amazonaws.com/uploads/images/gallery/2025-07/jeJm6W66tXfIKCxC-image.png)*\*\*\*If you encounter **Log Collector Setup Failed**. Please click "Retry" and carefully go gack to Steps 5 or 6. You can also try "**Manual**" installation. If issues persist please contact our technical support at **
For a more detailed report and in-depth analysis, navigate to **CyTech - AQUILA > Cyber Monitoring > Endpoint Detection and Response(EDR)**. This section provides comprehensive visibility into endpoint activity, detection timelines, threat classifications, and response actions to support advanced threat analysis and incident investigation.
[](https://cytechint-docs-bookstack.s3.amazonaws.com/uploads/images/gallery/2025-06/JTplpsqWMr83Ufbi-image.png) [](https://cytechint-docs-bookstack.s3.amazonaws.com/uploads/images/gallery/2025-06/jWMnSkzvcm89lb8x-image.png) [](https://cytechint-docs-bookstack.s3.amazonaws.com/uploads/images/gallery/2025-06/YIdIVQT0fcq3P8IZ-image.png) *If you need further assistance, kindly contact our technical support at ***\*\*\*If you encounter **Log Collector Setup Failed**. Please click "Retry" and carefully go back to Step 5 or 6. You can also try "**Manual**" installation. If issues persist, please contact our technical support at **
For a more detailed report and in-depth analysis, navigate to **CyTech - AQUILA > Cyber Monitoring > Endpoint Detection and Response (EDR)**. This section provides comprehensive visibility into endpoint activity, detection timelines, threat classifications, and response actions to support advanced threat analysis and incident investigation.
[](https://cytechint-docs-bookstack.s3.amazonaws.com/uploads/images/gallery/2025-06/JTplpsqWMr83Ufbi-image.png) [](https://cytechint-docs-bookstack.s3.amazonaws.com/uploads/images/gallery/2025-06/jWMnSkzvcm89lb8x-image.png) [](https://cytechint-docs-bookstack.s3.amazonaws.com/uploads/images/gallery/2025-06/YIdIVQT0fcq3P8IZ-image.png) *If you need further assistance, kindly contact our technical support at ****Note: The name of your Endpoint is using the name of your Personal Computer (PC).**
[](https://cytechint-docs-bookstack.s3.amazonaws.com/uploads/images/gallery/2026-01/U5M1OurakBQg9l9M-hehe-4.png) Or the client can access the endpoint in the "**Control Panel**" as well to isolate it or uninstall the Endpoint Detection and Response (EDR) but be wary, **Endpoint Detection and Response (EDR)** is a separate application process of the AQUILA Agent Endpoint therefore do not uninstall the **Endpoint Detection and Response (EDR).** If the client decides to uninstall it, please contact ***| **Protection Type ** | **OS Support ** | **Detect ** | **Prevent** | **Description ** |
| **Malware ** | Windows, macOS, Linux | ✅ | Blocks known malicious executables and scripts at runtime. | |
| **Ransomware ** | Windows | ✅ | Detects rapid file changes and unauthorized encryption activity. | |
| **Memory Threats ** | Windows, macOS, Linux | ✅ | Prevents memory-based attacks like process injection or ROP chains. | |
| **Malicious Behavior ** | Windows, macOS, Linux | ✅ | Stops suspicious techniques such as abnormal child processes or LOLBins. | |
| **Credential Hardening ** | Windows | Enabled | Protects credentials by preventing unauthorized LSASS access. |
| **Event Type ** | **Windows ** | **macOS ** | **Linux ** | **Description ** |
| **API ** | ✅ | – | Logs sensitive API calls that may indicate injection or system tampering. | |
| **DLL & Driver Load ** | ✅ | – | Captures DLL/driver loading to detect unsigned or malicious code injection. | |
| **DNS ** | ✅ | – | Records DNS queries/responses to spot C2, tunneling, or data exfiltration. | |
| **File ** | ✅ | ✅ | ✅ | Monitors file creation, deletion, and modification to detect malware or ransomware. |
| **Network ** | ✅ | ✅ | ✅ | Logs connections, ports, and protocols to uncover C2 traffic or lateral movement. |
| **Process ** | ✅ | ✅ | ✅ | Tracks process execution, parent/child relationships, and suspicious spawns. |
| **Registry ** | ✅ | – | – | Detects persistence or tampering with critical Windows registry keys. |
| **Security ** | ✅ | – | – | Captures login attempts, privilege changes, and policy modifications. |
| **Event Type ** | **Description ** | **Use Case ** | **Example ** |
| **API Events** | Capture system-level API calls made by processes. These events show how applications interact with the OS, libraries, and security-sensitive functions. | Detect process injection, privilege escalation, exploitation attempts, or use of unusual APIs by non-standard processes. | A Microsoft Office process (WINWORD.EXE) invokes VirtualAllocEx and WriteProcessMemory to inject code into another process. |
| **DLL & Driver Load Events** | Record the loading of DLLs into user processes and drivers into the OS kernel. Includes path, signature status, and process context. | Detect unsigned or suspicious DLLs/drivers, DLL search order hijacking, and kernel-level rootkits. | An unsigned driver is loaded during system boot, or a legitimate app loads a DLL from a non-standard directory. |
| **DNS Events ** | Log all DNS lookups and responses, showing which domains are queried and by which process. | Detect C2 callbacks, malware beaconing, DNS tunneling, and suspicious domain resolution. | A process repeatedly queries random subdomains of example\[.\]com, suggesting DGA (Domain Generation Algorithm) use. |
| **File Events ** | Monitor file activity: creation, modification, deletion, renaming, and read access. Includes metadata like file path, hash, and process context. | Detect ransomware encryption, malware staging (dropping executables), tampering with sensitive files, or unauthorized access. | A process writes multiple .encrypted files in rapid succession in a user’s documents folder. |
| **Network Events** | Capture TCP/UDP connections, ports, IPs, protocols, and process responsible. | Detect outbound connections to malicious infrastructure, lateral movement inside a network, or data exfiltration attempts. | PowerShell initiates a connection to a known malicious IP over port 443 with unusual payload size. |
| **Process Events** | Record process lifecycle: creation, termination, parent-child relationships, command-line arguments, and integrity info. | Detect abnormal parent-child chains, privilege escalation, process hollowing/injection, and script-based attacks. | explorer.exe launches powershell.exe with a Base64-encoded command to download a payload. |
| **Registry Events** | Log modifications to Windows Registry, including key creation, deletion, and value changes. | Detect persistence mechanisms, system tampering, and security feature bypasses. | Malware creates HKCU\\Software\\Microsoft\\Windows\\CurrentVersion\\Run\\malware.exe for auto-start persistence. |
| **Security Events ** | Record security-related activity: authentication attempts, user/group changes, privilege assignments, and policy alterations. | Detect brute force attacks, privilege abuse, unauthorized access, and security control disabling. | Multiple failed login attempts followed by a successful login with a privileged account. |
| **DLP Purpose** | **Description** | **DLP Detect** |
|---|---|---|
| **Identify Sensitive Data** | Finds confidential or regulated information (PII, PHI, PCI, IP). | Recognizes sensitive data using patterns, keywords, regex, file classification, or ML. |
| **Monitor Data Usage** | Observes how data is accessed, edited, or transferred. | Flags unusual or risky user activities (e.g., mass copying or emailing). |
| **Prevent Unauthorized Data Transfer** | Ensures data doesn’t leave the organization improperly. | Detects attempts to send data via email, USB, cloud apps, or printing. |
| **Protect Against Data Breaches** | Reduces risk from insiders, malware, or accidents. | Alerts on anomalous access or large data movement. |
| **Enforce Security Policies** | Ensures compliance with regulations (GDPR, HIPAA, PCI). | Detects policy violations automatically. |
| **Control Data Flow** | Manages how data moves inside/outside the network. | Detects data movement patterns and unauthorized destinations. |
| **Provide Visibility & Reporting** | Offers logs and insights for audits/investigations. | Detects events and logs all data-related activities. |
| **Category / Purpose** | **Description** | **Detect** |
|---|---|---|
| **Identify System Weaknesses** | Finds flaws in software, hardware, or configurations that attackers could exploit. | Scans for outdated software, missing patches, weak configurations, known CVEs. |
| **Assess Security Posture** | Evaluates how secure an environment is against threats. | Runs vulnerability assessments, baseline checks, and compliance scans. |
| **Detect Misconfigurations** | Finds incorrect or insecure setup of systems or applications. | Identifies open ports, weak permissions, default passwords, insecure protocols. |
| **Find Network Vulnerabilities** | Looks for weaknesses within network infrastructure. | Scans firewalls, routers, switches, exposed services, and network paths. |
| **Identify Application Vulnerabilities** | Locates flaws in web and software applications. | Detects OWASP Top 10 issues (XSS, SQL Injection, CSRF, etc.). |
| **Detect Unauthorized Access Paths** | Finds hidden or unintended ways attackers could enter the system. | Identifies backdoors, exposed APIs, weak authentication paths. |
| **Continuous Monitoring** | Ongoing observation for new or emerging vulnerabilities. | Uses automated scanning, SIEM alerts, threat intelligence feeds. |
| **Risk Prioritization** | Determines which vulnerabilities are most dangerous. | Rates vulnerabilities using CVSS scores and exploit likelihood. |
| **Issue** | **Possible Cause** | **Resolution** |
|---|---|---|
| Task not created on client | GPO not applied | Run `gpresult /r` to confirm policy applied to computer. |
| MSI installation fails (Exit Code 1) | Wrong path or missing installer | Verify `$MsiPath` UNC path and folder permissions. |
| Logs not generated | Wrong `$CentralLogShare` path | Ensure DeployLogs share is accessible to Domain Computers. |
| gpupdate has no effect | Not run as Administrator | Re-run `gpupdate /force` in elevated Command Prompt. |
| Script doesn’t execute | Execution policy blocking | Ensure `-ExecutionPolicy Bypass` is in Scheduled Task arguments. |
**NOTE: If you already have a dedicated folder for storing the ZIP file and centralized logs, we can use that location. Just make sure to take note of its UNC path, as we’ll need it when updating the deployment script later. Alternatively, we can update the script for you and send it back—so all you need to do is save the script and configure the Group Policy to deploy it. If you prefer this option, please email us at support@cytechint.com.**
##### **Editing the Script** To edit the provided script, you can use **PowerShell ISE** by following these steps: - Click the **Start** menu and type **PowerShell ISE**. [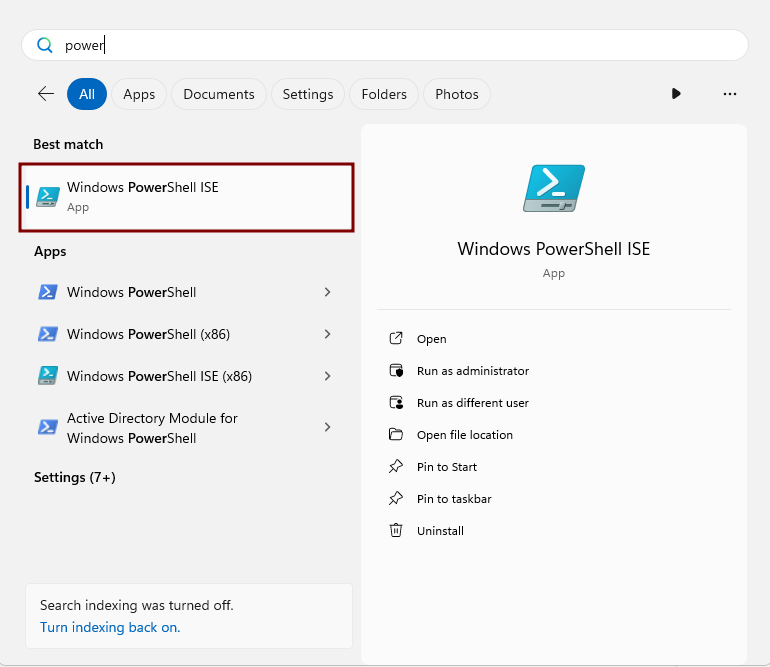](https://cytechint-docs-bookstack.s3.amazonaws.com/uploads/images/gallery/2025-11/xvn0Qc9BunXZIyWP-image.png) - In the upper-right corner, click the **Open Script** icon (folder symbol). [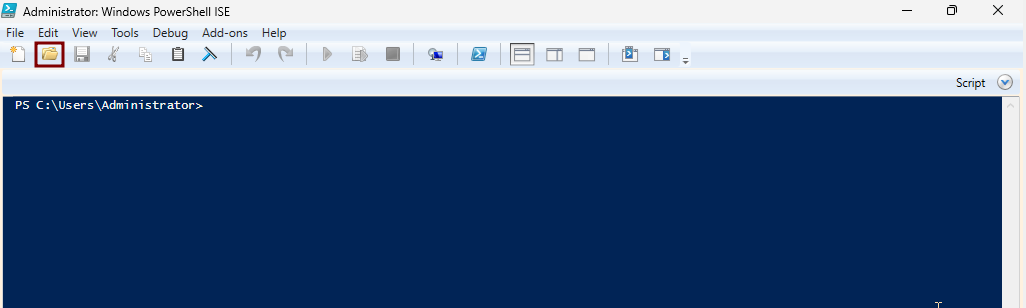](https://cytechint-docs-bookstack.s3.amazonaws.com/uploads/images/gallery/2025-11/WaAUl4dIBhmWJaSR-image.png) - Navigate to the folder where the script was saved, then open the file. [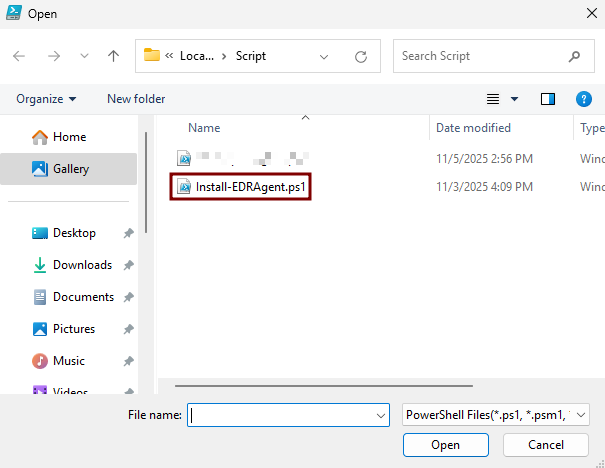](https://cytechint-docs-bookstack.s3.amazonaws.com/uploads/images/gallery/2025-11/CKKtJYbaF6DgqKwd-image.png) - Variables need to change: - **$elasticZipFile:** put the UNC path where the ZIP file was saved. *(e.g. \\\\WINJDHSGFYR\\ZIP\\edr-agent-8.18.1-windows-x86\_64.zip).* - **$logServerPath:** put the UNC path of the created Logs folder. *(e.g. \\\\WINJDHSGFYR\\Logs).* [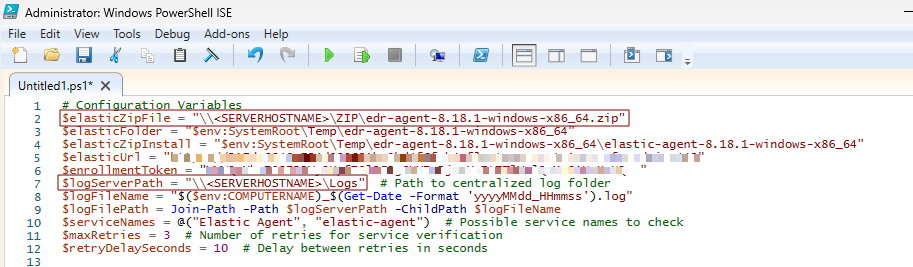](https://cytechint-docs-bookstack.s3.amazonaws.com/uploads/images/gallery/2025-11/dUU9KdNS4rkUM6tA-image.png) - Then **Save Script.** ##### **Deploying AQUILA EDR via Group Policy** Use Group Policy Management to create and link a Group Policy Object (GPO) that deploys the **AQUILA EDR** agent to domain-joined computers. 1. **Open Group Policy Management** - In **Server Manager**, go to **Tools → Group Policy Management**. [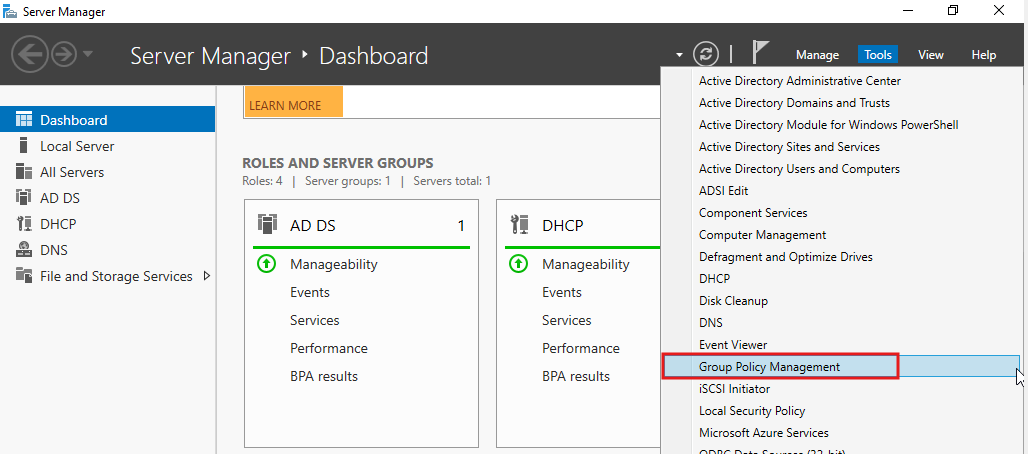](https://cytechint-docs-bookstack.s3.amazonaws.com/uploads/images/gallery/2025-08/sAgHF51O6wQXc3yz-image.png) 2. **Create a New GPO** - In the Group Policy Management Console, expand your domain and right-click the **Domain Controllers** container (or the appropriate **Organizational Unit (OU)**). - Select **Create a GPO in this domain, and Link it here**. - Provide a descriptive name (e.g., *New Patch Elastic Agent Deployment*), then click **OK**. [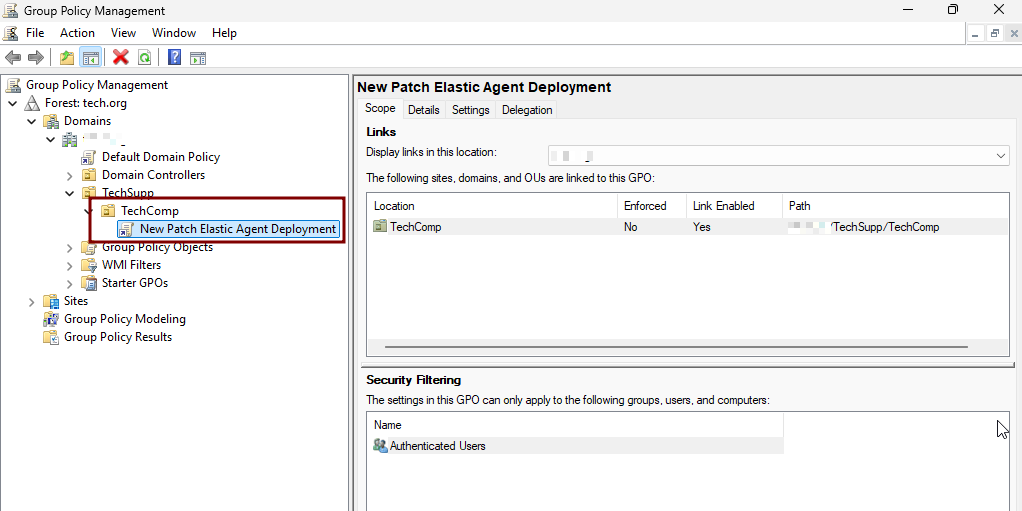](https://cytechint-docs-bookstack.s3.amazonaws.com/uploads/images/gallery/2025-11/eWlyhmNCTDgWAZ0W-image.png) 3. **Edit the GPO** - Right-click the newly created GPO and select **Edit**. - In the Group Policy Management Editor, navigate to: Computer Configuration → Preferences → Control Panel Settings → Scheduled Tasks [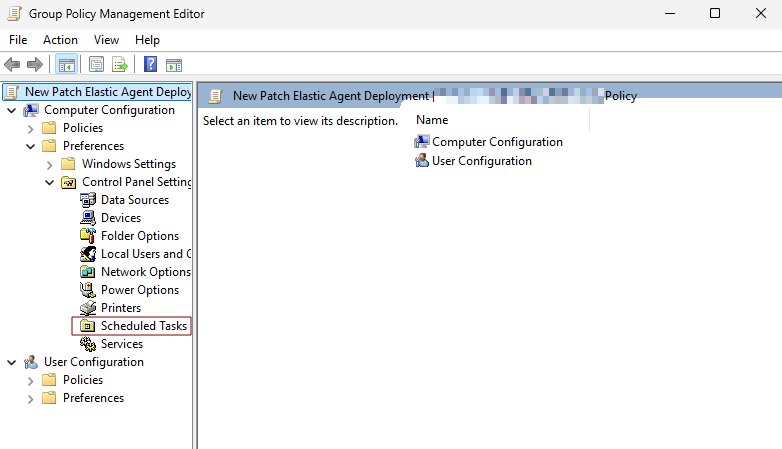](https://cytechint-docs-bookstack.s3.amazonaws.com/uploads/images/gallery/2025-11/Y1JQack13ecnMPDu-image.png) 1. **Scheduled Tasks** - Right-click then choose **New** → **Scheduled Task (At least Windows 7)**. - **General Tab** - **Action:** Create - **Name:** you can set a name of the scheduled task. *(e.g. Deploy EDR Aquila Agent)* - **When running the task, use the following user account:** NT AUTHORITY\\SYSTEM - Enable **Run whether user is logged on or not** - Enable **Run with highest privileges** - **Configure for:** Windows 7, Windows Server 2008R2 [ 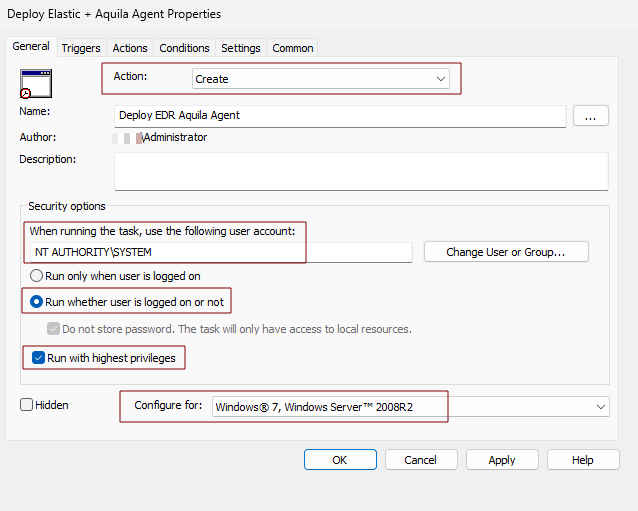](https://cytechint-docs-bookstack.s3.amazonaws.com/uploads/images/gallery/2025-11/J87malejLQW9iCQV-image.png) - **Triggers Tab** - Click **New** - **Begin the task:** At startup - **Delay task for:** 1 minute - **Enabled** [ 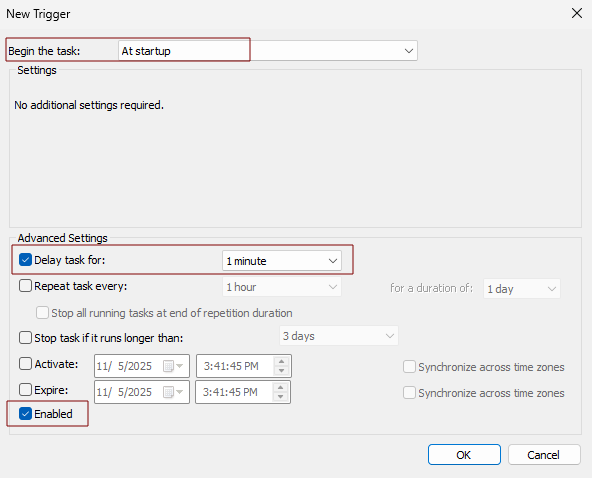](https://cytechint-docs-bookstack.s3.amazonaws.com/uploads/images/gallery/2025-11/Mis8kiYn7mxL9c4G-image.png) - **Actions Tab** - Click **New** - **Action:** Start a program - **Program/script:** powershell.exe - **Add arguments(optional):** -NoProfile -ExecutionPolicy Bypass -File "\\\\<SERVERHOSTNAME>\\Script\\Install-EDRAgent.ps1" *(e.g. \\\\WINSJHGJDHR\\Script\\Install-EDRAgent.ps1)* [ 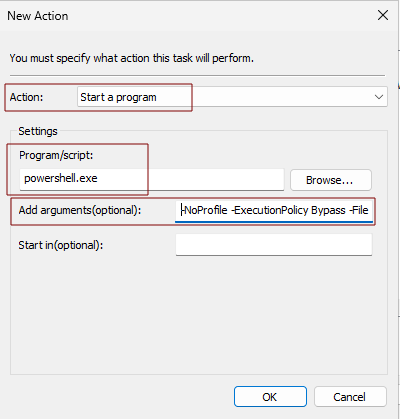](https://cytechint-docs-bookstack.s3.amazonaws.com/uploads/images/gallery/2025-11/aPBAjTgeDV3kWjcR-image.png) - **Settings Tab** - Enabled **Allow task to be run on demand** - **If the task fails, restart every:** 1 minute - **Attempt to restart up to:** 3 times [ 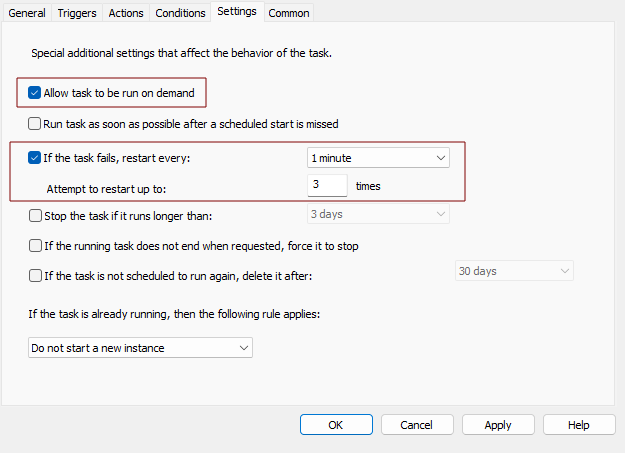](https://cytechint-docs-bookstack.s3.amazonaws.com/uploads/images/gallery/2025-11/rET665Eh2W4rBPWP-image.png) 1. **Finalize the GPO** - Close the Group Policy Management Editor. 2. **Test in the Client Computer before Deployment** - Go to the test client computer that is connected to the domain. - Open **Powershell** as administrator - Run the command: **gpupdate /force** - Running it refreshes the Group Policy on the server itself. - Open **Task Scheduler** and check if the scheduled task was reflected on the **Task Scheduler Library.** - If confirmed go back to **Powershell** - Run the command: - **shutdown /r /t 0** - To restart the test client computer 3. **Verify Installation** - Login to the test client computer and wait for the 1 minute to run the task. - You can open the **Task Scheduler** again and check **Task Scheduler Library** if the task is successful. - Confirm the agent, check **Task Manager** and search for **elastic-agent** and **elastic-endpoint**. ##### **Test the Script via PsExec** **Why This Method Is Necessary** Running the script through PsExec simulates how it will execute when deployed via GPO Scheduled Task—specifically under the **NT AUTHORITY\\SYSTEM** context. This helps identify issues that may not appear when running the script as a regular user. **Prerequisites** - Administrative privileges on the test computer and on the script’s UNC path. - The test computer must be online and reachable. - Verify that the script (e.g., `Install-EDRAgent.ps1`) is accessible via a UNC path such as `\\SERVER\Share\Install-EDRAgent.ps1`. **Step-by-Step Guide (Test Computer)** 1. **Download PsExec** Download the PsExec utility from the official Microsoft Sysinternals website and save the ZIP file to your workstation. Download [here](https://learn.microsoft.com/en-us/sysinternals/downloads/psexec). 2. **Extract the ZIP** Extract the ZIP file and open the extracted folder. 3. **Copy PsExec.exe** Locate `PsExec.exe` and copy it to a local folder on the test computer (e.g., `C:\Tools\PsExec\`). 4. **Open an Elevated Command Prompt** Right-click **Command Prompt** and choose **Run as administrator**. 5. **Open a SYSTEM-Level PowerShell Session** Navigate to the folder where the **PsExec** was copied (e.g., cd C:\\Tools\\PsExec). Run the following command: *Note:* The first run may display the Sysinternals license prompt. To avoid this, you may use: 6. **Execute the Script Under SYSTEM Context** Inside the SYSTEM PowerShell window, run: **Example:** 7. **Monitor Output and Collect Errors** Observe the PowerShell output for any installation errors. If the installer generates logs, please collect them for review. *If you need further assistance, kindly contact our support at* ***support@cytechint.com*** *for prompt assistance and guidance.* # AQUILA EDR Mass Deployment Via Microsoft Intune (EXE) #### Overview This guide explains how to install an Endpoint Detection & Response (EDR) solution on all devices managed through **Microsoft Intune**. The process ensures consistent protection across your organization’s endpoints by using Intune’s **Endpoint security policies** and **app deployment** features. ##### **Prerequisites** Before beginning, confirm the following: - You have **Global Administrator** or **Intune Administrator** rights in Microsoft 365. - Devices are already **enrolled and compliant** in Microsoft Intune. - You have the **installer package ( IntuneWin format)** for your chosen EDR solution. --- #### **Step 1:** Prepare the EDR Installer 1. Obtain the official EDR installation package (MSI) from AQUILA 2. If the installer is not in **.intunewin** format, convert it using the **Microsoft Win32 Content Prep Tool**. **Download tool:** *[GitHub - microsoft/Microsoft-Win32-Content-Prep-Tool: A tool to wrap Win32 App and then it can be uploaded to Intune](https://github.com/Microsoft/Microsoft-Win32-Content-Prep-Tool)* ##### **Steps for preparing an Installer for Intune (.intunewin format)** ##### **Download the Packaging Tool** **1.** Go to Microsoft’s official download page: [Win32 Content Prep Tool (GitHub)](https://github.com/Microsoft/Microsoft-Win32-Content-Prep-Tool) **2.** Download the ZIP file to your computer. [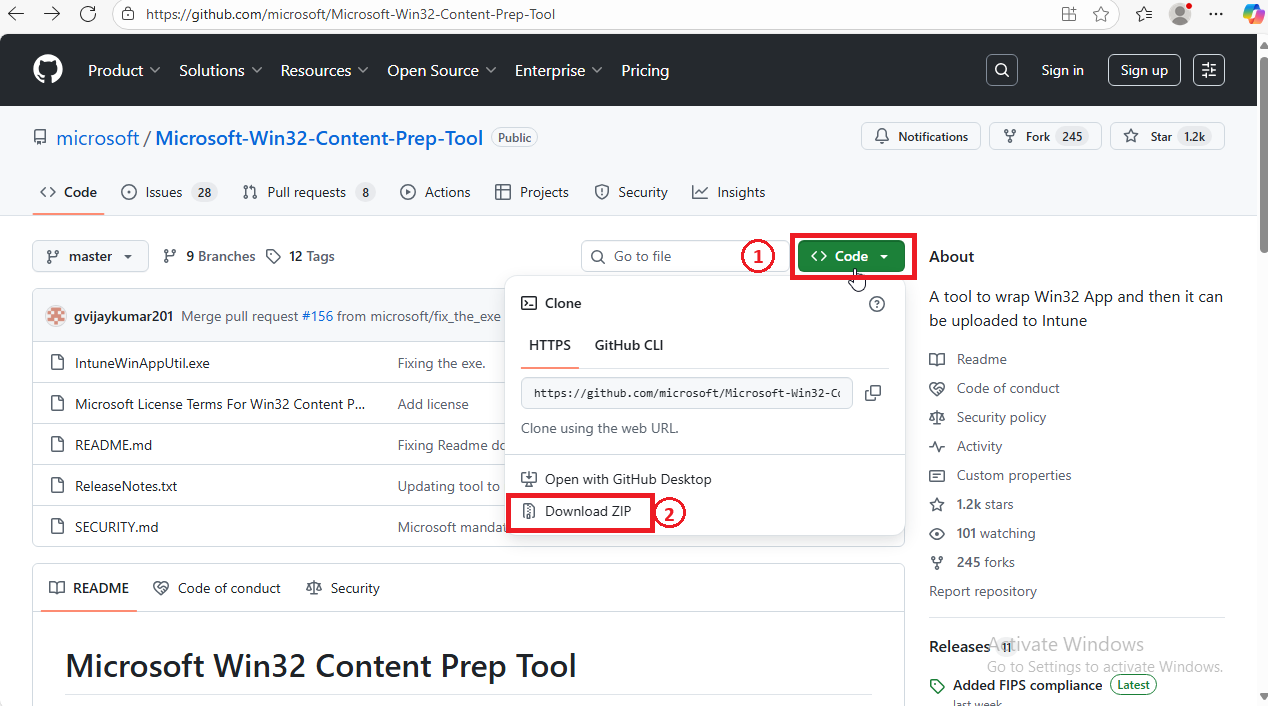](https://cytechint-docs-bookstack.s3.amazonaws.com/uploads/images/gallery/2025-08/vf2TWtQ9a4ZcqcHl-screenshot-2025-08-22-071813.png) **3.** Right-click the ZIP → **Extract All…** [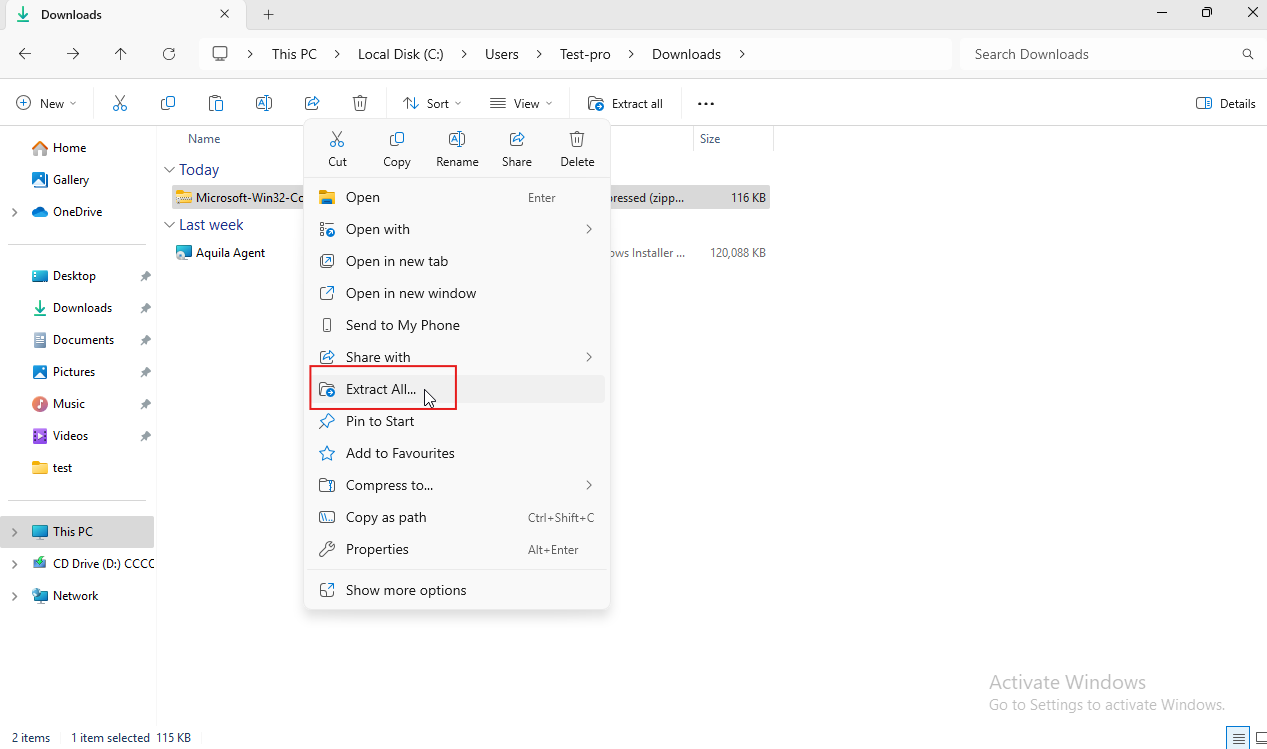](https://cytechint-docs-bookstack.s3.amazonaws.com/uploads/images/gallery/2025-08/A7GEVVKwW17NiQAR-image.png) **4.** Choose a location (for example: `C:\IntuneWinAppUtil`). [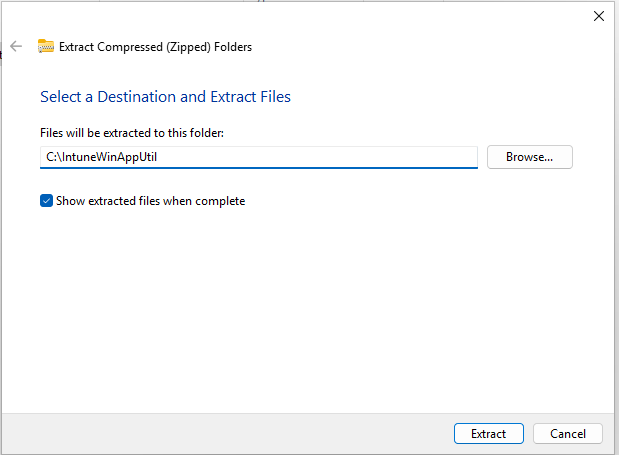](https://cytechint-docs-bookstack.s3.amazonaws.com/uploads/images/gallery/2025-08/N4XTo51op2F0kOEy-image.png) ##### **Prepare Your Installer Files** 1. 1. 1. Create a folder for your installer, for example: - `C:\2. Source\EDR` 2. Place the Master installer inside that folder. Place also here the script files. - Master-Installer.ps1 [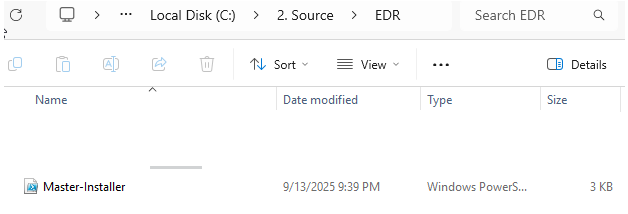](https://cytechint-docs-bookstack.s3.amazonaws.com/uploads/images/gallery/2025-10/TJTR3ObxlY2rtQDl-image.png) 3. Create another empty folder where the packaged file will be saved, for example: - `C:\3. Output` ##### **Run the Packaging Tool** **1.** Go to the folder where you extracted the tool and run it [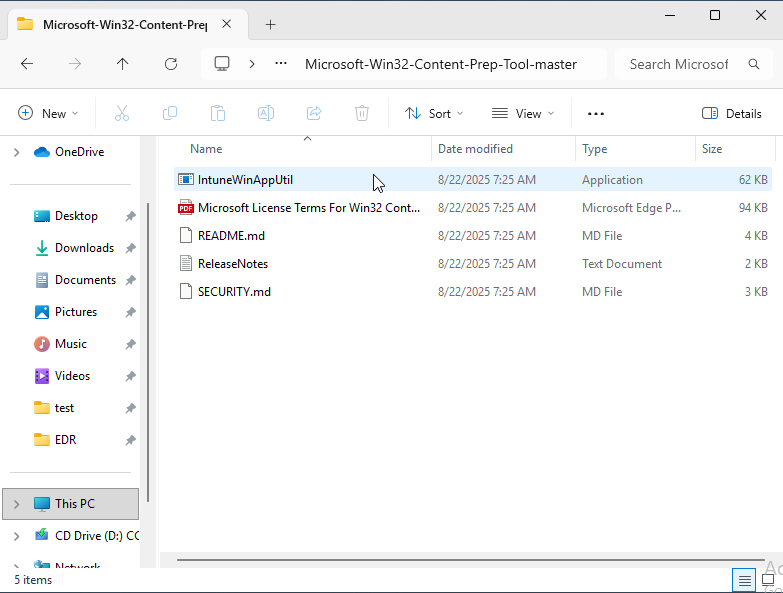](https://cytechint-docs-bookstack.s3.amazonaws.com/uploads/images/gallery/2025-09/wVL1CbpxDAGWx3u0-image.png) **2.** The tool will ask you a few questions. Enter the following: - **Source folder:** type the path to your installer folder. Click the path and copy. (e.g., `C:\Source\EDR`). [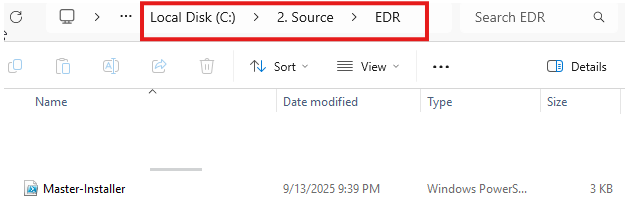](https://cytechint-docs-bookstack.s3.amazonaws.com/uploads/images/gallery/2025-10/ec2QK4YmhMYFz2oY-image.png) - **Setup file:** type the name of the Master Script and include its file type (e.g., Master-Installer.ps1). [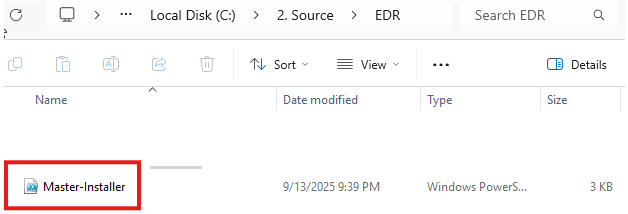](https://cytechint-docs-bookstack.s3.amazonaws.com/uploads/images/gallery/2025-10/j0pKsZmHWtG3egCI-image.png) - **Output folder:** type the path to your empty folder. Click the path and copy. (e.g., `C:\3. Output`). [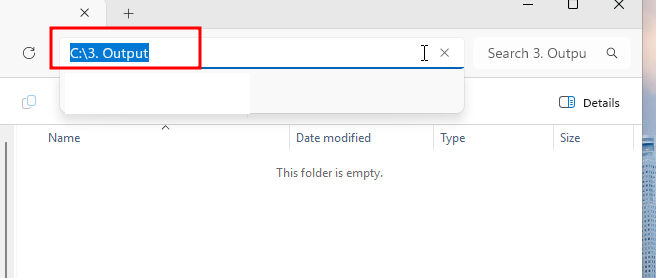](https://cytechint-docs-bookstack.s3.amazonaws.com/uploads/images/gallery/2025-10/MSrEZidvVFbs149C-image.png) - **Catalog folder:** just press **Enter** to skip. [](https://cytechint-docs-bookstack.s3.amazonaws.com/uploads/images/gallery/2025-09/3T4HQqmQkyslWX1Z-image.png) ##### **Check the Result** - - - Open your output folder (`C:\Output`). - You should now see a file ending in `.intunewin`, for example: - This is the file you’ll upload into Microsoft Intune. - [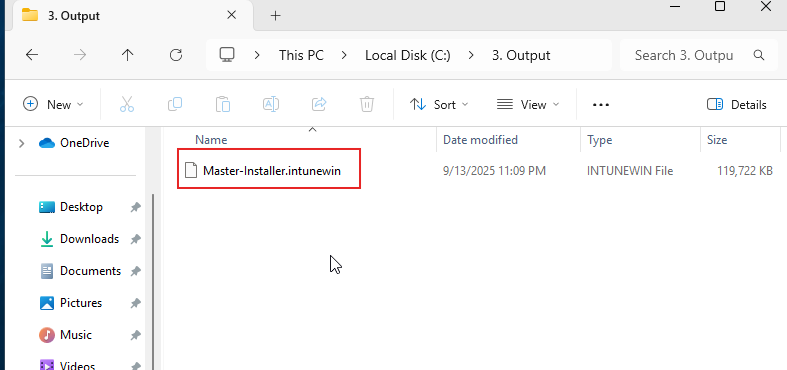](https://cytechint-docs-bookstack.s3.amazonaws.com/uploads/images/gallery/2025-09/IKy4NkD1KJqwfLsB-image.png) #### **Step 2:** Add the EDR App to Intune Sign in to the **Microsoft Intune admin center →** [*https://intune.microsoft.com*](https://intune.microsoft.com) - Go to **Apps**. [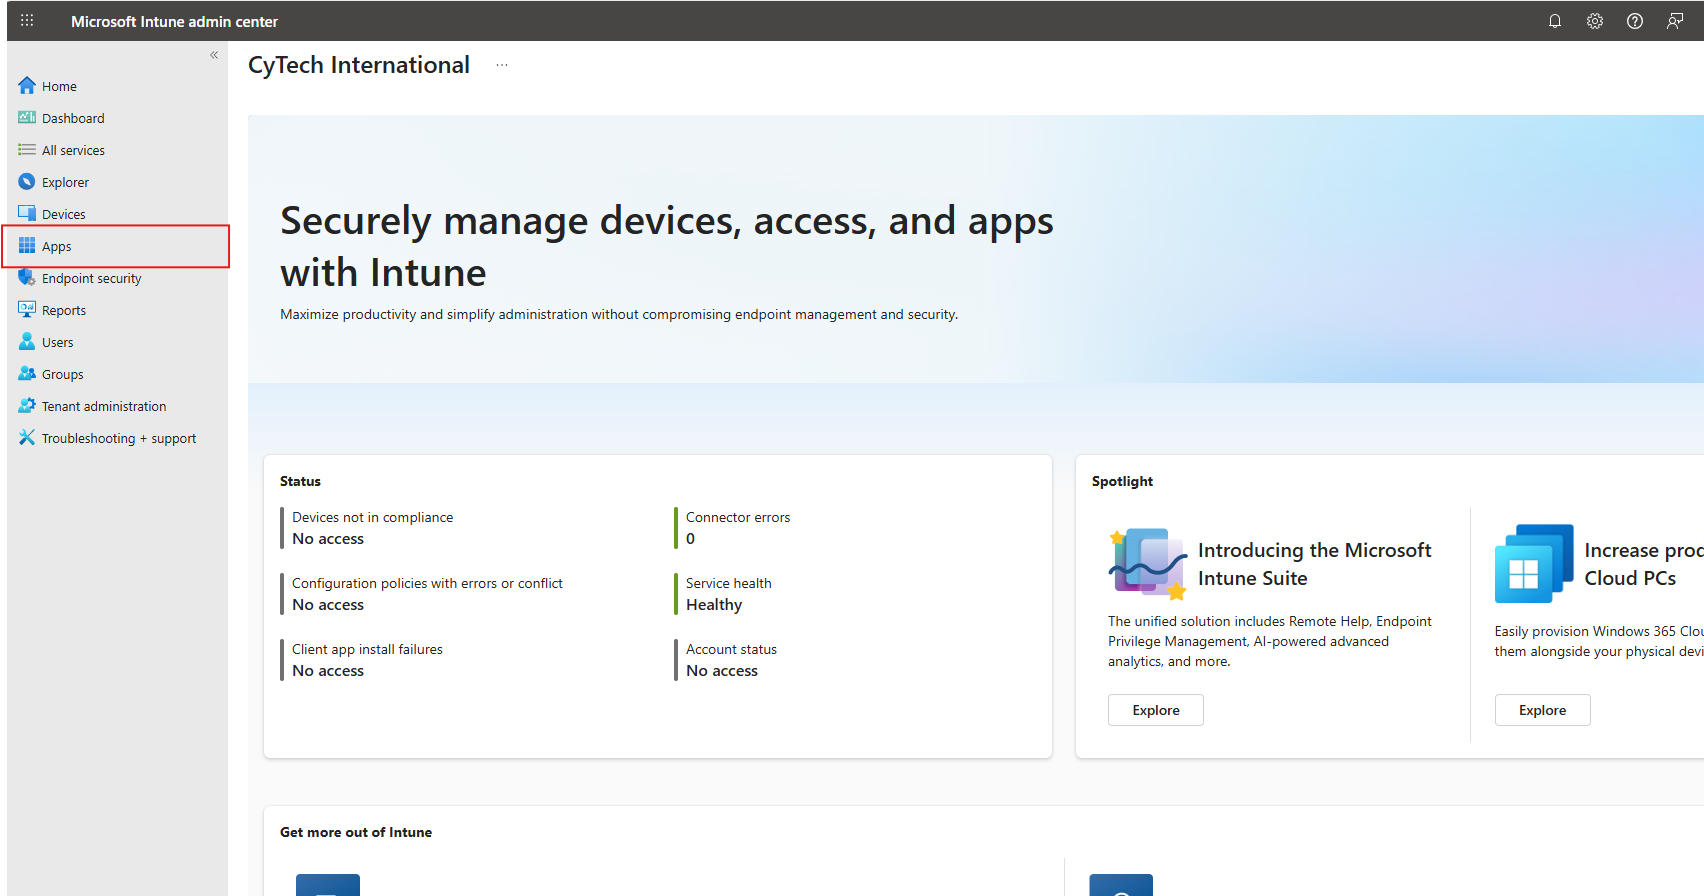](https://cytechint-docs-bookstack.s3.amazonaws.com/uploads/images/gallery/2025-08/yIpb67juZajlUanr-image.png) - **Windows App** [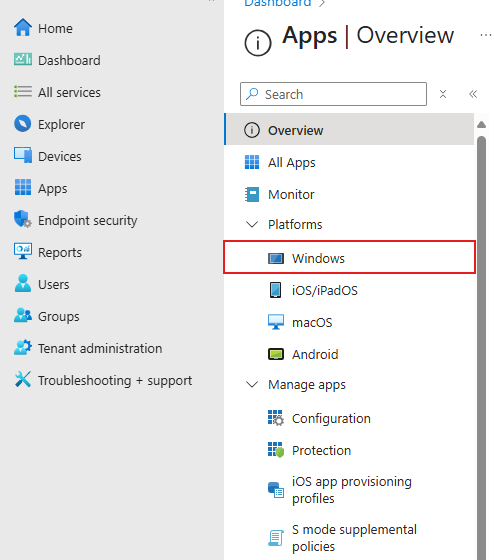](https://cytechint-docs-bookstack.s3.amazonaws.com/uploads/images/gallery/2025-09/fmMlT8j92Gq5FGIB-image.png) - **Add** [](https://cytechint-docs-bookstack.s3.amazonaws.com/uploads/images/gallery/2025-09/NtZLizgHyNfzQCfU-image.png) **1. Select the app type:** - - **Windows app (Win32)** for most EDR installers. [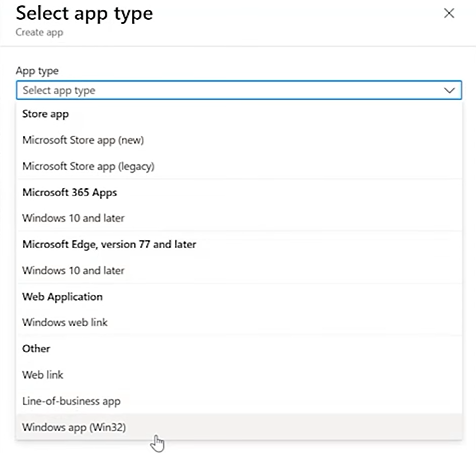](https://cytechint-docs-bookstack.s3.amazonaws.com/uploads/images/gallery/2025-09/kY1w792bYX8srp7X-image.png) **2. Upload** the prepared installer package. - **Find and upload** the **.intune** file on the **Output** folder from earlier. [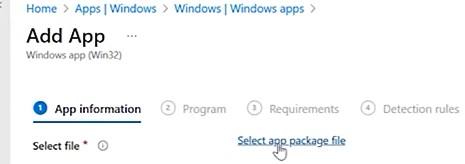](https://cytechint-docs-bookstack.s3.amazonaws.com/uploads/images/gallery/2025-09/olV1Maxtg4j0cTXQ-image.png) **3.** Configure **App Information**: name, description, publisher. [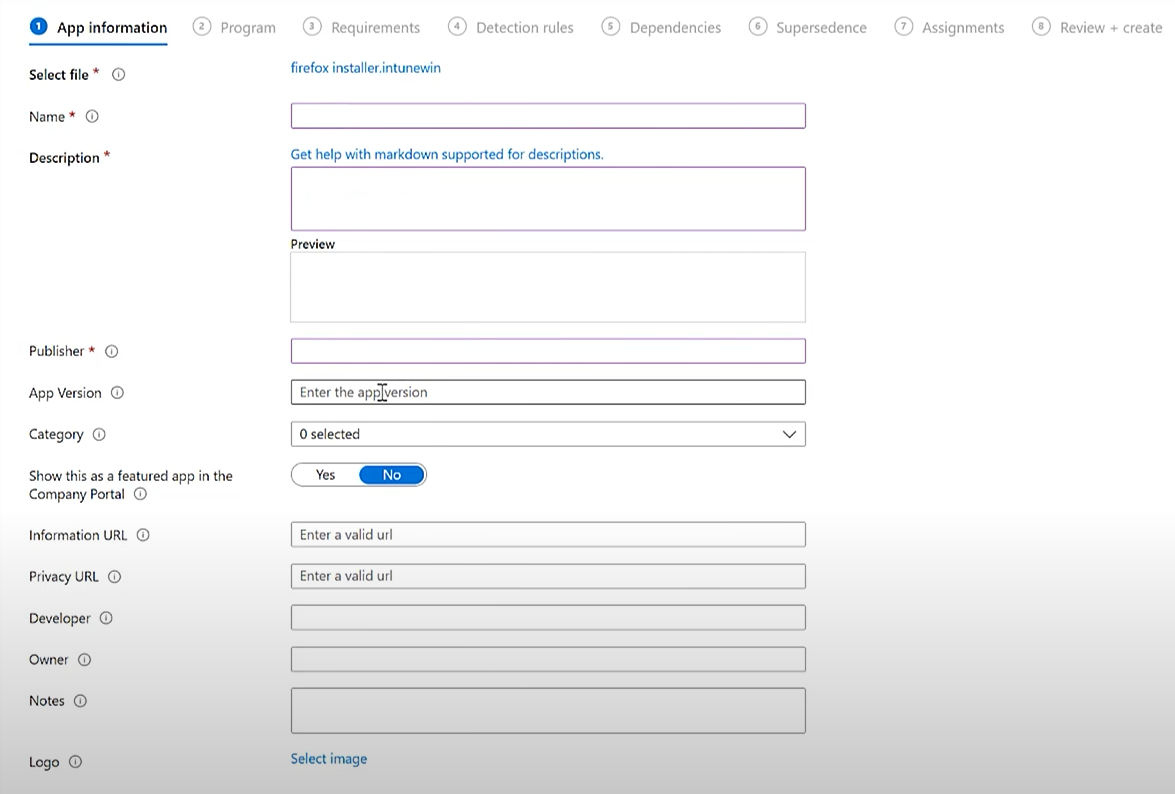](https://cytechint-docs-bookstack.s3.amazonaws.com/uploads/images/gallery/2025-09/FYVEKXpdD576ynCa-image.png) **4.** Set **Program Install/Uninstall Commands**.[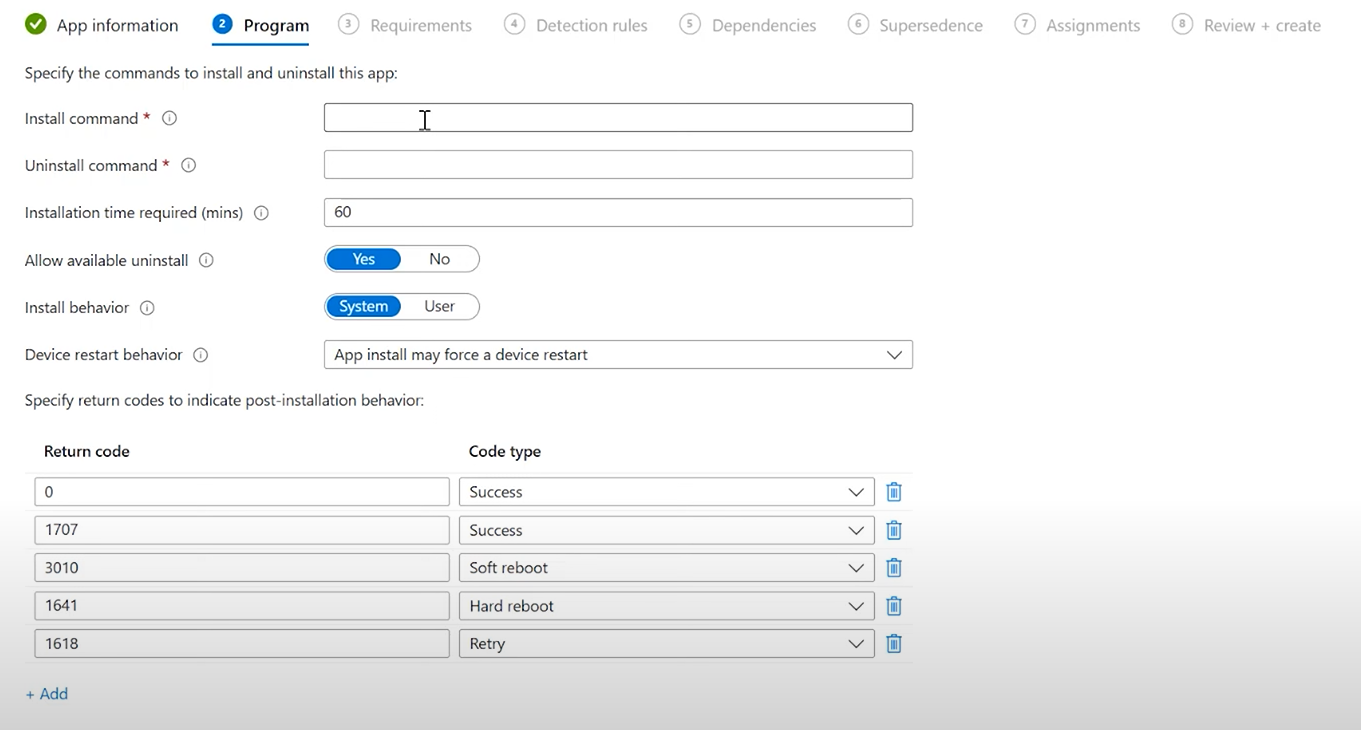](https://cytechint-docs-bookstack.s3.amazonaws.com/uploads/images/gallery/2025-09/YrBO0kSJBlWnTq7J-image.png) - **Install Command:** ```javascript powershell.exe -ExecutionPolicy Bypass -File .\Master-Installer.ps1 ``` - **Uninstall command:** **-Open the PowerShell as Administrator.** **-Get** the **Product Code of Aquila Agent** by running this command on **PowerShell.** ```javascript $msiPath = "C:\Path\To\Aquila Agent.msi" $installer = New-Object -ComObject WindowsInstaller.Installer $database = $installer.OpenDatabase($msiPath, 0) $view = $database.OpenView("SELECT Value FROM Property WHERE Property='ProductCode'") $view.Execute() $record = $view.Fetch() $record.StringData(1) ``` **[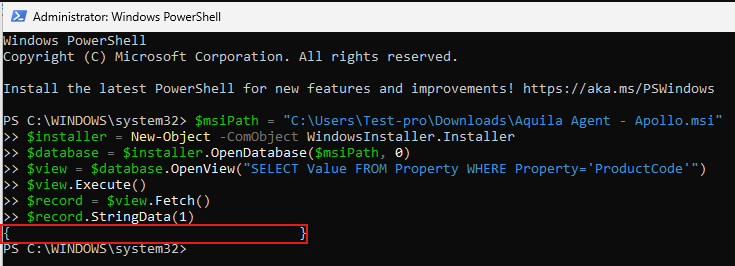](https://cytechint-docs-bookstack.s3.amazonaws.com/uploads/images/gallery/2025-10/XO7IMODwu2MoaoRv-image.png)** - **For Example,** this is now your **Uninstall Command:** ``` msiexec /x "{Product Code}" /quiet /norestart ``` **5.** Under **Requirements**, select OS architecture and minimum version. [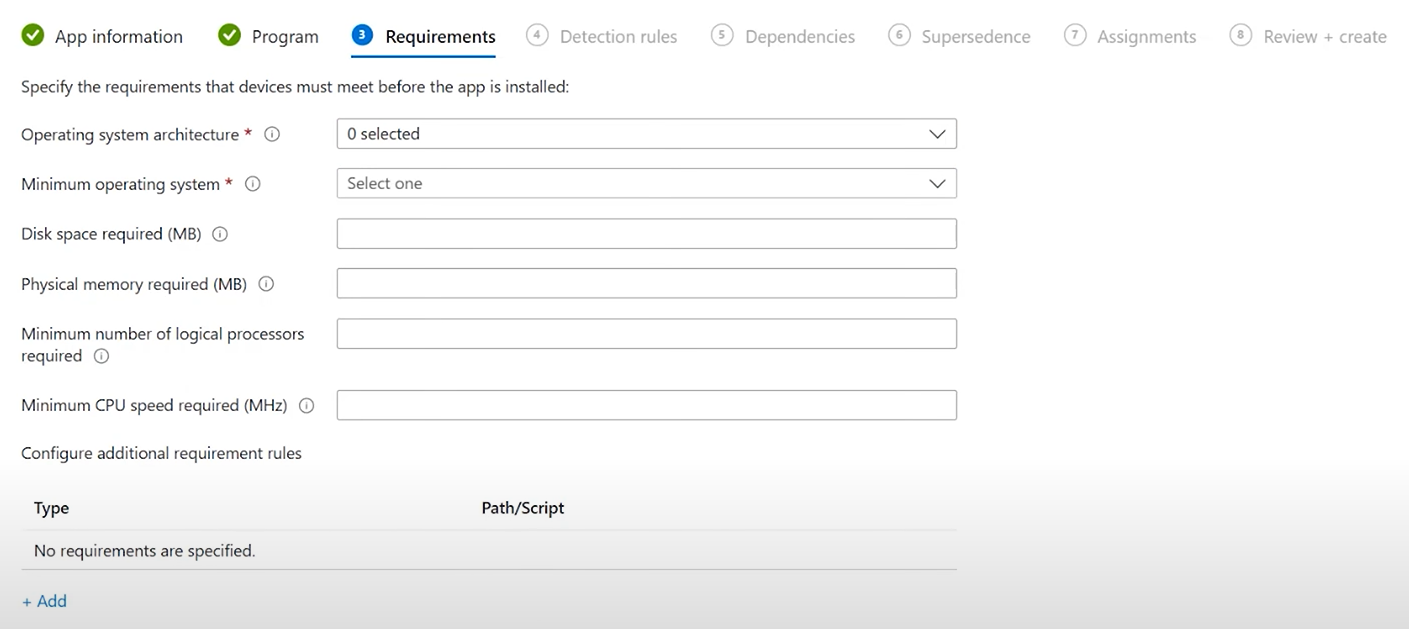](https://cytechint-docs-bookstack.s3.amazonaws.com/uploads/images/gallery/2025-09/xQp8cCziCuoN9W7D-image.png) **6.** Add **Detection Rules** to confirm successful installation. [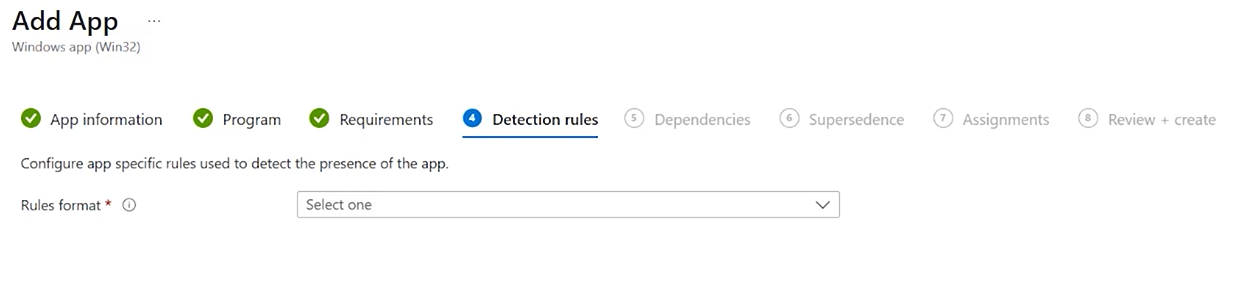](https://cytechint-docs-bookstack.s3.amazonaws.com/uploads/images/gallery/2025-09/2vwtRCFnCuaXVnTA-image.png) [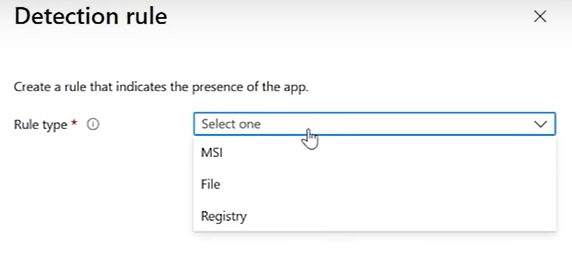](https://cytechint-docs-bookstack.s3.amazonaws.com/uploads/images/gallery/2025-09/xLcQU6ZlYRixzj4a-image.png) **Option A: MSI Product Code** (recommended if you know it) - Rule type: **MSI** - MSI product code: `{Aquila Agent Product code}` (Please refer to **4.** on how to get the Aquila Agent Product Code:) **Option B: File exists** - Rule type: **File** - Path: `C:\Program Files\Aquila Agent` - File or folder: `Aquila Agent.exe` - Detection method: File or folder exists **Option C: Registry key** - Rule type: **Registry** - Path: `Computer\HKEY_LOCAL_MACHINE\SOFTWARE\WOW6432Node\Microsoft\Windows\CurrentVersion\Uninstall\"{Aquila Product Code}"` - This is how to get the **Aquila Product Code**. - This is now the path to input: "`Computer\HKEY_LOCAL_MACHINE\SOFTWARE\WOW6432Node\Microsoft\Windows\CurrentVersion\Uninstall\"{Product Key}"`[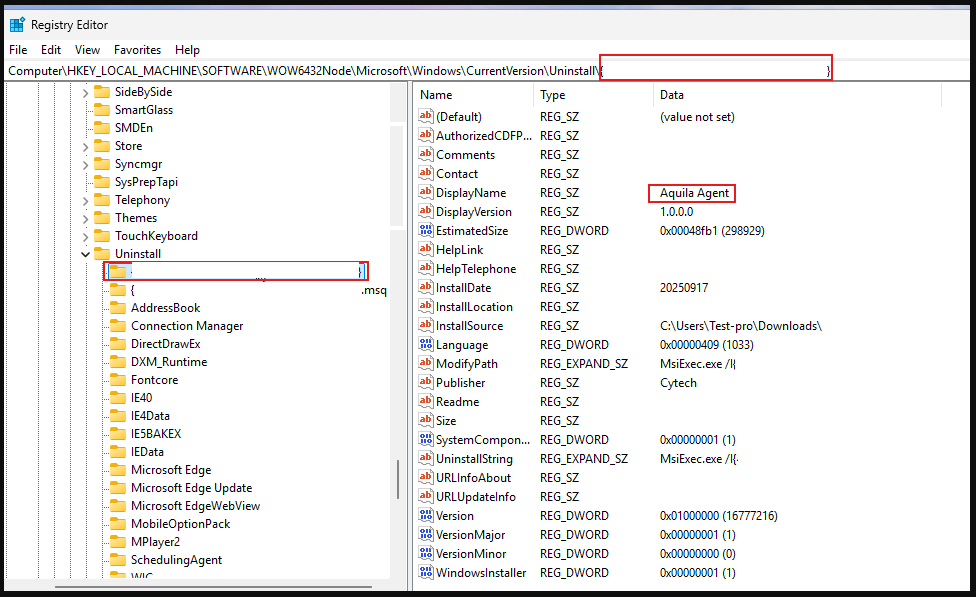](https://cytechint-docs-bookstack.s3.amazonaws.com/uploads/images/gallery/2025-10/TAaIfb7ZTZhUMRD1-image.png) - Value: `DisplayName` → check exists or equals “Aquila Agent” **7.** Set **Dependencies** [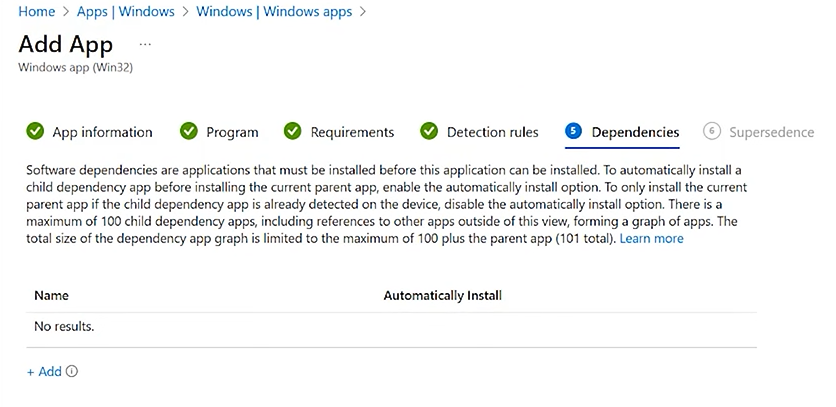](https://cytechint-docs-bookstack.s3.amazonaws.com/uploads/images/gallery/2025-09/Uff6l88VBWKeEqqC-image.png) **8. Supersedence** [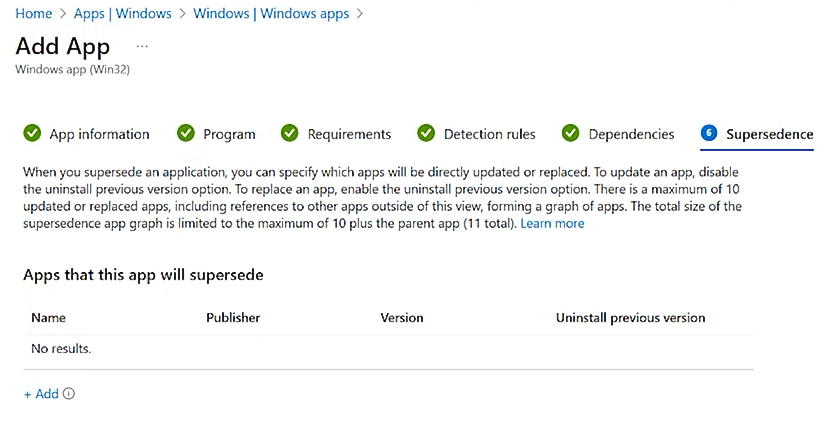](https://cytechint-docs-bookstack.s3.amazonaws.com/uploads/images/gallery/2025-09/eTmT8J0MXa7g5JzP-image.png) **9. Assignments** - **Required** - Intune **automatically installs the app** on targeted devices. - Perfect for your Elastic/Aquila Agent deployment. - **Available for enrolled devices** - Users can see the app in **Company Portal** and install it manually. - Good for optional apps or testing. - **Uninstall** - Used if you want to remove the app from certain groups. [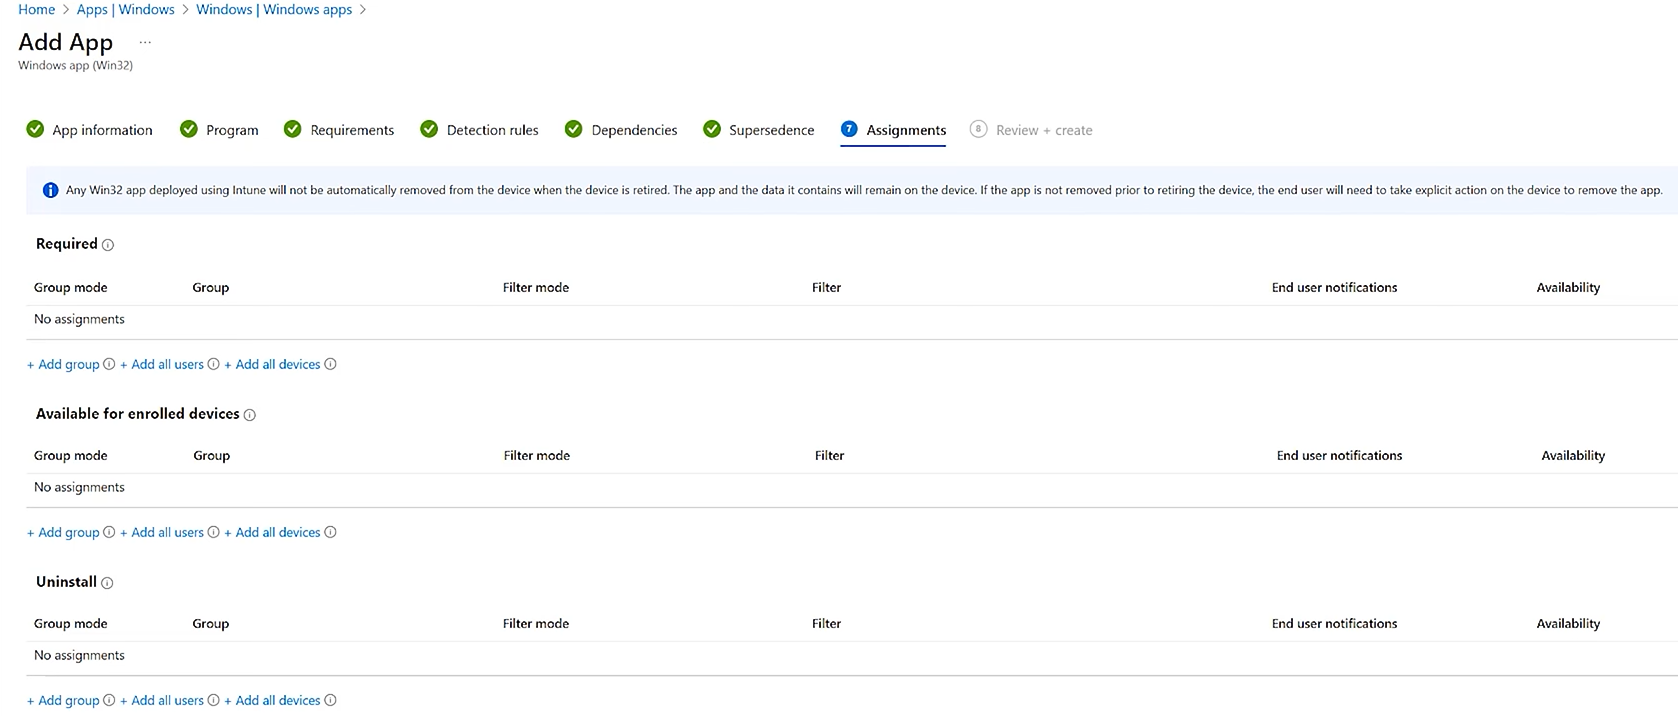](https://cytechint-docs-bookstack.s3.amazonaws.com/uploads/images/gallery/2025-09/sdobB43dVOh79F83-image.png) **10. Review + Create** [](https://cytechint-docs-bookstack.s3.amazonaws.com/uploads/images/gallery/2025-09/gULZwc2D3aQkBzwn-image.png) **Step 3:** Monitor Deployment 1. In the Intune admin center, go to **Apps** → select your EDR app. 2. Check **Device install status** to confirm successful installations. [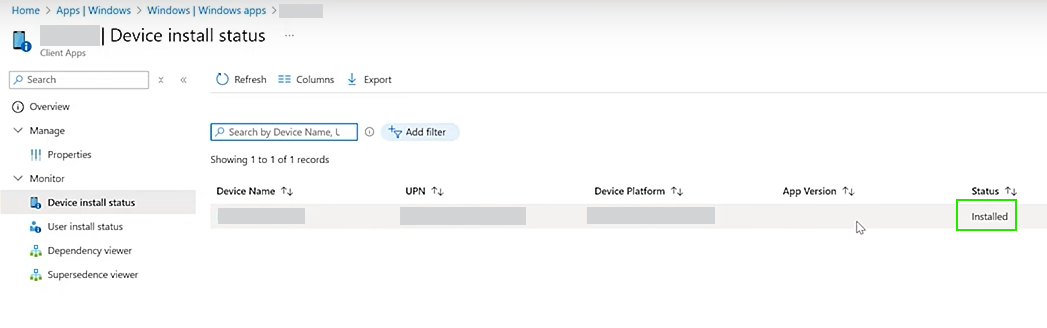](https://cytechint-docs-bookstack.s3.amazonaws.com/uploads/images/gallery/2025-09/ZRUrJq5IDzQ8WLmg-image.png) *If you need further assistance, kindly contact our technical support at **If prompted with a User Account Control (UAC) dialog stating that the app is from an unknown publisher, click **‘Yes’** to allow the installer to make changes and proceed with the installation.
**Step 2:** You may specify a custom installation directory or proceed with the default path. Click ‘**Install**’ to continue with the installation process. Wait for a moment to install the Aquila Agent. After AQUILA Agent has been succesfully installed. Click "**Finish**" to close installation wizard. [](https://cytechint-docs-bookstack.s3.amazonaws.com/uploads/images/gallery/2025-06/Hni3BJkQIjEejgtw-image.png) **Step 3:** Provide the required Secret Token to authorize and proceed with the installation. Click "**Install Agent**" to proceed. Please wait a few minutes for the installation process to complete. This will automatically initiate enrollment into the CyTech - AQUILA platform. [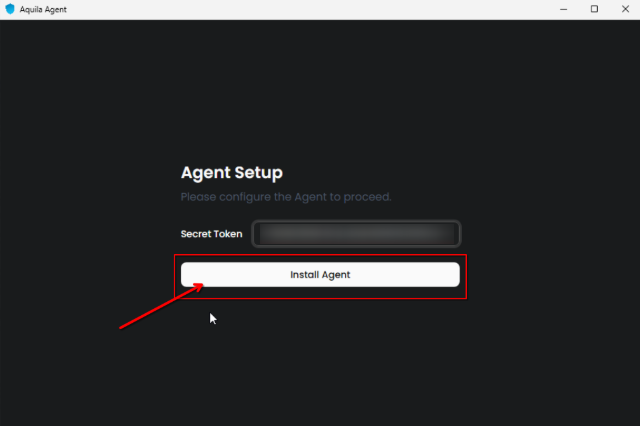](https://cytechint-docs-bookstack.s3.amazonaws.com/uploads/images/gallery/2025-09/nHb37JZdfcyFH0Qr-image.png) **Step 4:** After successful enrollment, an overview window will be displayed. Please note that it may take some time for the device to reflect an online status. Ensure the device remains connected to the network for the EDR policy to be properly applied. [](https://cytechint-docs-bookstack.s3.amazonaws.com/uploads/images/gallery/2025-06/ln4ghMC9isi5CerI-image.png)The Overview page provides a centralized dashboard displaying all recent detections related to your endpoint devices. This real-time monitoring allows security teams to quickly identify potential threats, analyze attack vectors, and prioritize response efforts based on severity and impact. By consolidating detection data, the Overview page supports proactive threat hunting and continuous endpoint security management as part of a comprehensive cybersecurity monitoring strategy.
[](https://cytechint-docs-bookstack.s3.amazonaws.com/uploads/images/gallery/2025-06/dU8R6czWUg0E8kGg-image.png)The Agent Details panel allows you to verify the status and identity of your endpoint device.
[](https://cytechint-docs-bookstack.s3.amazonaws.com/uploads/images/gallery/2025-06/n5Jyu4liWfqQERlk-image.png)You may also access AQUILA Agent Secure through the Windows taskbar's side dock panel.
[](https://cytechint-docs-bookstack.s3.amazonaws.com/uploads/images/gallery/2025-06/JUUlbRcGAxMcwrI0-image.png) 7. **Before you can proceed to the final installation set-up make sure you check off each steps required. Then you can click "Next".** [](https://cytechint-docs-bookstack.s3.amazonaws.com/uploads/images/gallery/2025-07/cWjeJVZIRWQcoTlL-image.png) 8. **A new window will appear and will check the log collector status and update the latest installation of EDR agent. Wait for it to finish and after successfull installation the endpoint will displayed in the dashboard.** [](https://cytechint-docs-bookstack.s3.amazonaws.com/uploads/images/gallery/2025-07/D2CsxzzQdp5L2Z6z-image.png) **9. This step confirms the successful installation and enrollment of the EDR Agent with the fleet server.** [](https://cytechint-docs-bookstack.s3.amazonaws.com/uploads/images/gallery/2025-07/jeJm6W66tXfIKCxC-image.png)*\*\*\*If you encounter **Log Collector Setup Failed**. Please click "Retry" and carefully go gack to Steps 5 or 6. You can also try "**Manual**" installation. If issues persist please contact our technical support at **
For a more detailed report and in-depth analysis, navigate to **CyTech - AQUILA > Cyber Monitoring > Endpoint Detection and Response(EDR)**. This section provides comprehensive visibility into endpoint activity, detection timelines, threat classifications, and response actions to support advanced threat analysis and incident investigation.
[](https://cytechint-docs-bookstack.s3.amazonaws.com/uploads/images/gallery/2025-06/JTplpsqWMr83Ufbi-image.png) [](https://cytechint-docs-bookstack.s3.amazonaws.com/uploads/images/gallery/2025-06/jWMnSkzvcm89lb8x-image.png) [](https://cytechint-docs-bookstack.s3.amazonaws.com/uploads/images/gallery/2025-06/YIdIVQT0fcq3P8IZ-image.png) *If you need further assistance, kindly contact our technical support at **For a more detailed report and in-depth analysis, navigate to **CyTech - AQUILA > Cyber Monitoring > Endpoint Detection and Response(EDR)**. This section provides comprehensive visibility into endpoint activity, detection timelines, threat classifications, and response actions to support advanced threat analysis and incident investigation.
[](https://cytechint-docs-bookstack.s3.amazonaws.com/uploads/images/gallery/2025-06/JTplpsqWMr83Ufbi-image.png) [](https://cytechint-docs-bookstack.s3.amazonaws.com/uploads/images/gallery/2025-06/jWMnSkzvcm89lb8x-image.png) [](https://cytechint-docs-bookstack.s3.amazonaws.com/uploads/images/gallery/2025-06/YIdIVQT0fcq3P8IZ-image.png) *If you need further assistance, kindly contact our technical support at ****Step 1: Login to CyTech - Aquila "[usdc.cytechint.io](https://usdc.cytechint.io/)" and nagivate to Aquila Modules at leftmost corner of the dashboard. **
**Step 2: Go to Cyber Monitoring> Endpoint Detection and Response (EDR, MDR).[](https://cytechint-docs-bookstack.s3.amazonaws.com/uploads/images/gallery/2025-05/W7310dZpcPSITvee-image.png)**
**Step 4: Navigate through Control Panel> Manage Endpoints> Install Endpoint > Choose Manual.[](https://cytechint-docs-bookstack.s3.amazonaws.com/uploads/images/gallery/2025-05/k2O3KtGPoy3RxjqL-image.png)**
**Step 8: Choose the correct Operating System for your endpoint. After choosing the type of your Operating System, the commands will display below needed for installing the EDR agent.[](https://cytechint-docs-bookstack.s3.amazonaws.com/uploads/images/gallery/2025-05/yftNuea1Nx2QDssx-image.png)**
**Step 9: Execute the command in your Endpoint environment using powershell or terminal under admin privilege. Once the commands are executed successfully, you should see an output similar to the example shown in the image below. Go back to Cytech - Aquila to finish manual installation. [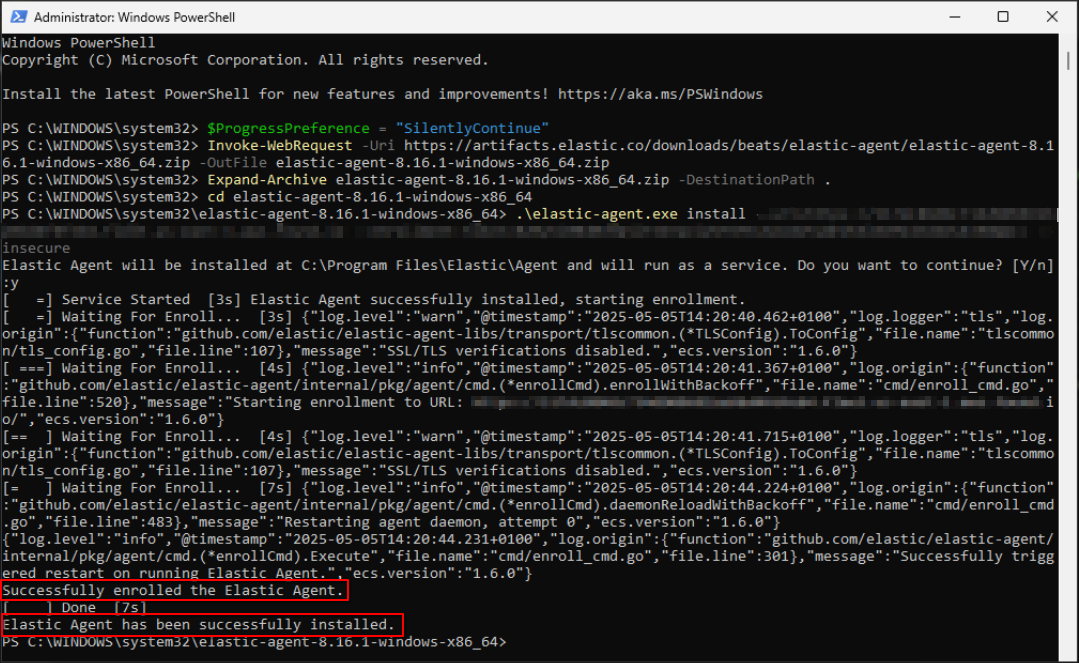](https://cytechint-docs-bookstack.s3.amazonaws.com/uploads/images/gallery/2025-05/ItyEDcd3n9c47yvj-image.png)**
**Step 10: Before you can proceed to the final installation set-up make sure you check off each steps required. Then you can click "Next".[](https://cytechint-docs-bookstack.s3.amazonaws.com/uploads/images/gallery/2025-05/28a7SRVoIeFoHEJC-image.png)**
**Step 11: A new window will appear and will check the log collector status and update the latest installation of EDR agent. Wait for it to finish and after successfull installation the endpoint will displayed in the dashboard. [](https://cytechint-docs-bookstack.s3.amazonaws.com/uploads/images/gallery/2025-04/IsvHFpr1T0tGHcjn-image.png)**
Step 12: This step confirms the successful installation and enrollment of the **EDR Agent** with the fleet server. [](https://cytechint-docs-bookstack.s3.amazonaws.com/uploads/images/gallery/2025-05/C7SUYEe4npzRa8Oj-image.png)
# AQUILA Agent Mass Deployment Manual (MSI Package) ## Overview This document provides a step-by-step guide for deploying the **AQUILA Agent** across Windows endpoints using **Microsoft Intune** with an **MSI installer**. The goal of this deployment is to ensure consistent, secure, and scalable installation of the AQUILA Agent to support SOC monitoring, endpoint visibility, and response capabilities. This guide is intended for: - SOC Engineers - IT Administrators - Endpoint & Security Operations Teams| Item | Value |
|---|---|
| Deployment Tool | Microsoft Intune |
| Installer Type | MSI |
| Installation Mode | Silent / Unattended |
| User Interaction | None |
| Deployment Scope | Device-based (recommended) |
**Cyber Monitoring > Endpoint Detection and Response (EDR) > Endpoints**
[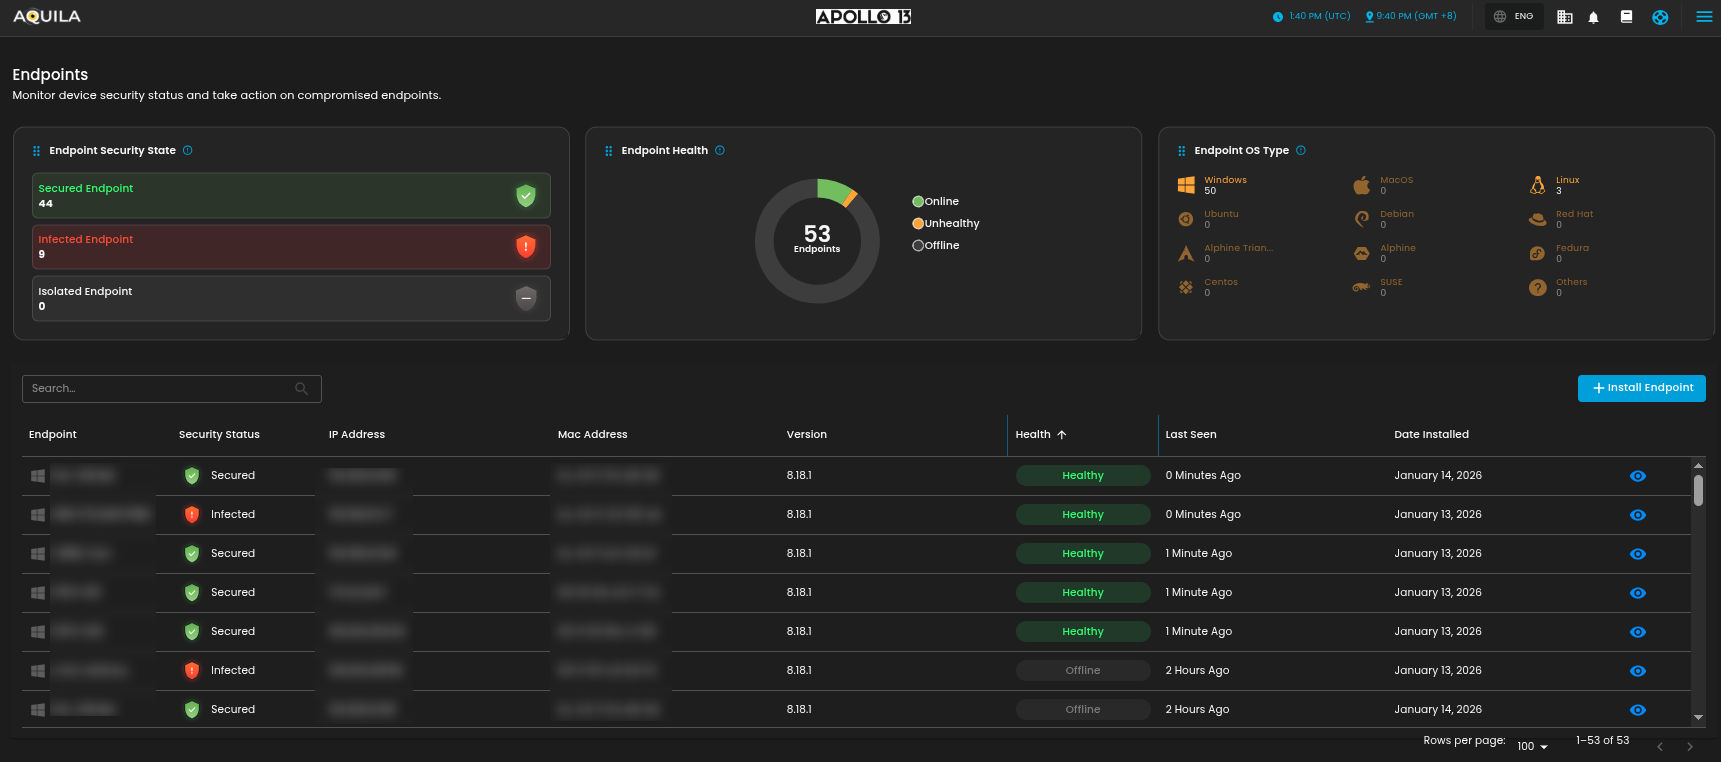](https://cytechint-docs-bookstack.s3.amazonaws.com/uploads/images/gallery/2026-01/o3uD6f1Wn54n8t7a-image.png)**Risk Management > Vulnerability Assessment and Management (VAM) > Endpoint**
[](https://cytechint-docs-bookstack.s3.amazonaws.com/uploads/images/gallery/2026-01/xGiaix2aahMIwiM2-image.png)**Data Security > Data Loss Prevention (DLP) > Dashboard**
[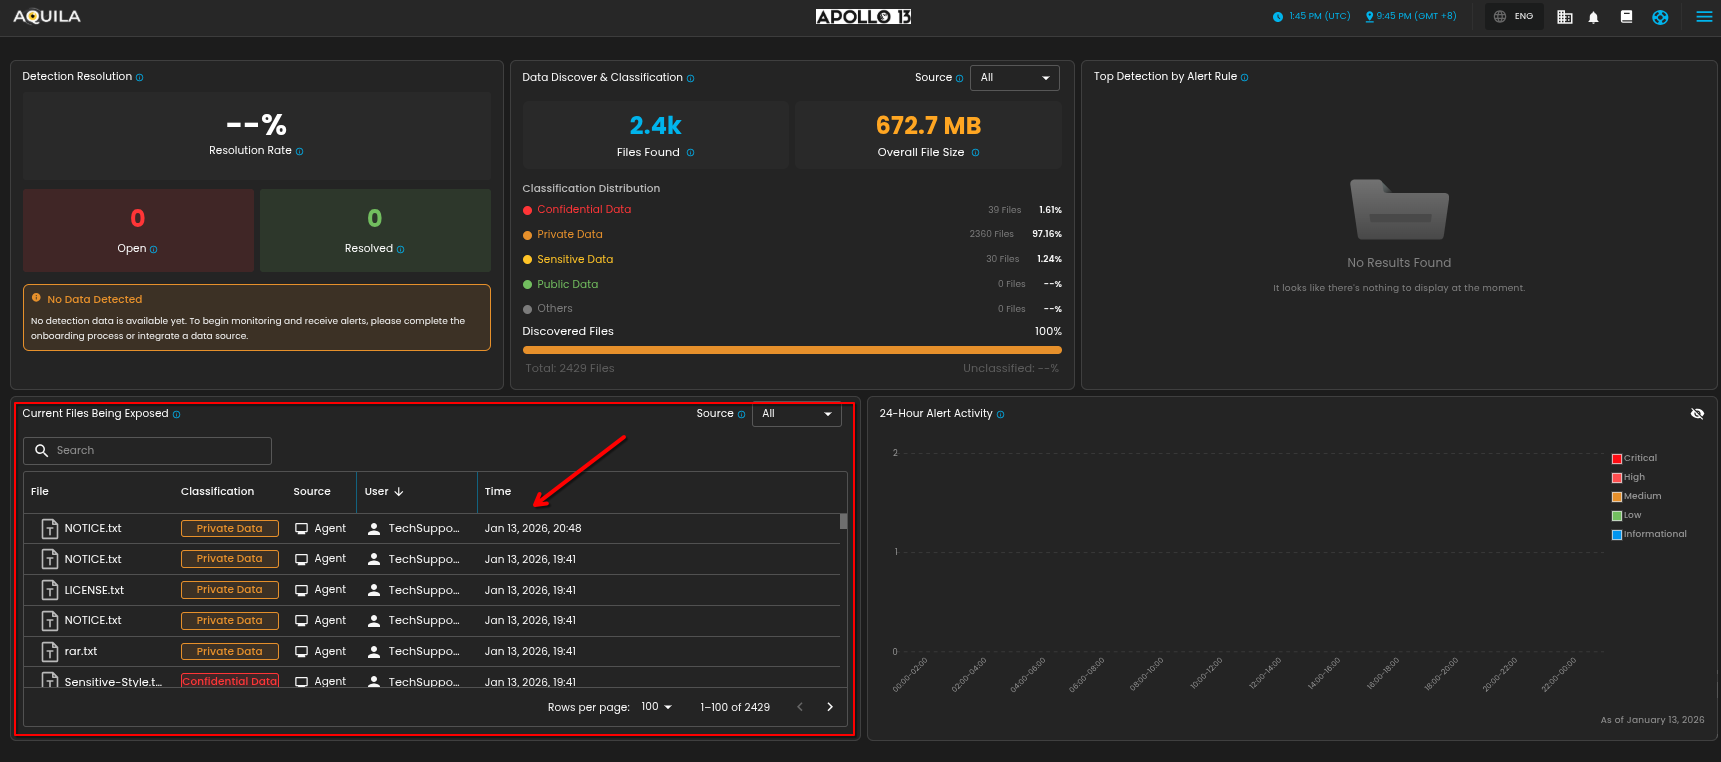](https://cytechint-docs-bookstack.s3.amazonaws.com/uploads/images/gallery/2026-01/1xPRwj3huJQ9KEaH-image.png)| Issue | Recommendation |
| Installation failed | Check Intune error codes and logs |
| Agent not visible in backend | Verify internet access and enrollment |
| Multiple versions installed | Ensure old versions are uninstalled or superseded |
| Defender/UAC prompt | Expected if CA signing is still in progress |
| Command | Purpose | Syntax Example | Key Notes / Limitations |
|---|---|---|---|
| **isolate** | Block all network communication | isolate --comment "Suspicious activity" | Immediate; irreversible without release |
| **release** | Restore network access | release --comment "False positive" | Reverses isolation |
| **status** | Show host status (agent, policy, last seen) | status | Quick health check |
| **processes** | List running processes | processes | Takes ~1 min; get PID or entityId |
| **kill-process** | Terminate a process | kill-process --pid 123 or --entityId id | Use entityId for reliability; SentinelOne: --processName |
| **suspend-process** | Pause a process | suspend-process --pid 123 or --entityId id | Reversible by killing or resuming |
| **get-file** | Download file (as password-protected ZIP) | get-file --path "/path/to/file" | Max 100 MB; password = elastic (may differ for third-party); use quarantine path from alerts |
| **execute** | Run shell command | execute --command "whoami" --timeout 10s | Output limited (~2000 chars); full in ZIP (password elastic); dangerous—use carefully |
| **upload** | Upload file to host | upload --file <select file> --overwrite | Max 25 MB (configurable up to 100 MB); default path = Endpoint install dir |
| **scan** | Malware scan on file/directory | scan --path "/path" | Uses current Defend policy (Detect/Prevent) |
| **runscript** | Run script (vendor-specific) | CrowdStrike: runscript --CloudFile="script" Defender: runscript --ScriptName="script" SentinelOne: runscript --script="script" | Syntax varies by EDR vendor; timeouts apply |
| **cancel** | Cancel pending action (Defender only) | cancel --action "runscript" | Microsoft Defender-specific |